Table of Contents
Creating visually appealing and dynamic websites is essential for engaging visitors, and Divi offers a wealth of tools to help you achieve just that. While Divi’s robust framework makes designing and customizing websites a breeze, there are times when you might want to add a bit of extra functionality without relying on third-party plugins. One such feature is converting a standard column layout into a slider. By doing this, you can present content in a more interactive and user-friendly way, enhancing the overall user experience.
In this guide, we’ll walk you through the steps to transform your Divi column layouts into a sleek, responsive slider—all without using any plugins. Whether you’re a seasoned web designer or just getting started, this tutorial will help you take your Divi website to the next level.
Step 1: Create Your Column Layout
Start by designing a 2 or 3-column layout using the Divi Builder:
- Open the Divi Builder on your desired page.
- Create a new section and add a row.
- Choose a 2-column or 3-column layout for your row based on your design needs.
Step 2: Add Design Your Columns
In Divi, create your columns by following these steps:
- Add a Section to your page.
- Create a Row within the section.
- Add the desired number of Columns to the row (e.g., 2 or 3 columns).
Step 3: Add a Class to Your Row
To enable the slider functionality, add a custom class to your row:
- Select the row where you want the slider effect.
- In the row settings, add the class “my_slider” to the CSS Class field. ( You can use any class name as per your need )
Step 4: Add CSS and JS cdn file links for the Slider
Now, you’ll need to add the necessary CSS and JavaScript files to create the slider effect:
- Go to Divi > Theme Options > Integration in your WordPress dashboard.
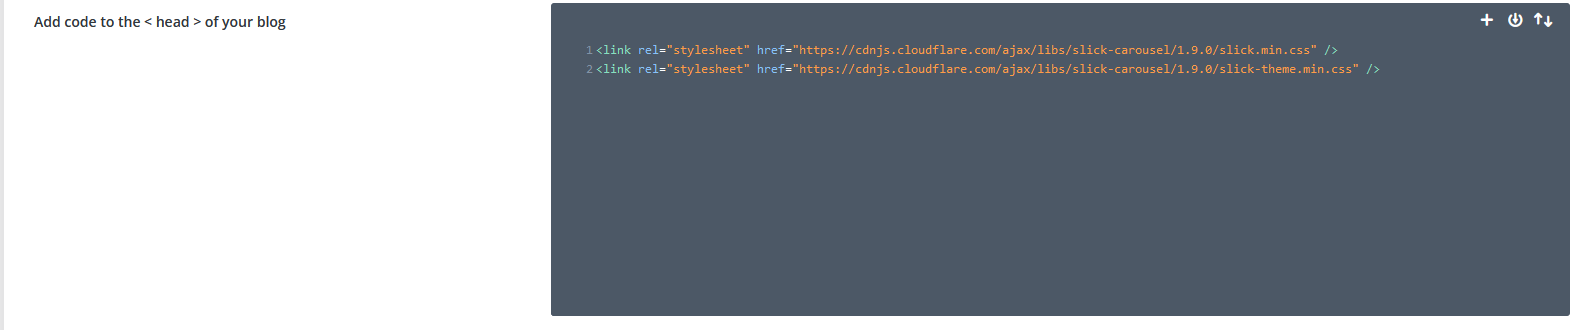
In the <head> section:
Add the following CDN URLs for the slider styles:
<link rel="stylesheet" href="https://cdnjs.cloudflare.com/ajax/libs/slick-carousel/1.9.0/slick.min.css" />
<link rel="stylesheet" href="https://cdnjs.cloudflare.com/ajax/libs/slick-carousel/1.9.0/slick-theme.min.css" />
( Use latest slick slider css files cdn link )
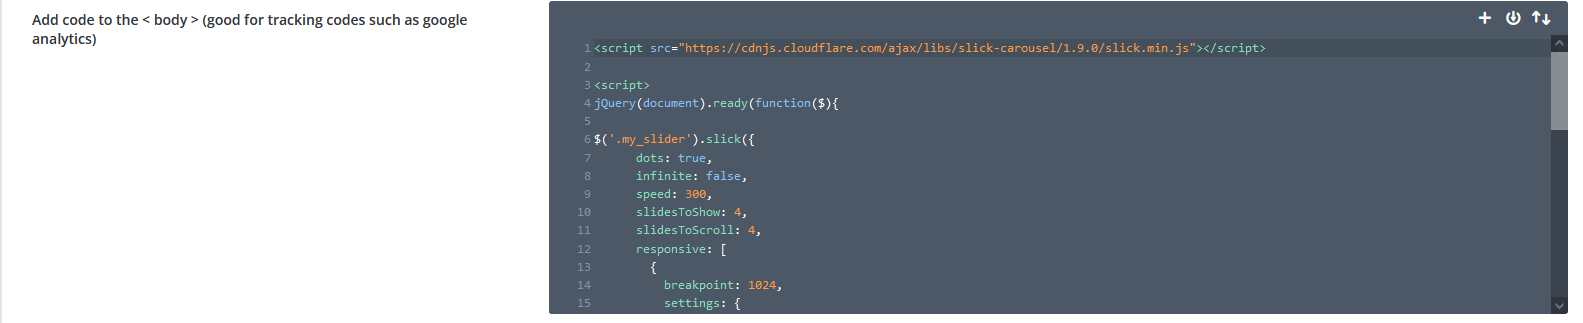
In the <body> section:
Add the CDN URL for the slider script and initialize the slider with this code:
You can change the below code as per your need.
<script src="https://cdnjs.cloudflare.com/ajax/libs/slick-carousel/1.9.0/slick.min.js"></script>
<script>
jQuery(document).ready(function($){
  $('.my_slider').slick({
    dots: true,
    infinite: true,
    speed: 300,
    slidesToShow: 4,
    slidesToScroll: 4,
    responsive: [
      {
        breakpoint: 1024,
        settings: {
          slidesToShow: 3,
          slidesToScroll: 3
        }
      },
      {
        breakpoint: 600,
        settings: {
          slidesToShow: 2,
          slidesToScroll: 2
        }
      },
      {
        breakpoint: 480,
        settings: {
          slidesToShow: 1,
          slidesToScroll: 1
        }
      }
    ]
  });
});
</script>
Step 5: Save and Publish Your Page
Finally, save your changes and publish the page.
Your Divi columns will now display as a slider!
By following these steps, you can transform any column layout in Divi into a dynamic slider without needing any plugins.
And there you have it—a simple way to turn your Divi columns into an interactive slider without any plugins. This method keeps your site sleek and efficient while adding a dynamic touch that’s sure to impress your visitors. Keep exploring and pushing the boundaries of what you can create with Divi!