
Table of Contents
With Crocoblock’s JetEngine and JetTabs plugins, you can display repeater field data in a dynamic accordion layout — perfect for showing structured information like FAQs, daily itineraries, or feature lists. This tutorial walks you through the complete process.
Overview
With Crocoblock, you can easily convert Repeater Fields from any page, category, or custom post type into dynamic and well-structured accordion content.
In this article, we’ll provide a brief guide on how to convert Repeater Fields of a Custom Post Type using crocoblock — helping you transform your ACF data into visually appealing, user-friendly, and fully editable accordion sections that integrate seamlessly with your website’s design.
Step 1: Creating Custom Repeater Meta Fields
- In your WordPress dashboard, go to JetEngine → Post Types and open the Custom Post Type where you want to add the repeater fields.
- Navigate to the Meta Fields tab and click “New Meta Field.”
- Fill in the Label and Name/ID fields with appropriate values.
- Keep the Object Type as “Field” and select “Repeater” as the Field Type.
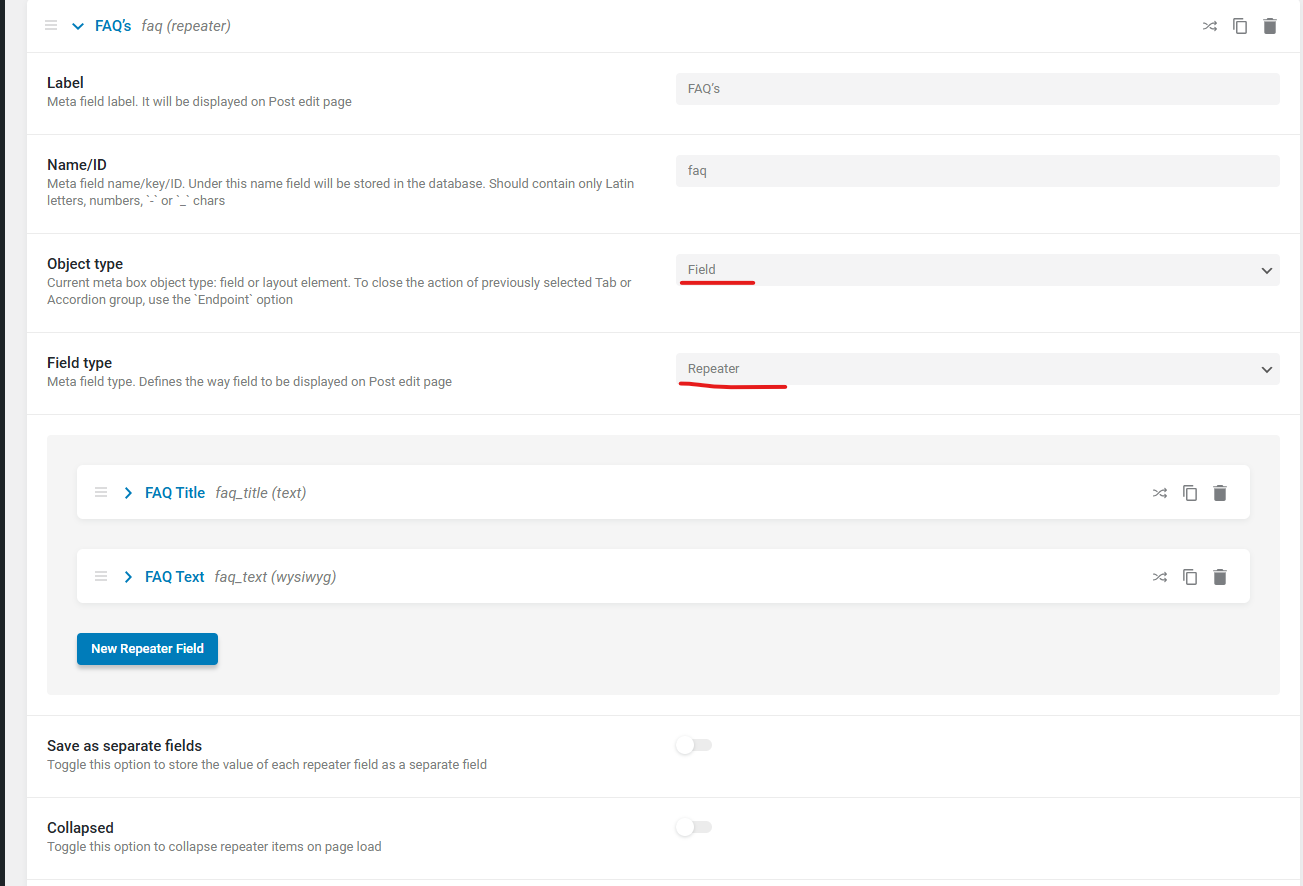
- Inside the repeater, click “New Repeater Field” to add subfields:
– A Text field for the accordion tab label.
– A WYSIWYG field for the accordion tab content.
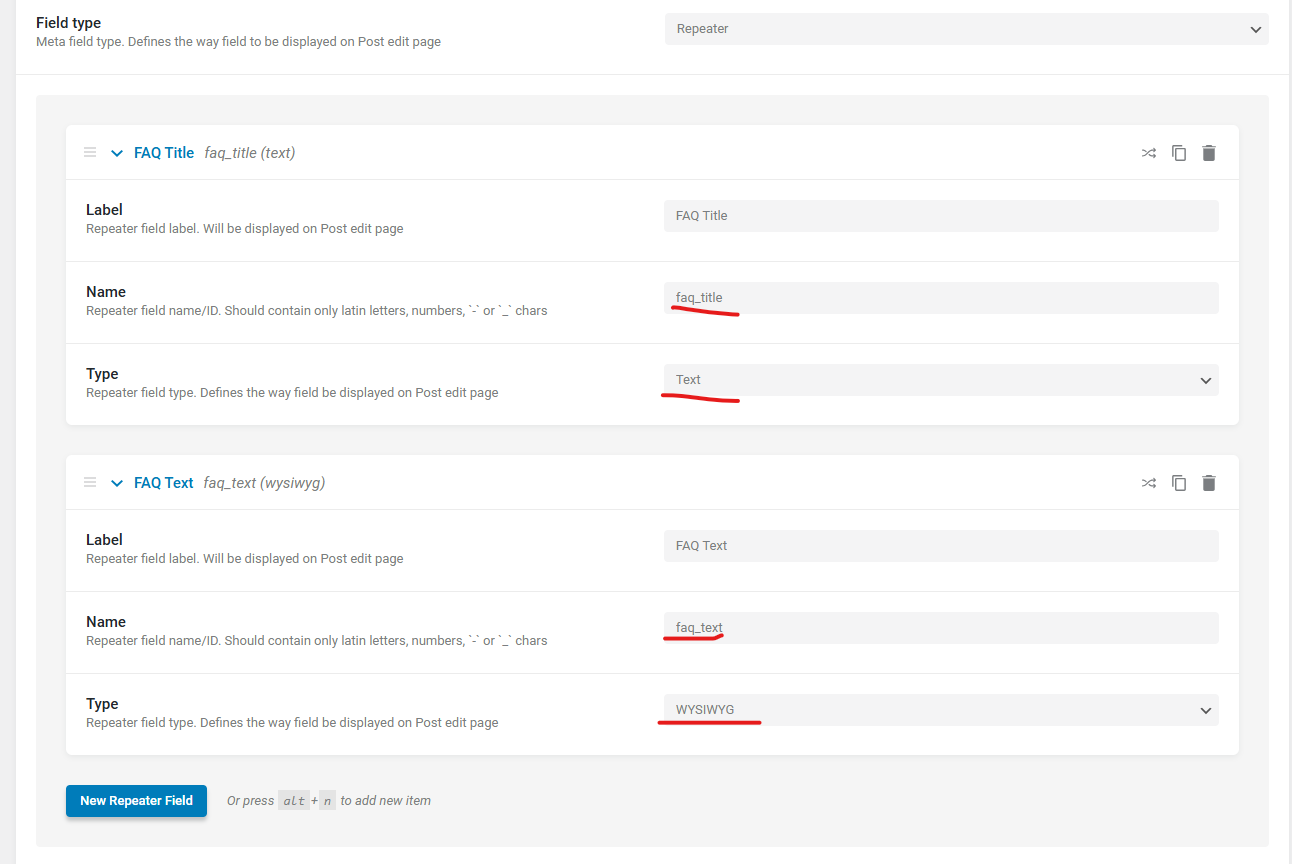
- Once all fields are added, click “Update Post Type.”
Step 2: Filling the Repeater Fields in Posts
- Open a post of your selected Custom Post Type.
- Scroll down to the repeater meta fields section and add your data.
- Each repeater item will represent one accordion tab — add as many as needed (for example, “item 1,” “item 2,” etc.).
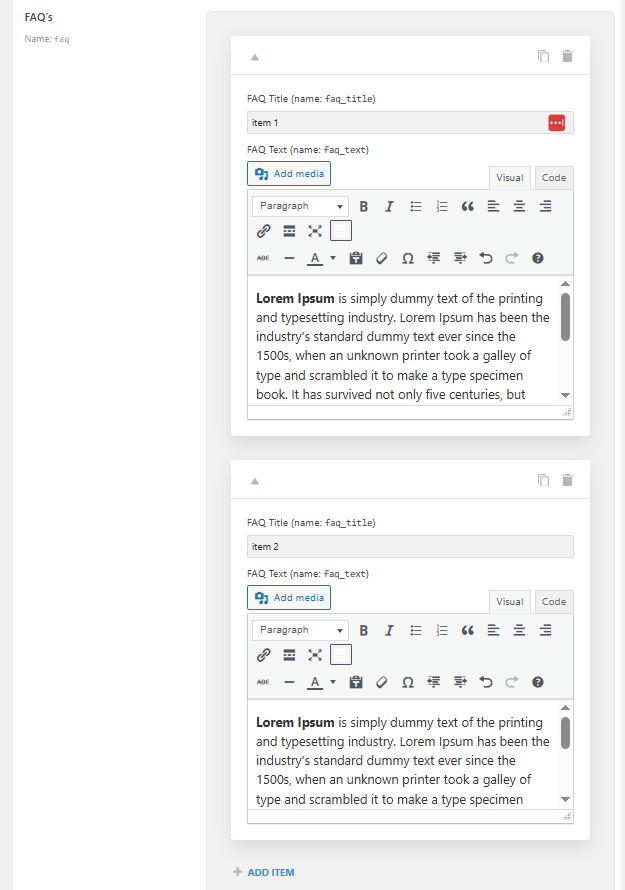
- Click “Update” to save the post.
- Repeat this process for all posts where you want the accordion to appear.
Step 3: Building a Repeater Query
- Go to JetEngine → Query Builder and click “Add New.”
- Give your query a Name and select “Repeater Query” as the Query Type.
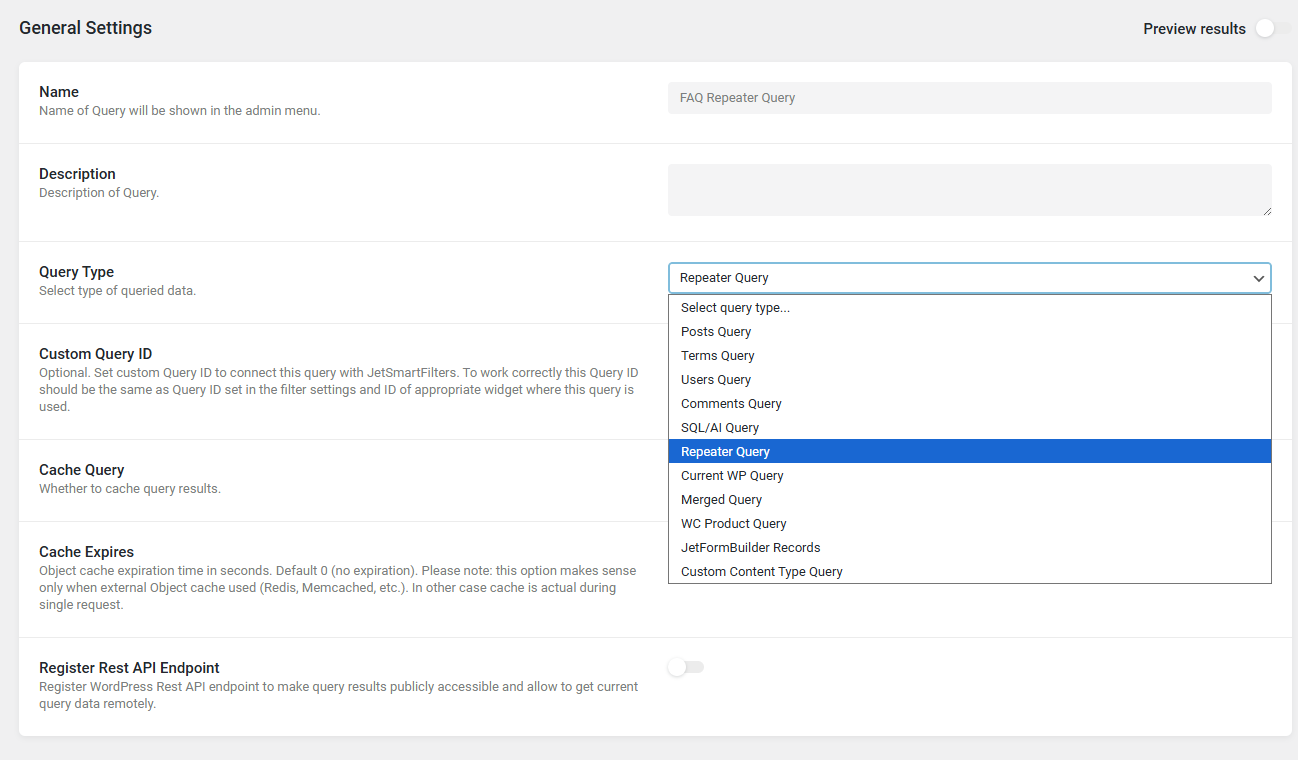
- In the Repeater Query section:
– Set Source to “JetEngine Meta Field.”
– Choose the Repeater Field you created earlier.
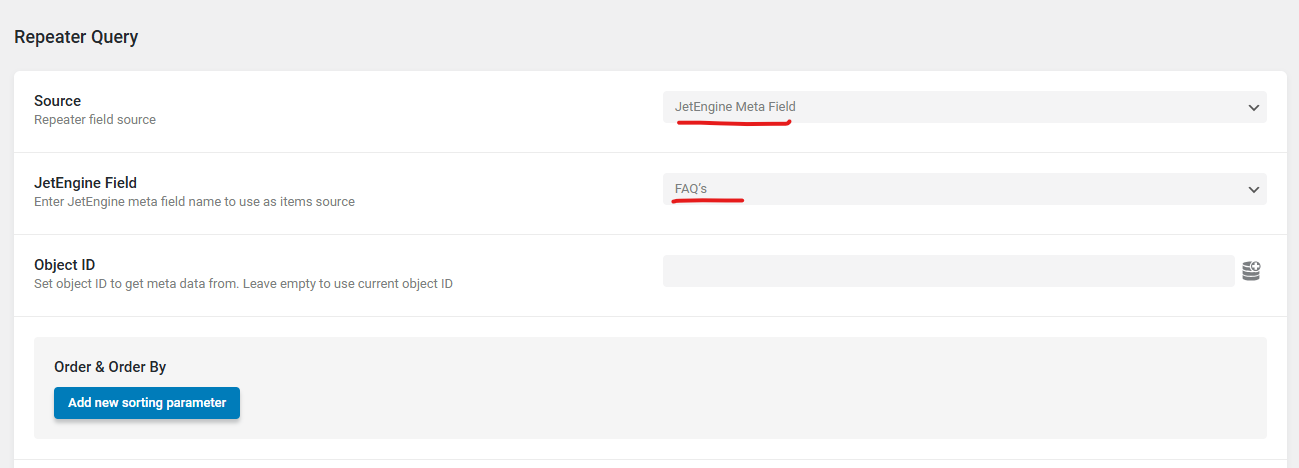
- If you are displaying this repeater on a Single Post template, leave the Object ID blank.
– For static pages, specify the Post ID manually. - (Optional) If your repeater has multiple fields and you only need specific ones, add them in the Query Arguments section:
– Click “Add new”
– Enter the field key/name under Field Key/Name
– Set Compare Operator to “Exists”
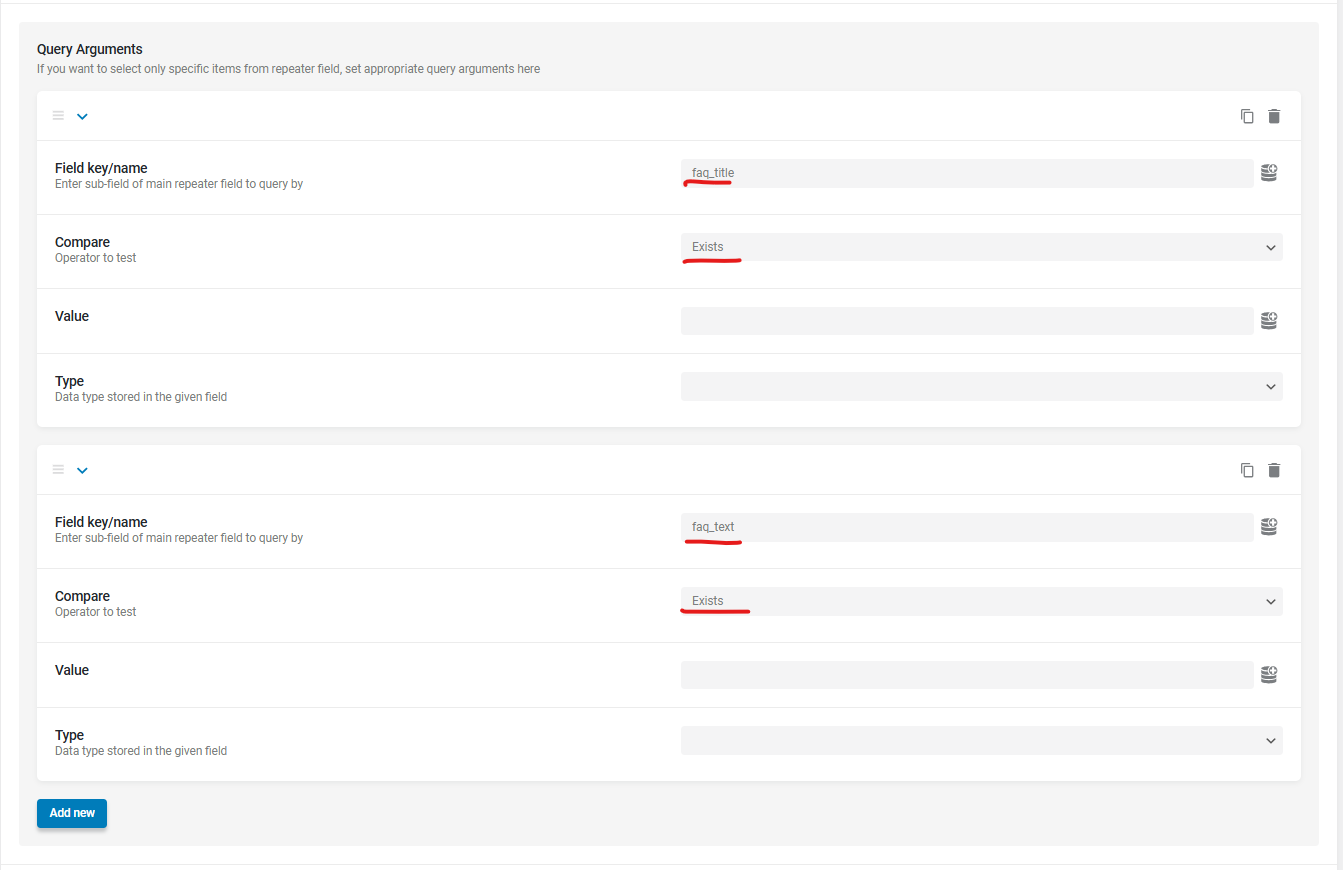
- Once done, click “Add Query.”
Step 4: Displaying the Repeater Data in an Accordion
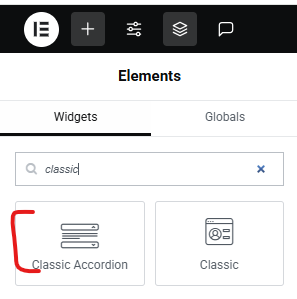
You’ll need JetThemeCore (for building Single templates) and JetTabs (for the Accordion widget).
- Open your Single Post template in Elementor.
- Add the Classic Accordion widget (from JetTabs).
- Enable “Use JetEngine Query” and select the Repeater Query you just created.
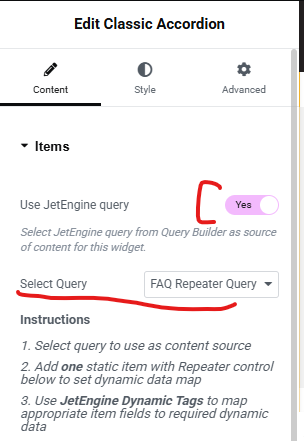
- Remove the extra default accordion items, keeping only one.
- In Toggle #1 → Label, click the Dynamic Tags icon → choose Current Object Field.
– Set Field to your repeater’s label field.
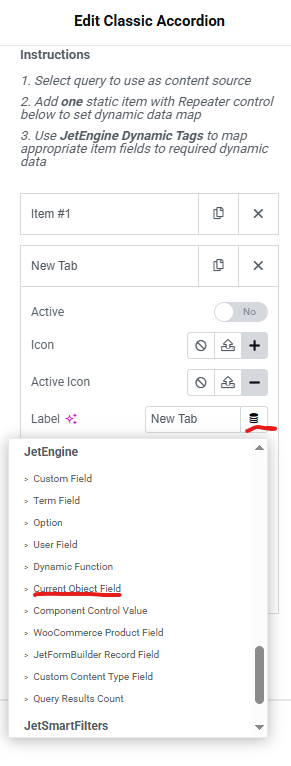
- In the Content Type section:
– Choose Editor, then click Dynamic Tags again → Current Object Field.
– Set Field to your repeater’s content field (e.g., WYSIWYG).
- Adjust the styling as you wish, then click Update.
Final Result
On the front end, the Classic Accordion widget will now display dynamic repeater data — each repeater item becomes an accordion tab containing the corresponding label and content.
This method provides a clean and efficient way to showcase structured, repeatable information using JetEngine’s Repeater fields and JetTabs’ Accordion widget — all without writing custom code.
Building dynamic content elements becomes simple when you use Crocoblock tools effectively. If you need expert help with customization or Elementor development, the team at TechnoCrackers is ready to assist.


Thank you for this!!!
Finally was able to create an accordion with a repeater field.