Table of Contents
Building a portfolio gallery in Divi without relying on additional plugins is simpler. With just a bit of custom code, you can create a fully filterable, visually appealing portfolio that showcases your work beautifully. This guide walks you through the entire process, allowing you to create a stunning gallery that’s easy to manage and completely integrated with Divi.
Let’s get started on building your custom portfolio!
Step-by-Step Guide to Creating a Portfolio Gallery in Divi
Step 1: Add Custom Code to Your Theme
Access the Divi Settings:
- Go to Dashboard > Divi > Theme Options > Integration.
- Paste the following JavaScript code into the <head> or <body> box to enable dynamic filtering functionality:
<script>
  jQuery(document).ready(function ($) {
    // Assign categories to gallery items based on the title attribute
    $('.custom_gallery .et_pb_gallery_item').each(function () {
      var title = $(this).find('.et_pb_gallery_image a').attr('title');
      var category = title ? title.toLowerCase().replace(/\s+/g, '-') : 'uncategorized';
      $(this).addClass(category);
    });

    // Implement filter functionality
    $('.custom_gallery .gallery-filters button').on('click', function () {
      $('.custom_gallery .gallery-filters button').removeClass('active');
      var filterValue = $(this).attr('data-filter');
      if (filterValue === 'all') {
        $('.custom_gallery .et_pb_gallery_item').show();
      } else {
        $('.custom_gallery .et_pb_gallery_item').hide();
        $('.custom_gallery .' + filterValue).show();
      }
      $(this).addClass('active');
    });
  });
</script>
Note: This code dynamically assigns categories to your gallery images based on their titles and creates a filterable portfolio gallery.
- Go to Dashboard > Divi > Theme Options > custom css
- Paste the following css code
.custom_gallery .et_pb_gallery_items {
     display: flex;
     flex-wrap: wrap;
}
.custom_gallery .et_pb_gallery_item {
     display: block;
     padding:15px;
}
.gallery-filters {
     display: flex;
     justify-content: center;
     gap: 20px;
     margin-bottom: 20px;
     flex-wrap: wrap;
}
.gallery-filters button {
     padding: 10px 30px;
     text-transform: uppercase;
     font-weight: bold;
     font-size: 14px;
     cursor: pointer;
     transition: 0.3s all ease;
     border: none;
     background: #00308F;
     color: #fff;
     border-radius: 30px;
     box-shadow: 4px 4px 0px 0px rgba(136,143,231,0.5);
      min-width: 160px;
}
.gallery-filters button.active,
.gallery-filters button:hover {
     background: #F0BD03;
     border-color: transparent;
     box-shadow: 4px 4px 0px 0px rgba(240,189,0,0.5);
}
Step 2: Create the Portfolio Section on Your Desired Page
Design Your Portfolio Section:
- Go to the page where you want to add the portfolio gallery.
- Add a new Section and assign it to the class “custom_gallery.”
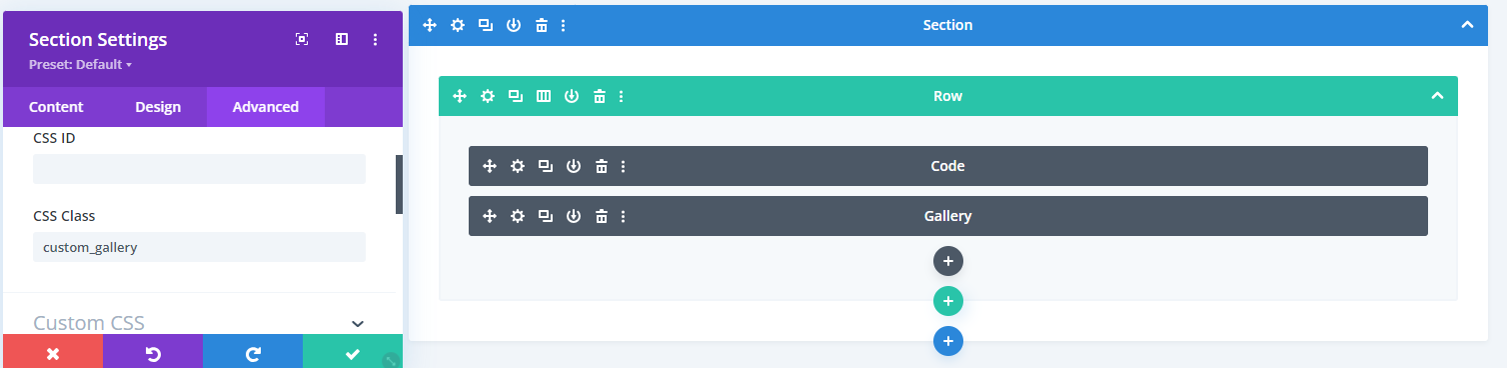
- Within this section, add a Row.
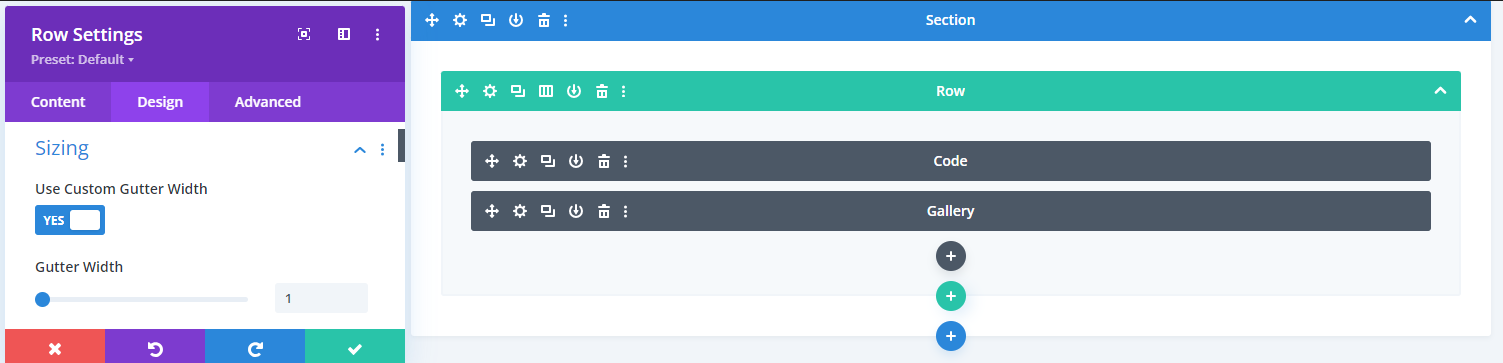
- In the Raw setting, go to Design > sizing > use custom gutter width and set the gutter width value to 1.
- Add a Text Block or Code Block inside the row and insert the following HTML code:
<div class="gallery-filters-main">
<div class="gallery-filters">
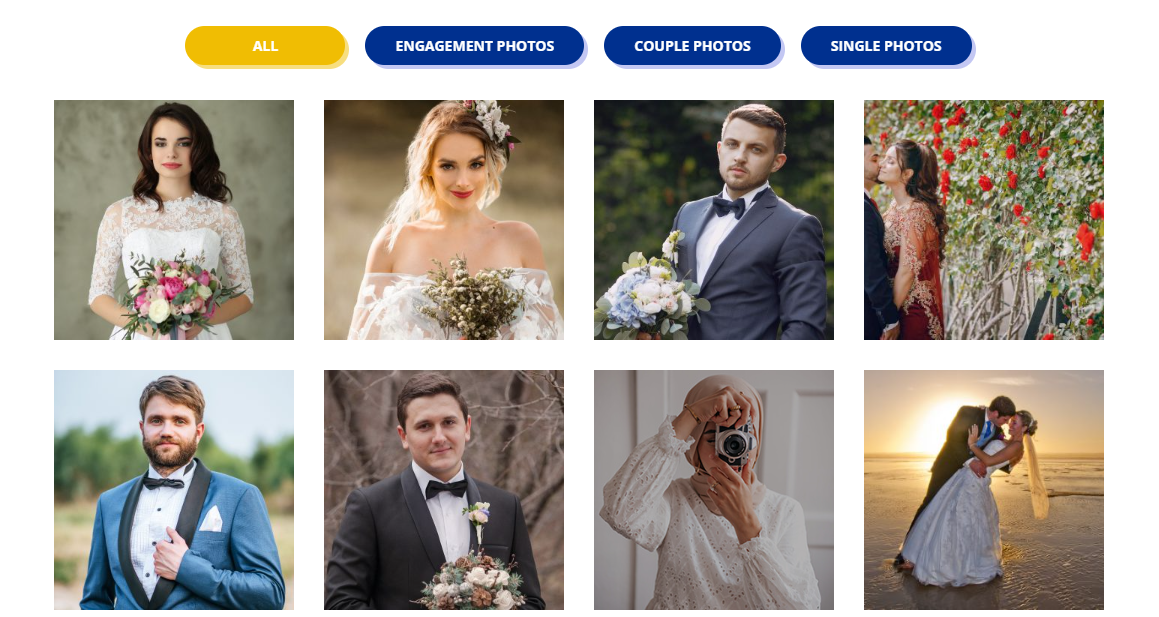
<button class="active" data-filter="all">All</button>
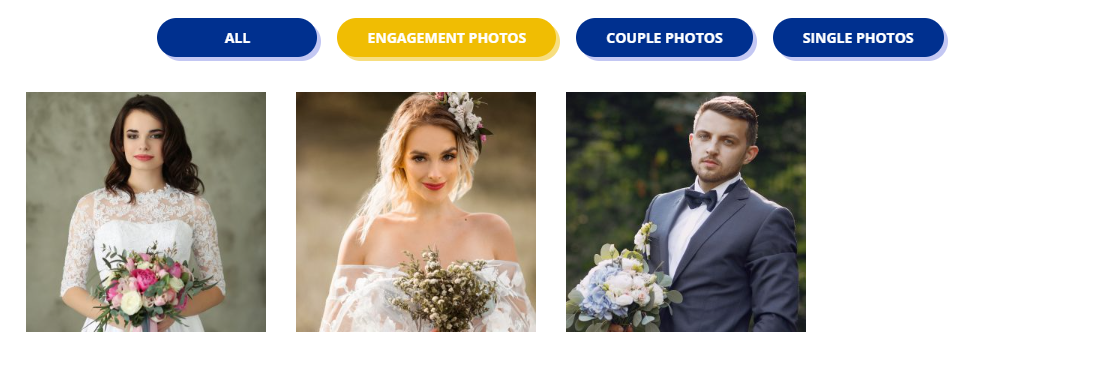
<button data-filter="engagement-photos">Engagement Photos</button>
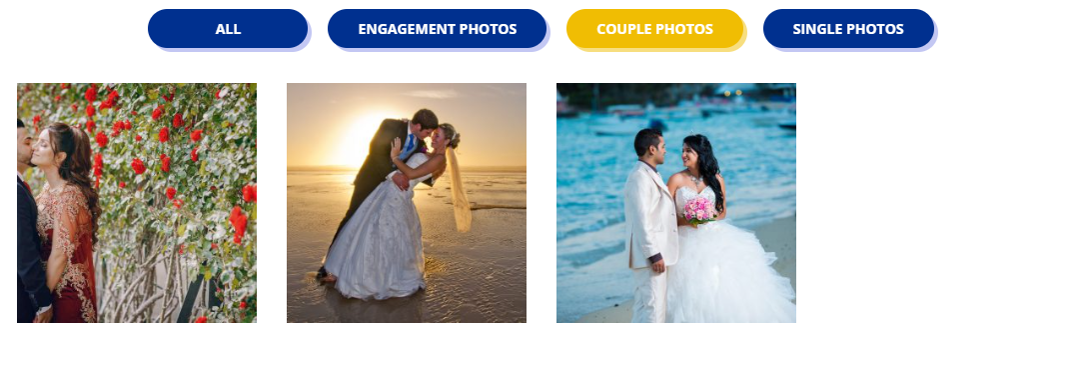
<button data-filter="couple-photos">Couple Photos</button>
<button data-filter="single-photos">Single Photos</button>
</div>
</div>
Note: You can customize the button text and data-filter values as needed.
- Add the Gallery Module:
- After the above code, add the Gallery module within the same row.
Step 3: Assign Titles to Your Images
Set Titles for Filtering:
- Go to Dashboard > Media.
- Assign titles to each image in your gallery corresponding to the data-filter text you used earlier. For example, use ” engagement-photos,” ” couple-photos,” etc., to match the filter buttons.
Step 4: Save and Publish
Finalize and Publish:
- Save all changes and publish your page to showcase a beautifully filtered portfolio gallery on your website.

Extra Tips for Enhancing Your Portfolio Gallery

- Customize Your Filters: You can create additional categories or change the existing ones to fit your portfolio’s content better.
- Use CSS for Styling: Apply custom CSS to further style your gallery, filter buttons, and hover effects to make your portfolio more visually appealing.
Conclusion
Creating a dynamic portfolio gallery in Divi is straightforward and highly customizable. With a few lines of code and Divi’s built-in tools, you can easily manage and display your work without needing any extra plugins.
This setup keeps your site lightweight and flexible, making it an efficient choice for showcasing your portfolio. Now that your gallery is live, you have a professional way to highlight your projects and leave a lasting impression on visitors.