Table of Contents
When your website has many projects, posts, or other content, visitors need an easy way to find the content they’re looking for.
With Divi 5’s new Loop Builder and Post Filter features, you can create a searchable and filterable content layout without relying on a complicated custom filtering system.
In this tutorial, we’ll create a Projects loop with a filter sidebar that allows visitors to search, filter, sort, and reset the results.
What We’re Building
For this example, we created a Projects custom post type and displayed the projects using a Divi 5 Loop.
Our layout contains:
Filter Sidebar
- Search
- Project Categories
- Project Tags
- Author
- Order By
- Order
- Reset
- Apply
Projects Area
- Project Image
- Project Title
- Description
- Read More Button
The filters in the sidebar will control which projects are displayed in the loop.
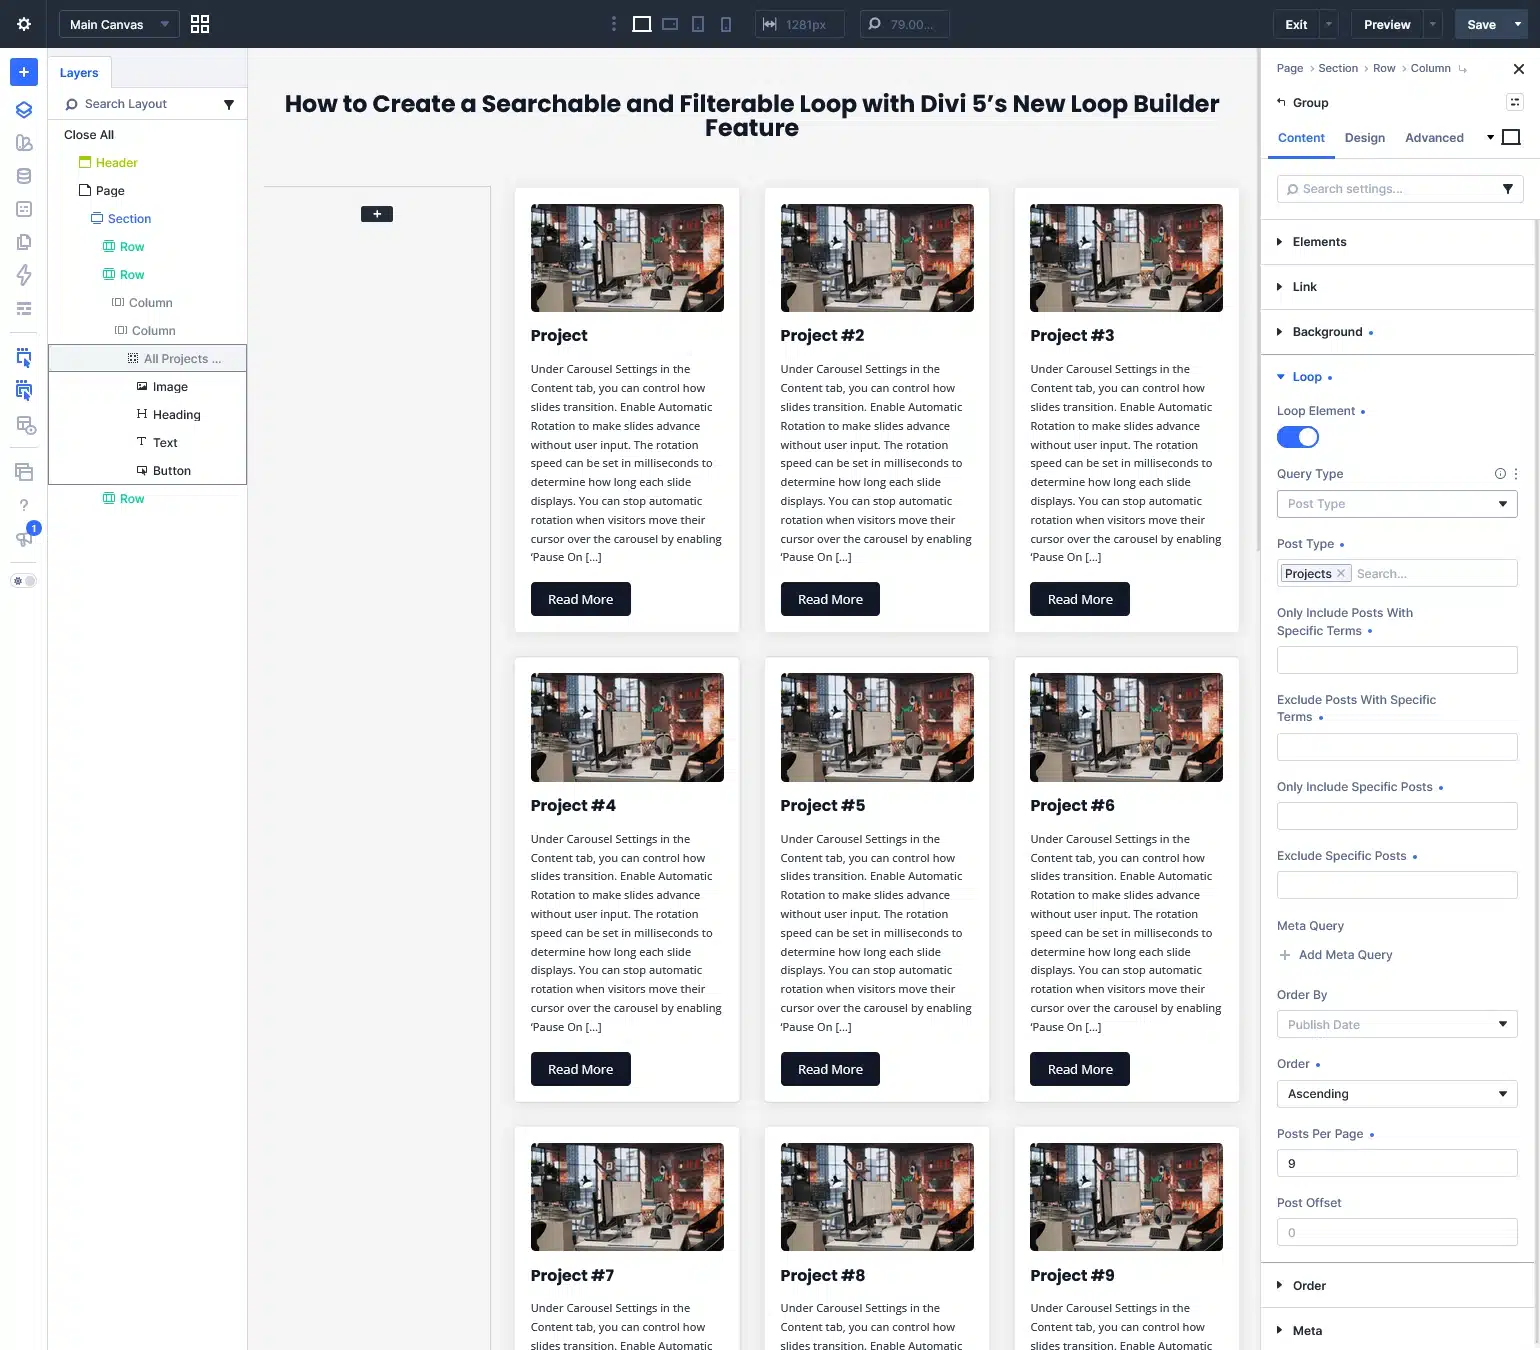
Step 1: Create Your Projects Loop
First, create your Projects content and add a few projects.
Open the Divi 5 Visual Builder and create your project layout.
Inside the Loop, you can add the elements you need, such as:
- Image
- Heading
- Text
- Button
Design the project card according to your website.
Name Your Loop
Once your loop is created, give the Loop Group a clear name.
For example: All Projects Group
This name will help you easily identify and connect the loop when setting up the Post Filter.
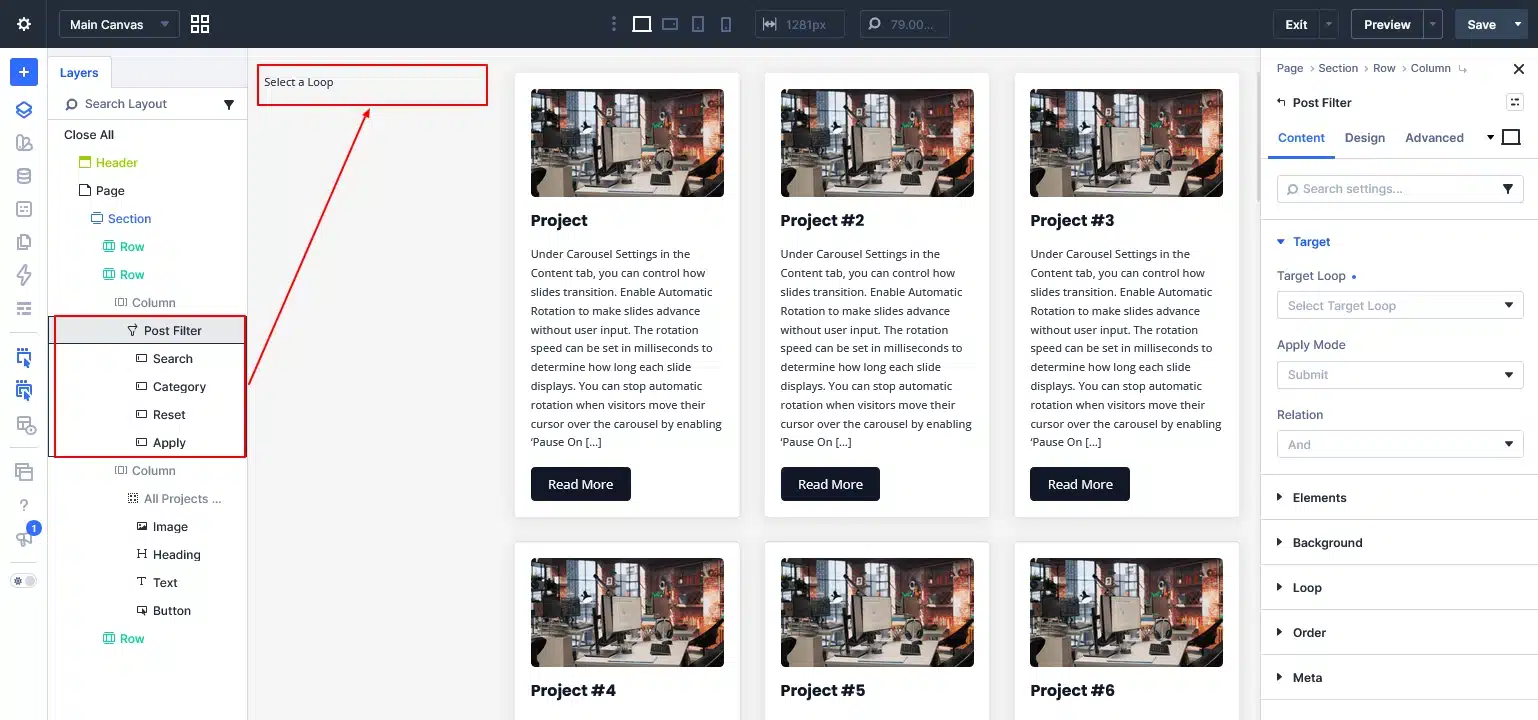
Step 2: Add the Post Filter Module
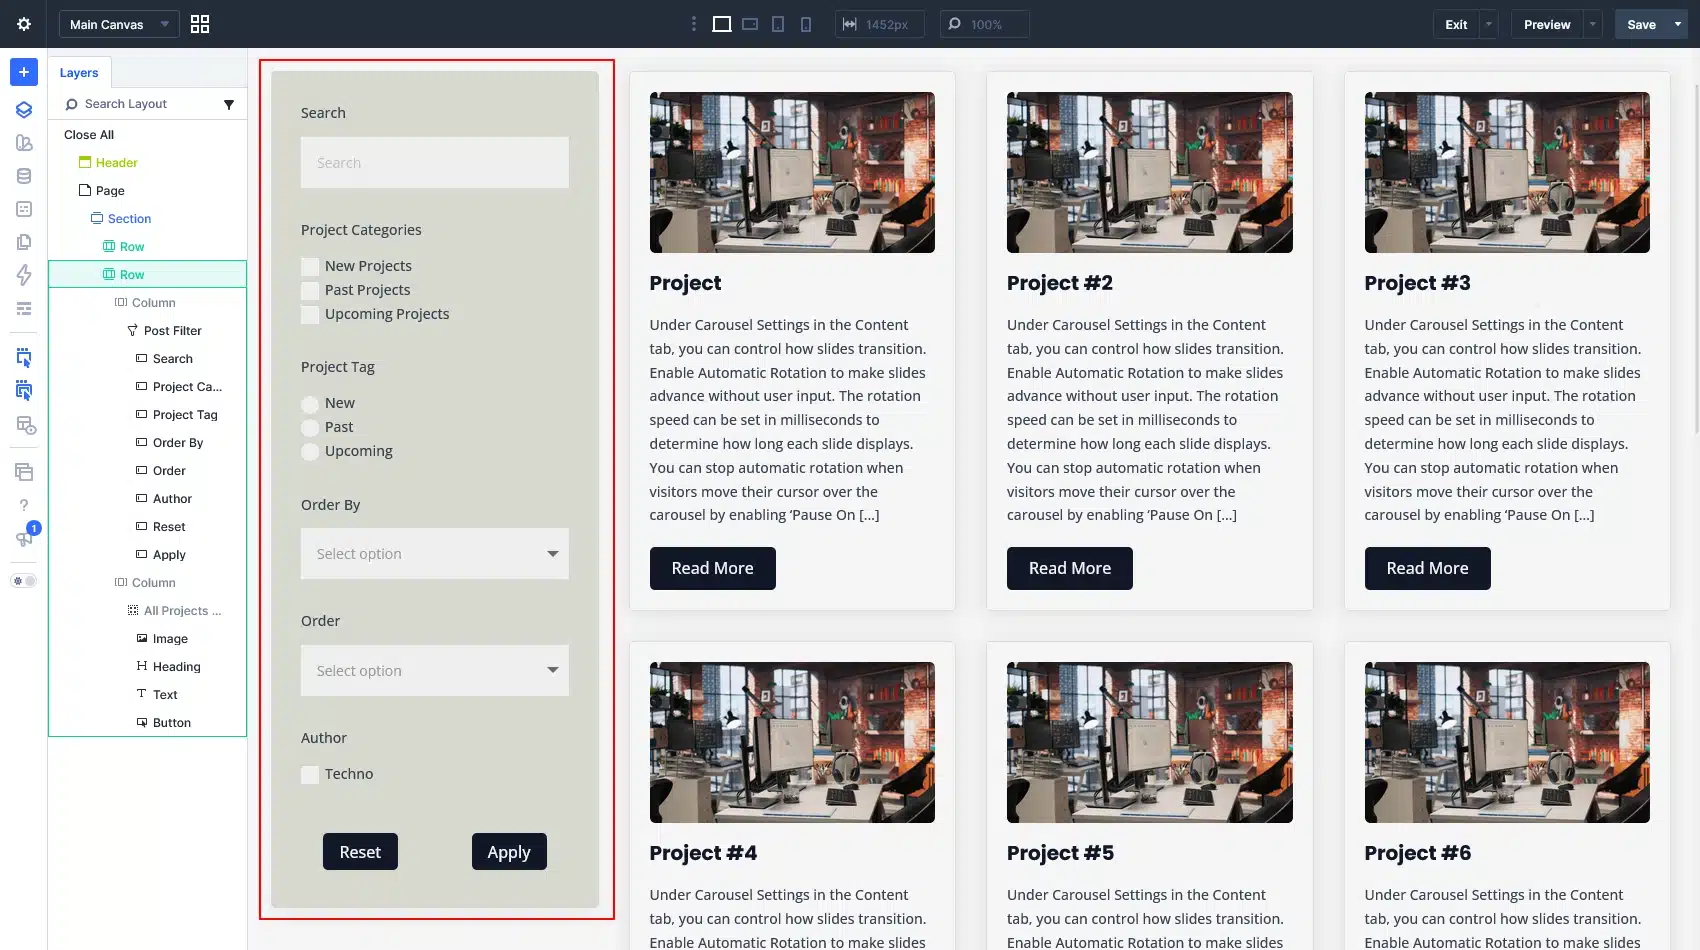
Now create a two-column layout.
Place the Post Filter module in the left column and your Projects Loop in the right column.
The Post Filter module is where you can add all the filtering options for your loop.
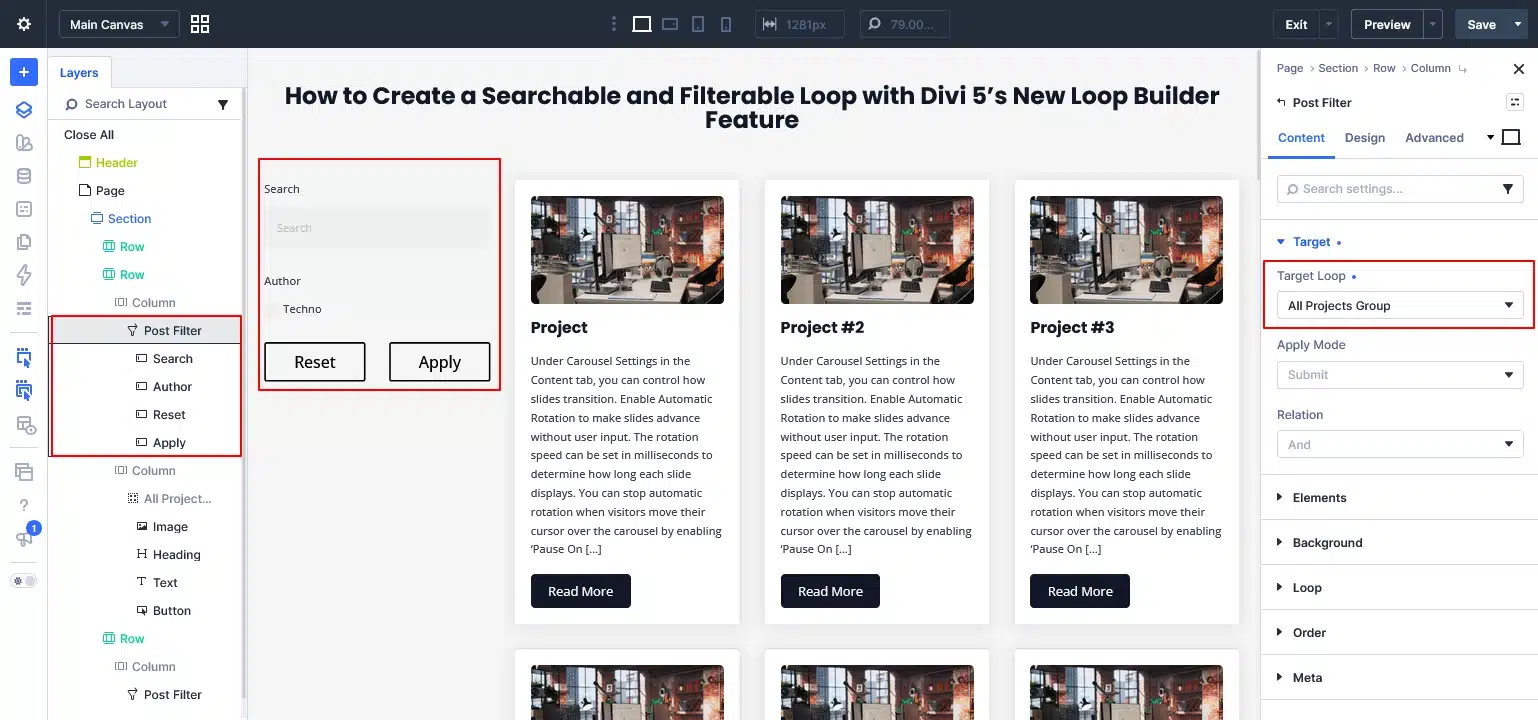
Step 3: Connect the Post Filter to Your Loop
Open the Post Filter module settings and go to the Target options.
Target Loop
Under Target Loop, select the Loop Group you created earlier.
In our example, we selected:
All Projects Group
Now Divi knows which loop should be filtered when visitors use the options in the sidebar.
Apply Mode
Next, choose how the filters should be applied.
You can choose between:
- Auto – Results update automatically when a filter is changed.
- Submit – Visitors select their filters and click the Apply button to update the results.
Relation
You can also control how multiple filters work together:
- AND – Results must match all selected conditions.
- OR – Results can match any selected condition.
Choose the option that works best for your project listing.
Step 4: Add Your Filter Options
Now you can add the filter items you need inside the Post Filter module.
Divi 5 gives you several options for filtering your loop, so you can build the sidebar according to your content.
For our Projects example, we added:
- Search – Allows visitors to search for projects using keywords.
- Category – Lets visitors filter projects by category.
- Tag – Allows filtering by project tags.
- Author – Lets visitors filter projects by author.
- Order By – Allows visitors to change how projects are sorted.
- Order – Choose how the projects should be displayed, such as ascending or descending order.
You can also use options such as Custom Meta and other available fields depending on your content.
Choose the Field Type
Each filter can use a different field type depending on how you want visitors to make their selection.
For example, Divi provides options such as:
- Checkbox – Select multiple options.
- Radio – Select one option.
- Select – Choose from a dropdown.
- Text – Enter a search value.
This makes it easy to create a filter sidebar that fits your website.
For our example, we used checkboxes for categories, radio buttons for tags, a text field for search, and a select field for sorting.
Step 5: Add Reset and Apply Buttons
To make the filter area easier to use, add Reset and Apply buttons.
The Reset button allows visitors to clear their selected filters and return to the default project list.
The Apply button can be used when you select Submit as the Apply Mode.
Step 6: Style Your Filter and Loop
Once the functionality is ready, customize the design to match your website.
You can adjust:
- Spacing
- Background colors
- Typography
- Button styles
- Input styles
- Project card design
- Columns and layout
Keep the filter sidebar simple and easy to scan so visitors can quickly find the options they need.
Final Result
That’s it!
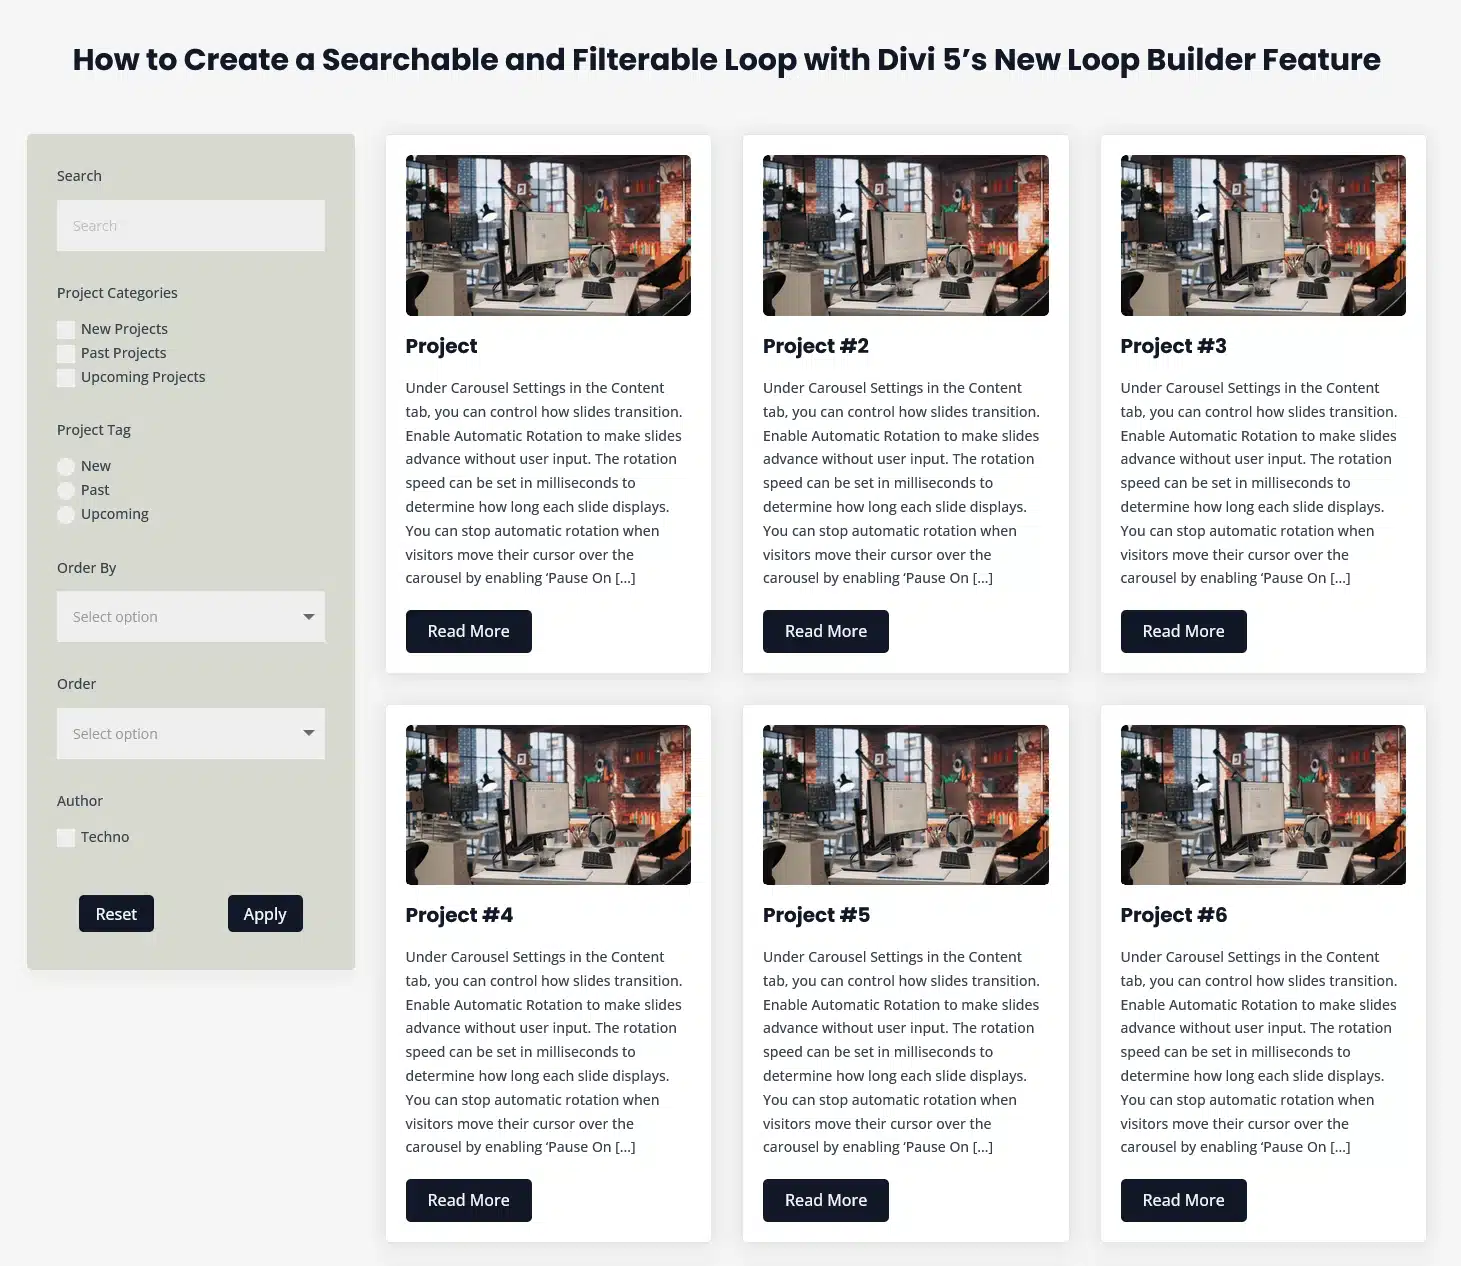
You now have a searchable and filterable Projects listing where visitors can easily find the content they need.
They can search for a project, filter by category or tag, choose an author, change the sorting order, or reset the filters.
Conclusion
Divi 5’s Loop Builder and Post Filter make it much easier to create dynamic and user-friendly content listings.
You can create your loop, connect it to the Post Filter module, add the filter options you need, and customize the design—all without building a complicated filtering system from scratch.
In short:
- Create your Projects Loop.
- Give the Loop Group a recognizable name.
- Add the Post Filter module.
- Connect it to your Loop.
- Add your required filter options.
- Choose the appropriate field types.
- Add Apply and Reset buttons.
- Style your layout.
And you’re ready to go!