Table of Contents
- What You’ll Build
- Step 1: Create Your Header Layout
- Step 2: Add a New Canvas (Important Step)
- Step 3: Design the Mega Menu Layout
- Step 4: Style the Off-Canvas Menu
- Step 5: Hide the Canvas by Default
- Step 6: Add Interaction to Open Menu
- Step 7: Add Close Interaction
- Step 8: (Optional) Add Overlay Effect
- Step 9: Make It Responsive
- Final Result
- Why This Method is Better
- Conclusion
- Pro Tips
Creating an advanced off-canvas mega menu in Divi 5 is now easier than ever thanks to the new Canvas system and Interactions feature.
In this tutorial, I’ll show you a real-world method to build a clean, fully functional mega menu using:
- Divi 5 Header Builder
- Canvas feature
- Interactions (no custom JS required)
What You’ll Build
- A header with a Mega Menu button
- A hidden off-canvas mega menu
- Smooth open/close animation using interactions
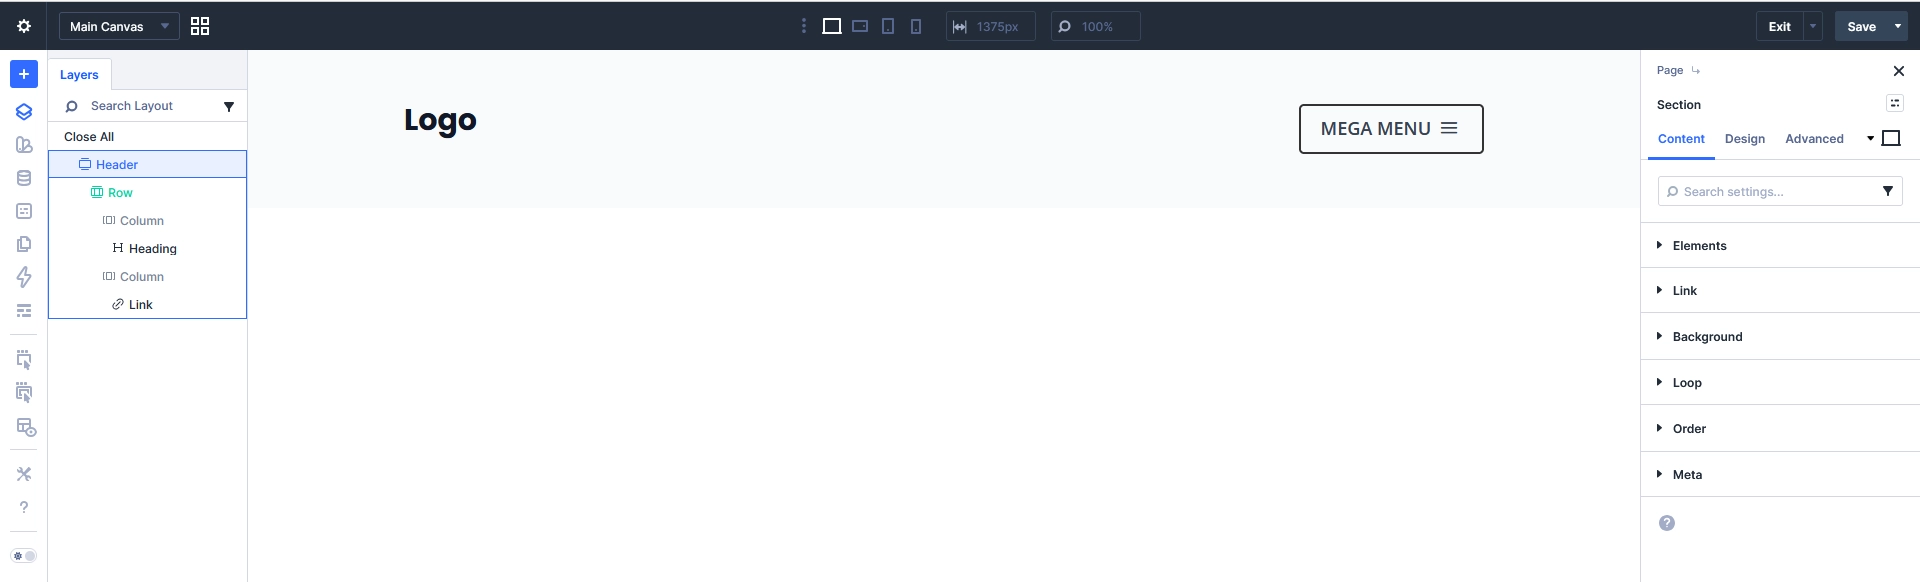
Step 1: Create Your Header Layout
Start by creating your header.
- Go to Divi → Theme Builder
- Edit or create a Global Header
- Add a Row
- Inside the row:
- Left: Add your Logo
- Right: Add a Button / Link (Mega Menu trigger)
Example:
- Text: MEGA MENU
- Add an icon if needed
This button will be used to open the menu.
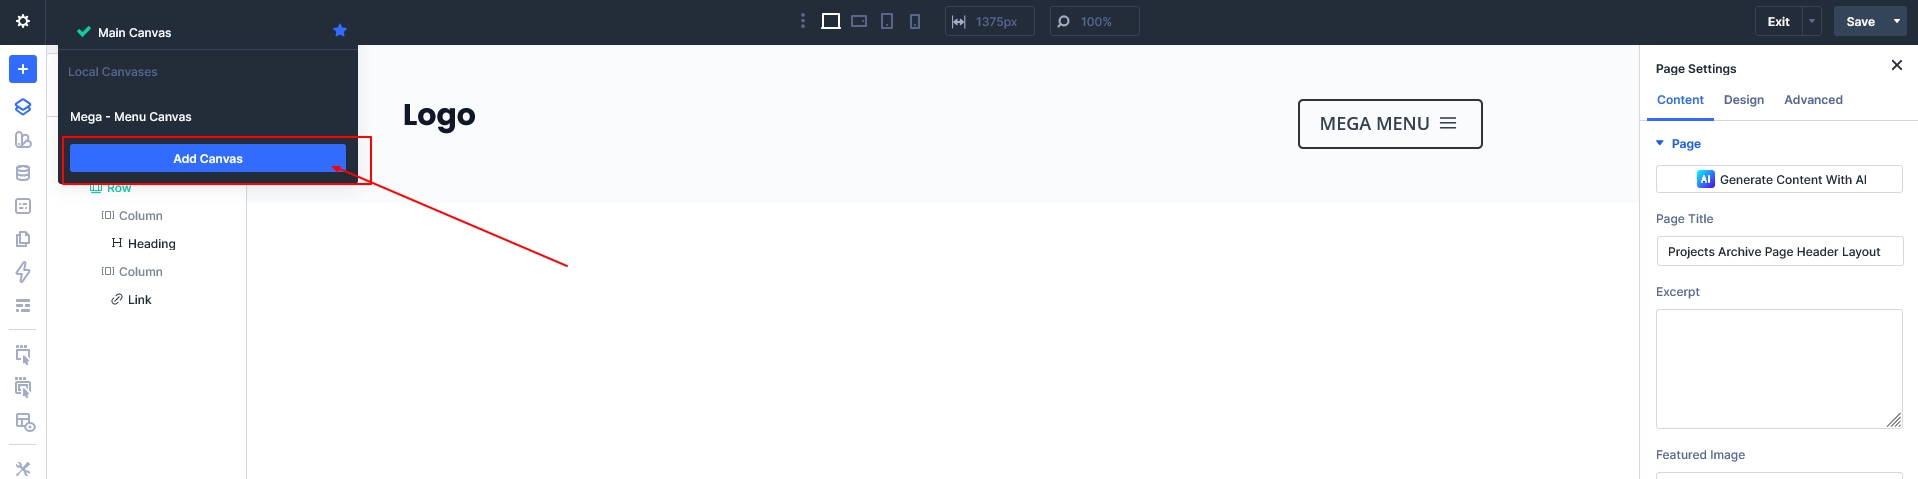
Step 2: Add a New Canvas (Important Step)
Now we’ll create the off-canvas area.
- In Divi Builder (left panel)
- Click on Canvas Switcher
- Click “Add Canvas”
- Name it: Mega Menu Canvas
This creates a separate design layer for your menu.
This is the key feature in Divi 5 that replaces complex positioning hacks.
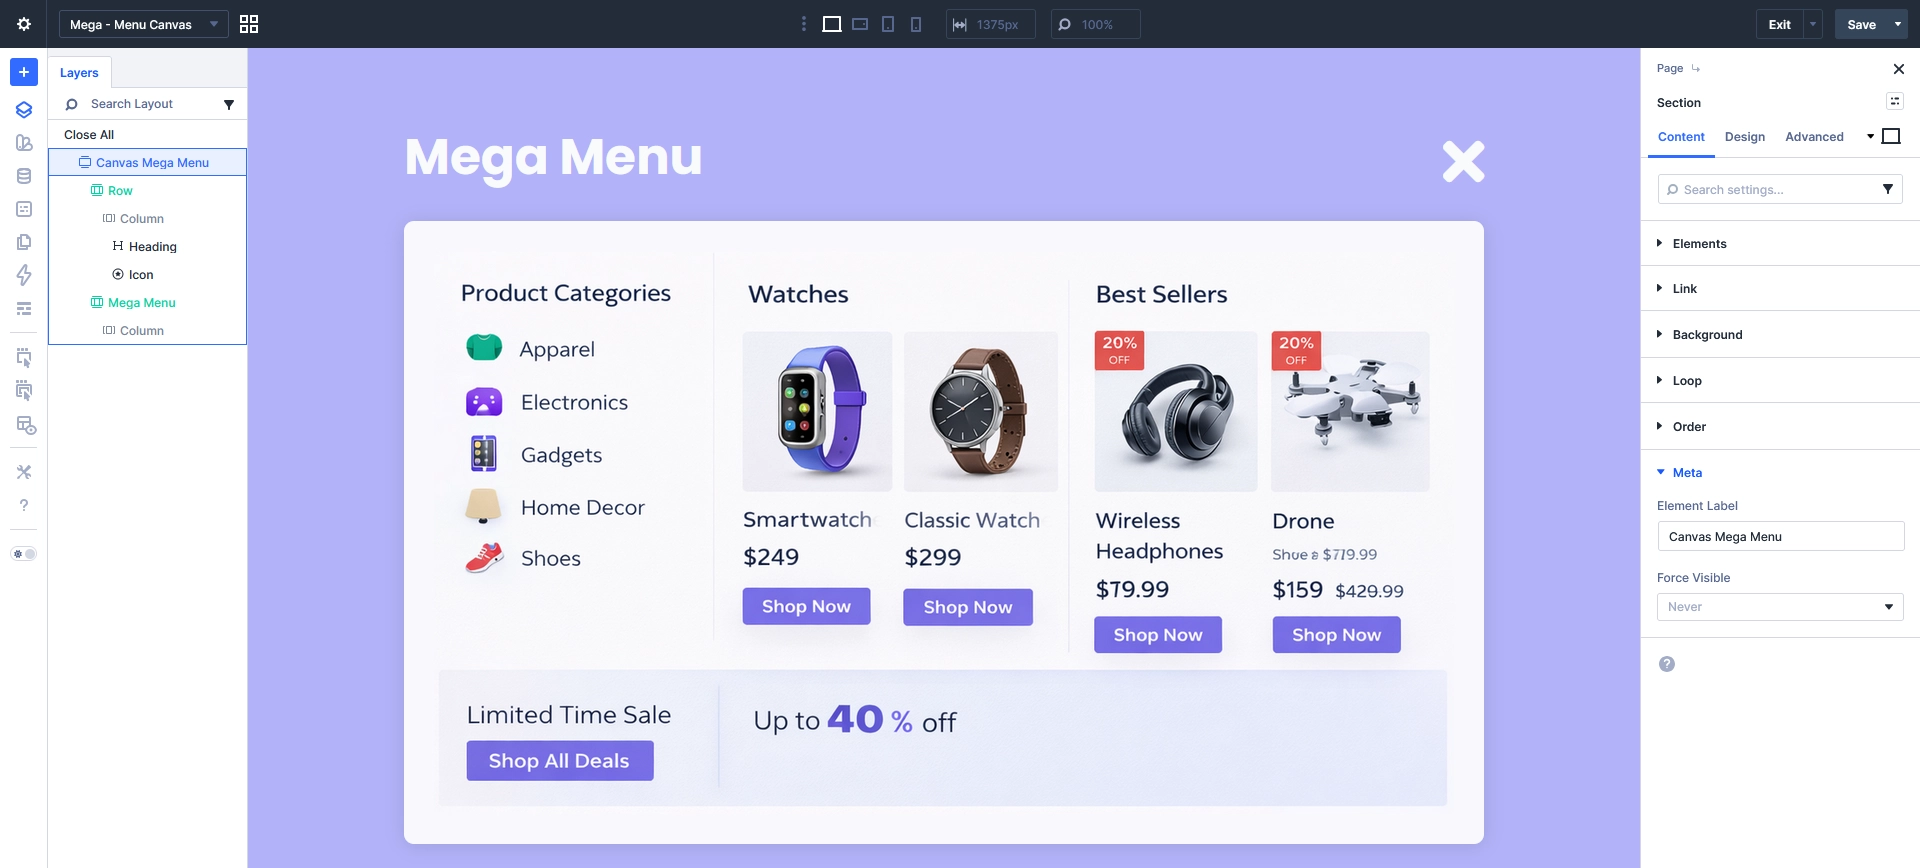
Step 3: Design the Mega Menu Layout
Now switch to your newly created canvas.
- Open Mega Menu Canvas
- Add a Section
- Label it: Canvas Mega Menu
Inside this section, build your layout:
Suggested Structure:
- Column 1: Product Categories
- Column 2: Featured Products
- Column 3: Best Sellers
- Bottom: Promotional Banner
Add Elements:
- Headings
- Icons
- Images
- Buttons
- Links
Tip: Use multiple columns for a true mega menu feel
Step 4: Style the Off-Canvas Menu
Make your menu look like an overlay panel:
Section Settings:
- Background: Light or gradient
- Width: 80% or fixed (e.g., 1200px)
- Padding: Generous spacing
- Border Radius: Optional
- Shadow: For depth
Add Close Button:
- Add an Icon module (X icon) at top-right
- This will be used to close the menu
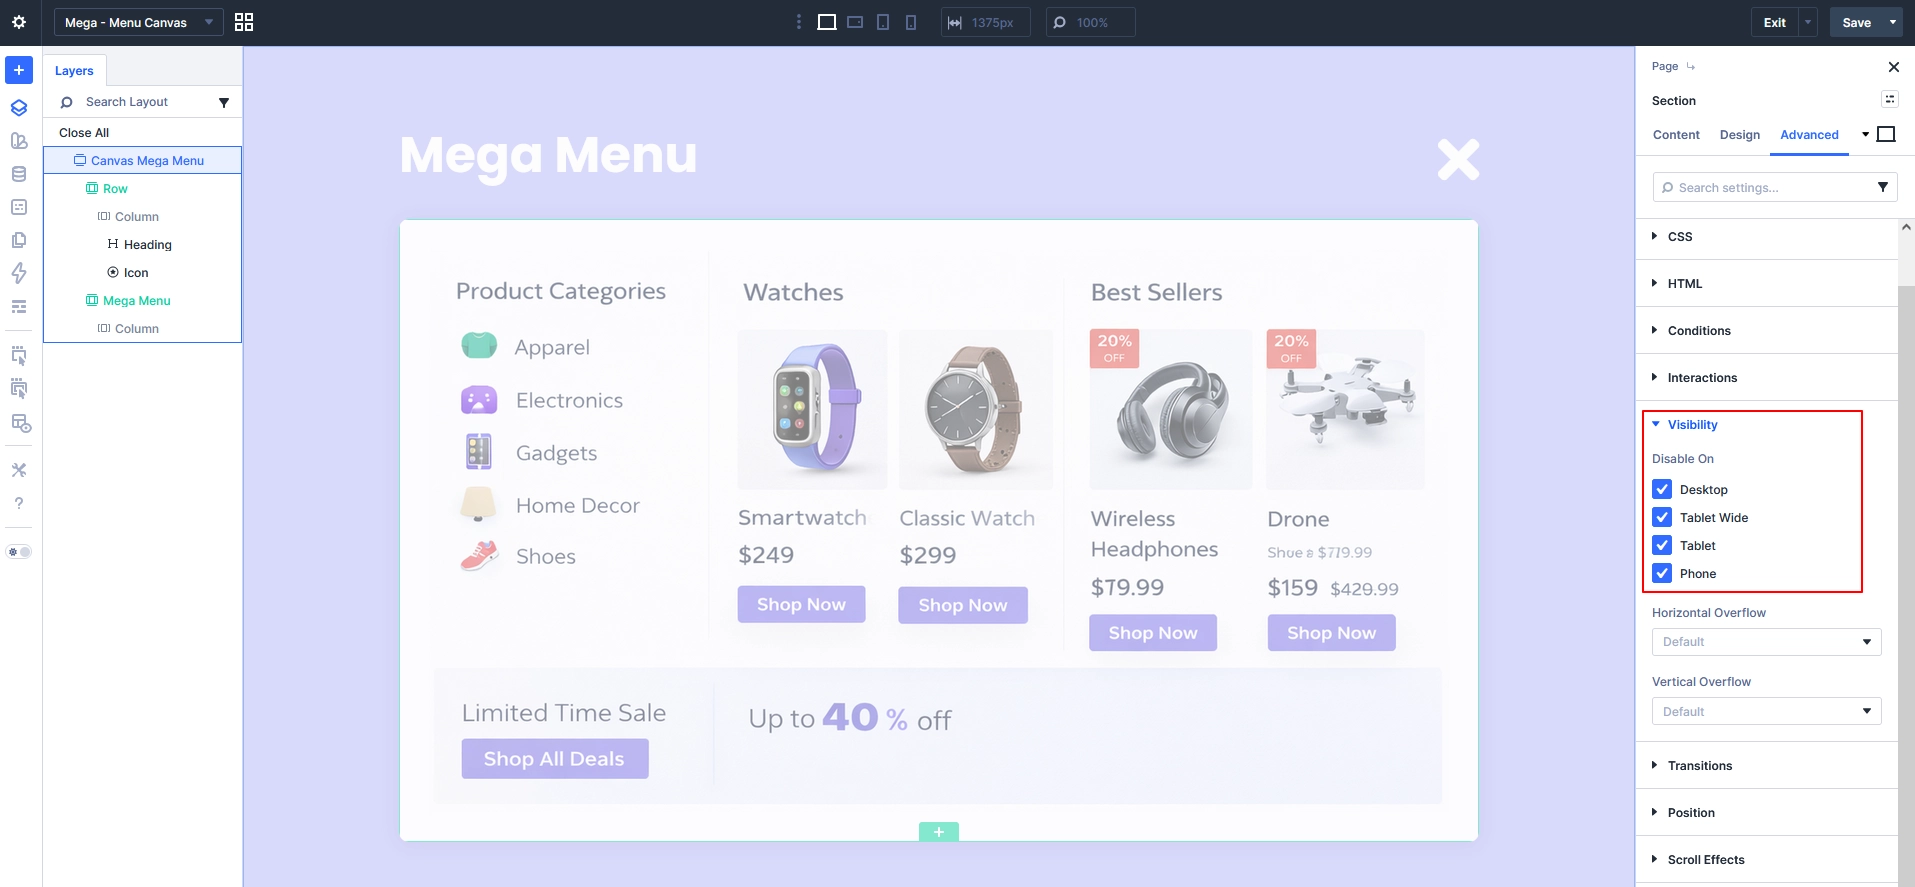
Step 5: Hide the Canvas by Default
This is very important.
- Select your Mega Menu Section
- Go to:
- Advanced → Visibility / Meta
- Set:
- Disable : All devices
Now the menu is hidden initially.
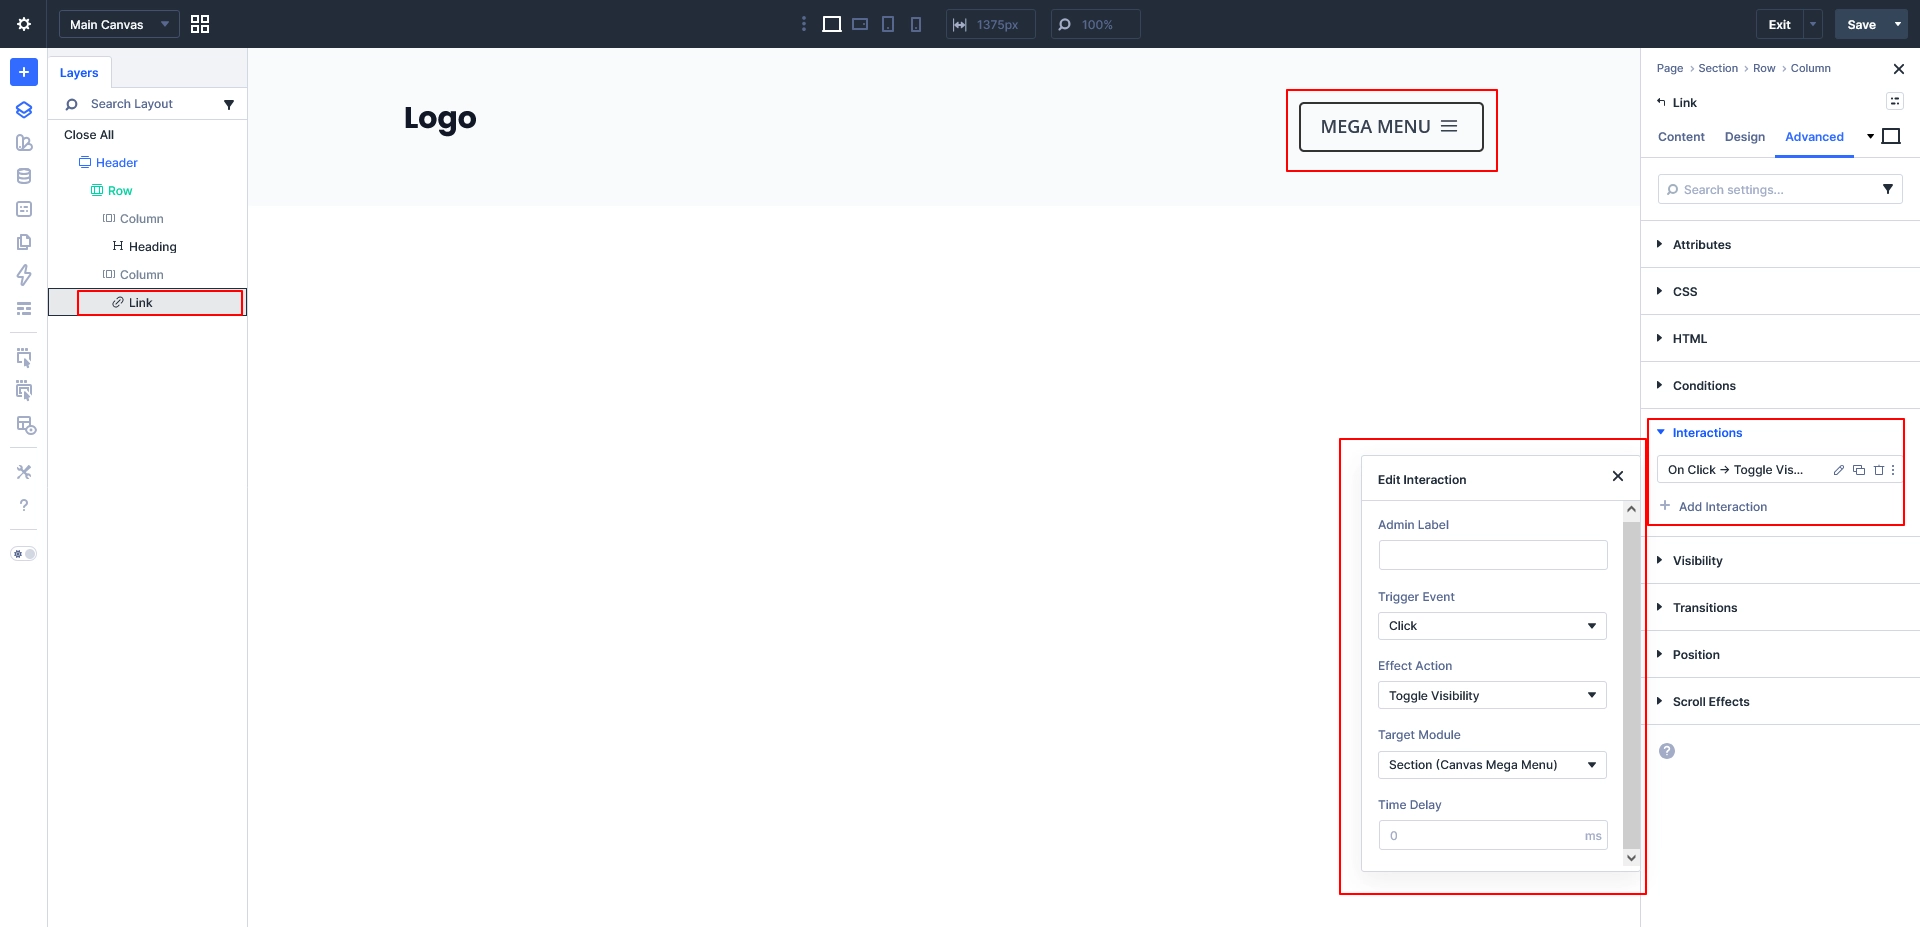
Step 6: Add Interaction to Open Menu
Now connect the button with the canvas.
- Go back to Main Canvas (Header)
- Select your Mega Menu Button / Link
- Go to Interactions
- Click Add Interaction
Settings:
- Trigger Event: Click
- Effect Action: Toggle Visibility
- Target Module: Section (Canvas Mega Menu)
This will open the menu when clicked.
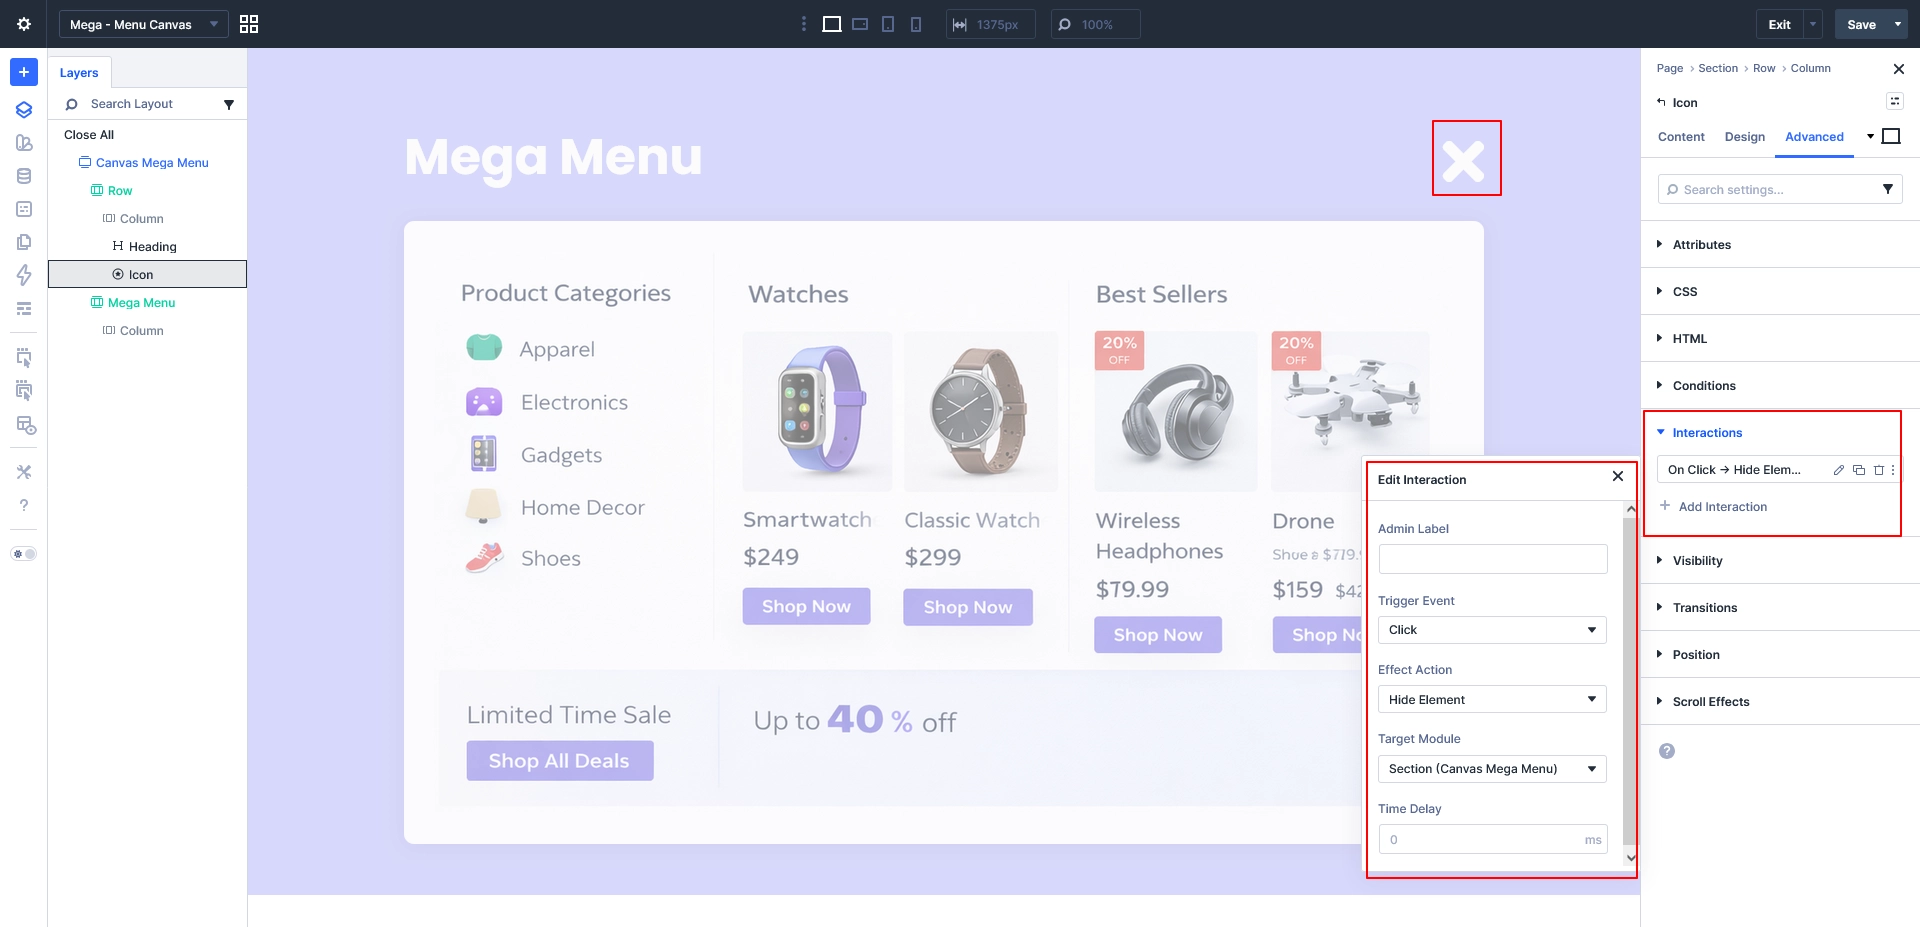
Step 7: Add Close Interaction
Now make the close button work.
- Go to Mega Menu Canvas
- Select the Close Icon (X)
- Add Interaction:
Settings:
- Trigger: Click
- Action: Toggle Visibility
- Target: Canvas Mega Menu Section
Now users can close the menu easily.
Step 8: (Optional) Add Overlay Effect
To improve UX:
- Add a semi-transparent background
- Or style the section to feel like a modal
Example:
background: rgba(0,0,0,0.6);
Step 9: Make It Responsive
Ensure your menu works perfectly on mobile:
- Use stacked columns
- Increase spacing for touch
- Adjust font sizes
- Set width to 100% on mobile
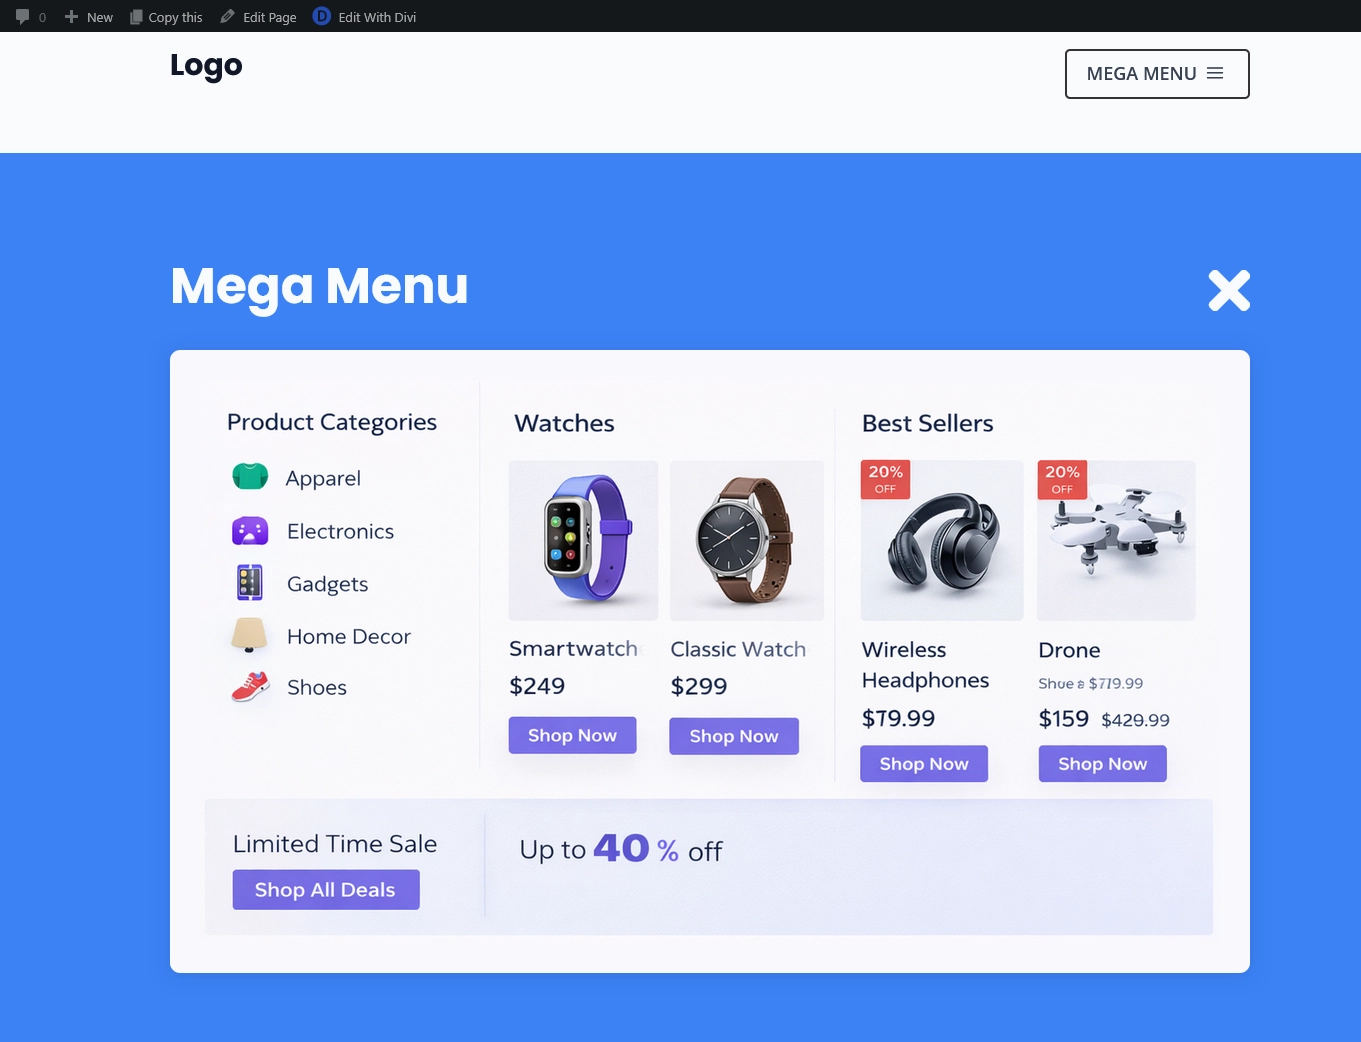
Final Result
You now have:
- A clean off-canvas mega menu
- Built using Divi 5 Canvas
- Powered by Interactions (no JS)
- Fully customizable layout
Why This Method is Better
- No custom coding required
- Fully visual workflow
- Easy to update and scale
- Works perfectly with Divi 5 architecture
Conclusion
Divi 5’s Canvas + Interactions completely changes how we build advanced navigation.
With just a few steps, you can create a professional off-canvas mega menu that looks modern, performs well, and improves user experience.
Pro Tips
- Add animation using transitions
- Use dynamic WooCommerce products
- Save layout to Divi Library
- Reuse canvas for multiple menus