Table of Contents
- Why Menus & Styles Break After WordPress 6.9
- Step 1 : Clear All Cache (Most Important Step)
- Step 2 : Regenerate CSS & Static Files (Critical for Menus)
- Step 3 : Re-Save Menus & Menu Locations
- Step 4 : Disable CSS/JS Minification Temporarily
- Step 5 : Check Theme & Child Theme Compatibility
- Step 6 : Inspect Console Errors (Advanced but Helpful)
- Step 7 : Reset Permalinks & Flush Rewrite Rules
- Step 8 : Test with Default Theme (Last Resort)
- Final Quick Checklist
- Pro Tip for Business & Client Websites
After upgrading to WordPress 6.9, many site owners notice menus not opening, CSS styles missing, mobile menus broken, or layouts looking completely off. This usually happens due to cache conflicts, theme compatibility issues, or outdated assets after the update.
This guide walks you through clear, practical fixes to restore menus and styles quickly—without guesswork.
Why Menus & Styles Break After WordPress 6.9
After updating WordPress 6.9, the most common causes are:
- Cached CSS/JS files no longer matching the new core version
- Theme or page builder not fully compatible yet
- Minification or optimization plugins serving old files
- Menu locations reset during update
- Header builder CSS not regenerated
The good news: most issues are fixable in minutes.
Step 1 : Clear All Cache (Most Important Step)
Start here—this alone fixes many broken-style issues.
Clear cache from:
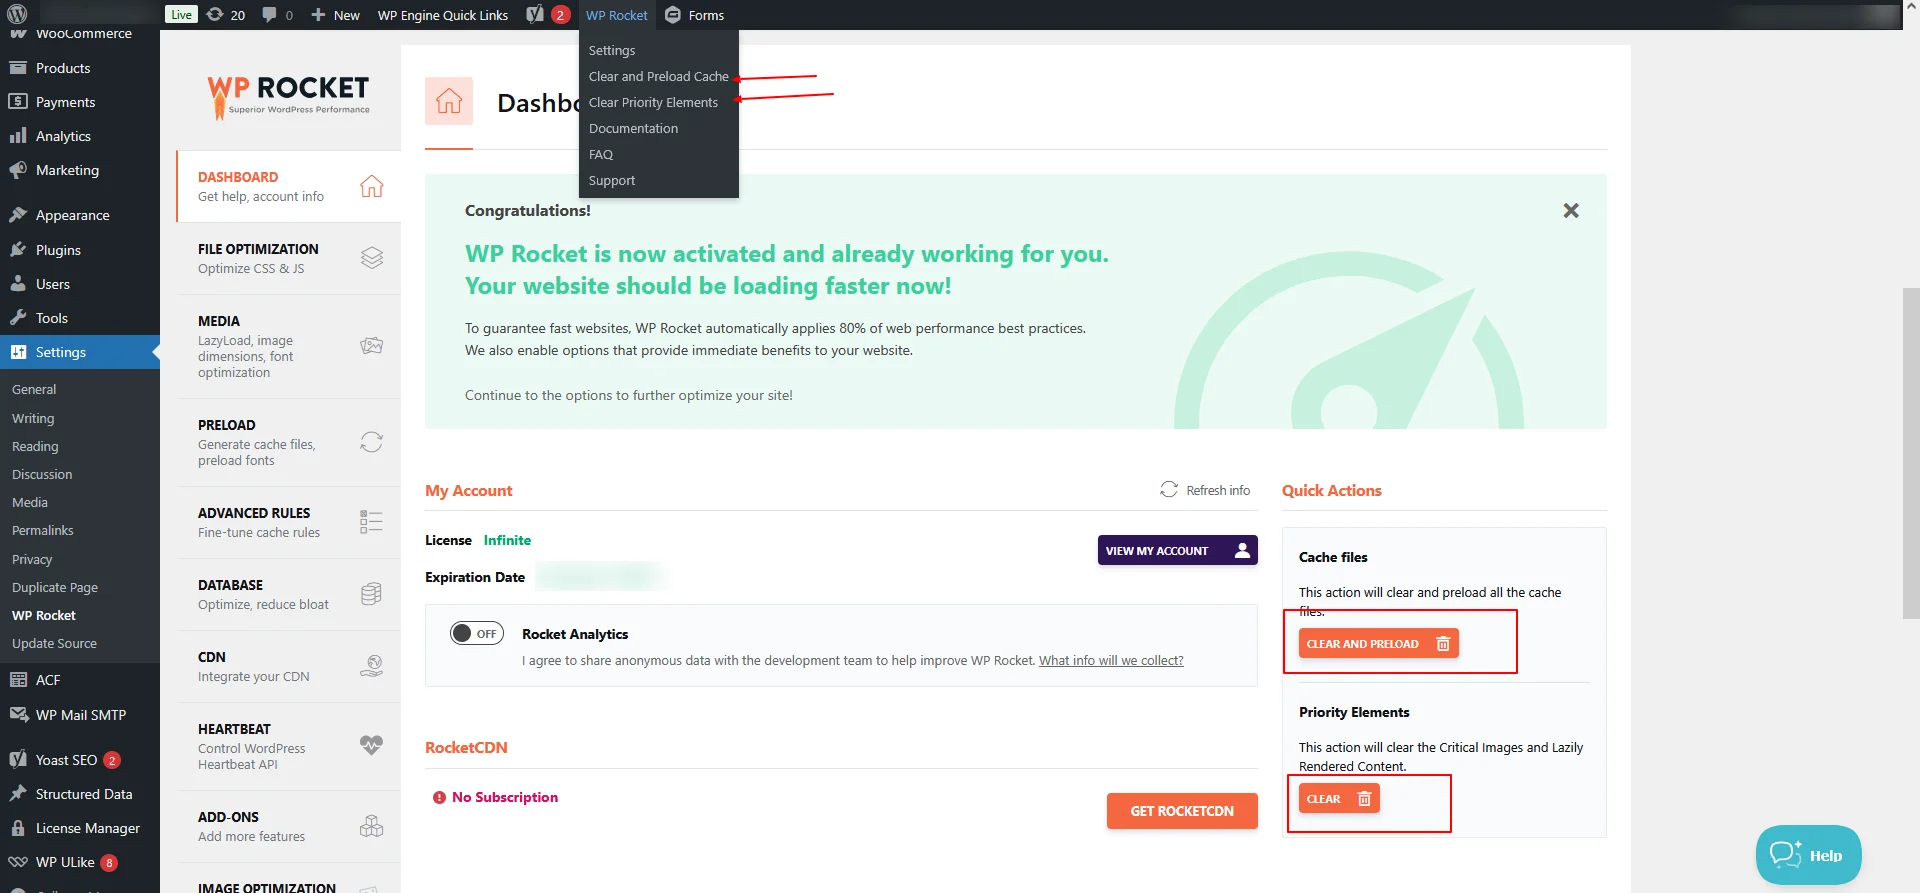
- WordPress cache plugin (WP Rocket, LiteSpeed, W3 Total Cache, etc.)
- Hosting/server cache
- CDN cache (Cloudflare, Bunny.net)
Also hard-refresh your browser:
- Windows: Ctrl + F5
- Mac: Cmd + Shift + R
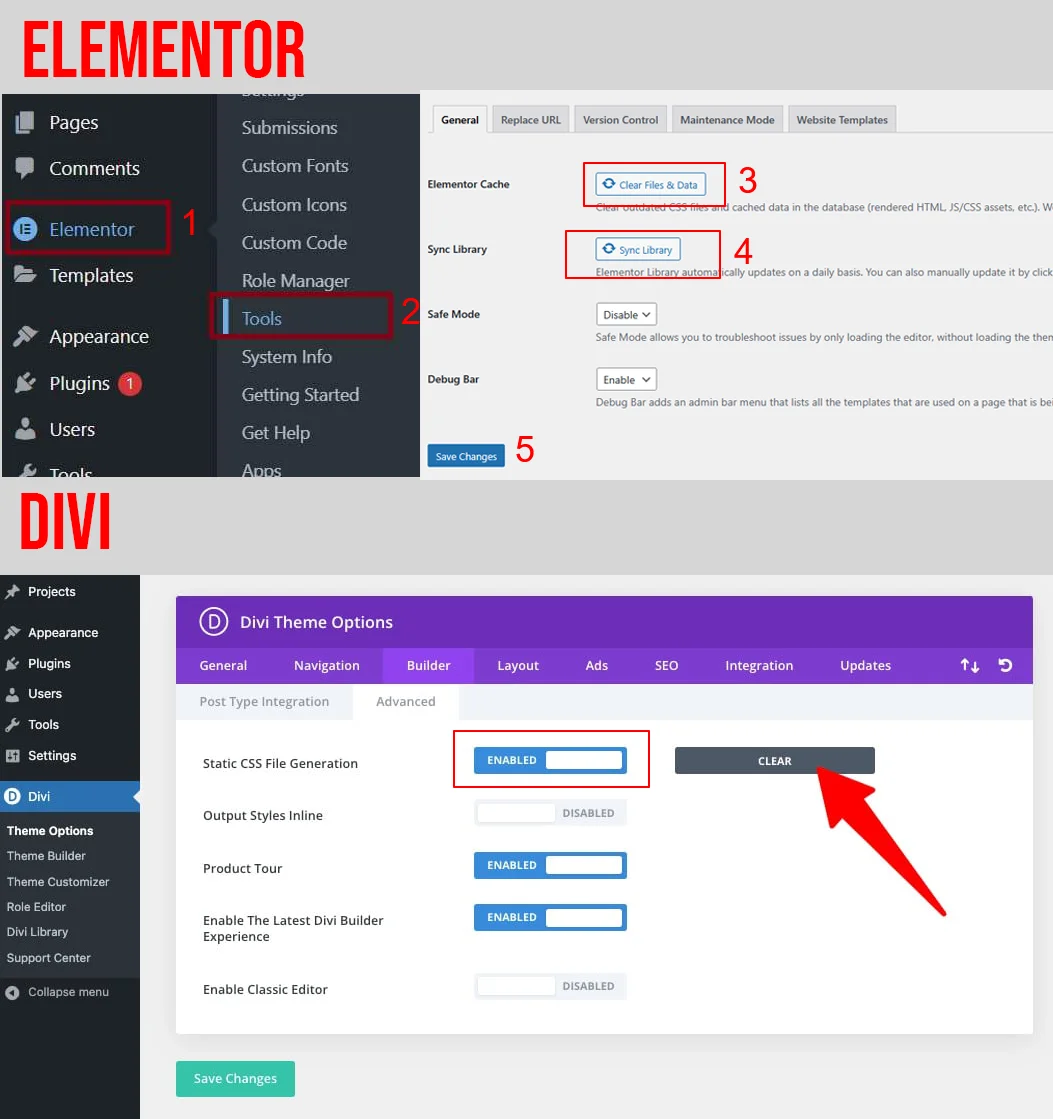
Step 2 : Regenerate CSS & Static Files (Critical for Menus)
If you use Elementor
- Go to Elementor → Tools
- Click Regenerate Files & Data
- Save permalinks (Settings → Permalinks → Save)
If you use Divi
- Go to Divi → Theme Options → Builder
- Clear Static CSS File Generation
- Enable Dynamic CSS if available
This rebuilds menu and header styles.
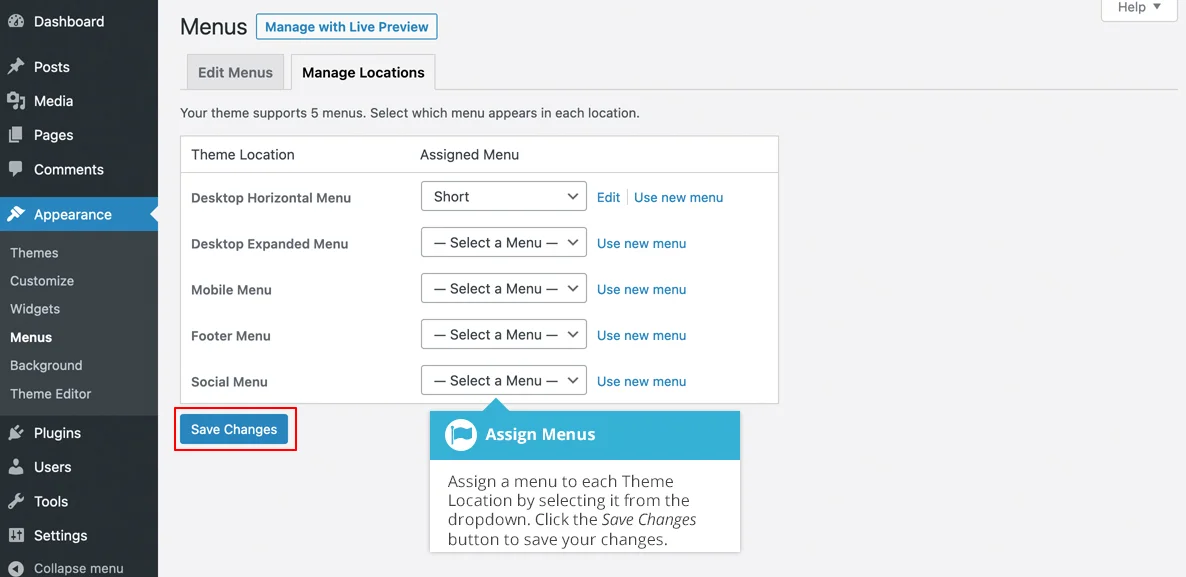
Step 3 : Re-Save Menus & Menu Locations
Sometimes WordPress 6.9 resets menu assignments.
Steps:
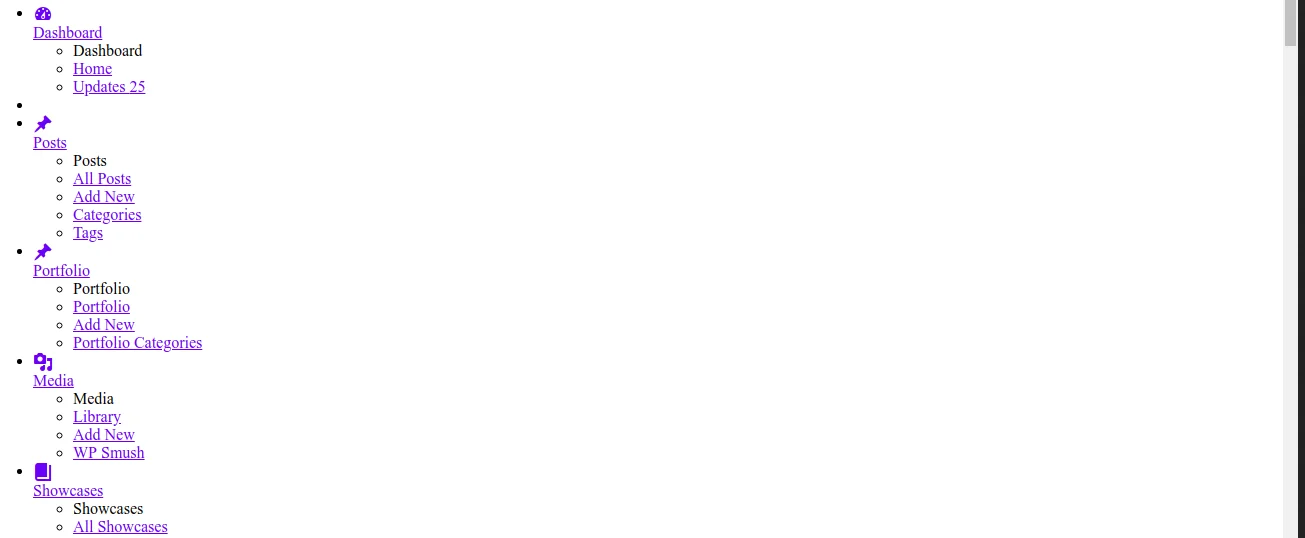
- Go to Appearance → Menus
- Select your main menu
- Click Save Menu
- Check Menu Locations:
- Primary Menu
- Mobile Menu
- Header Menu
Especially important for mobile menus.
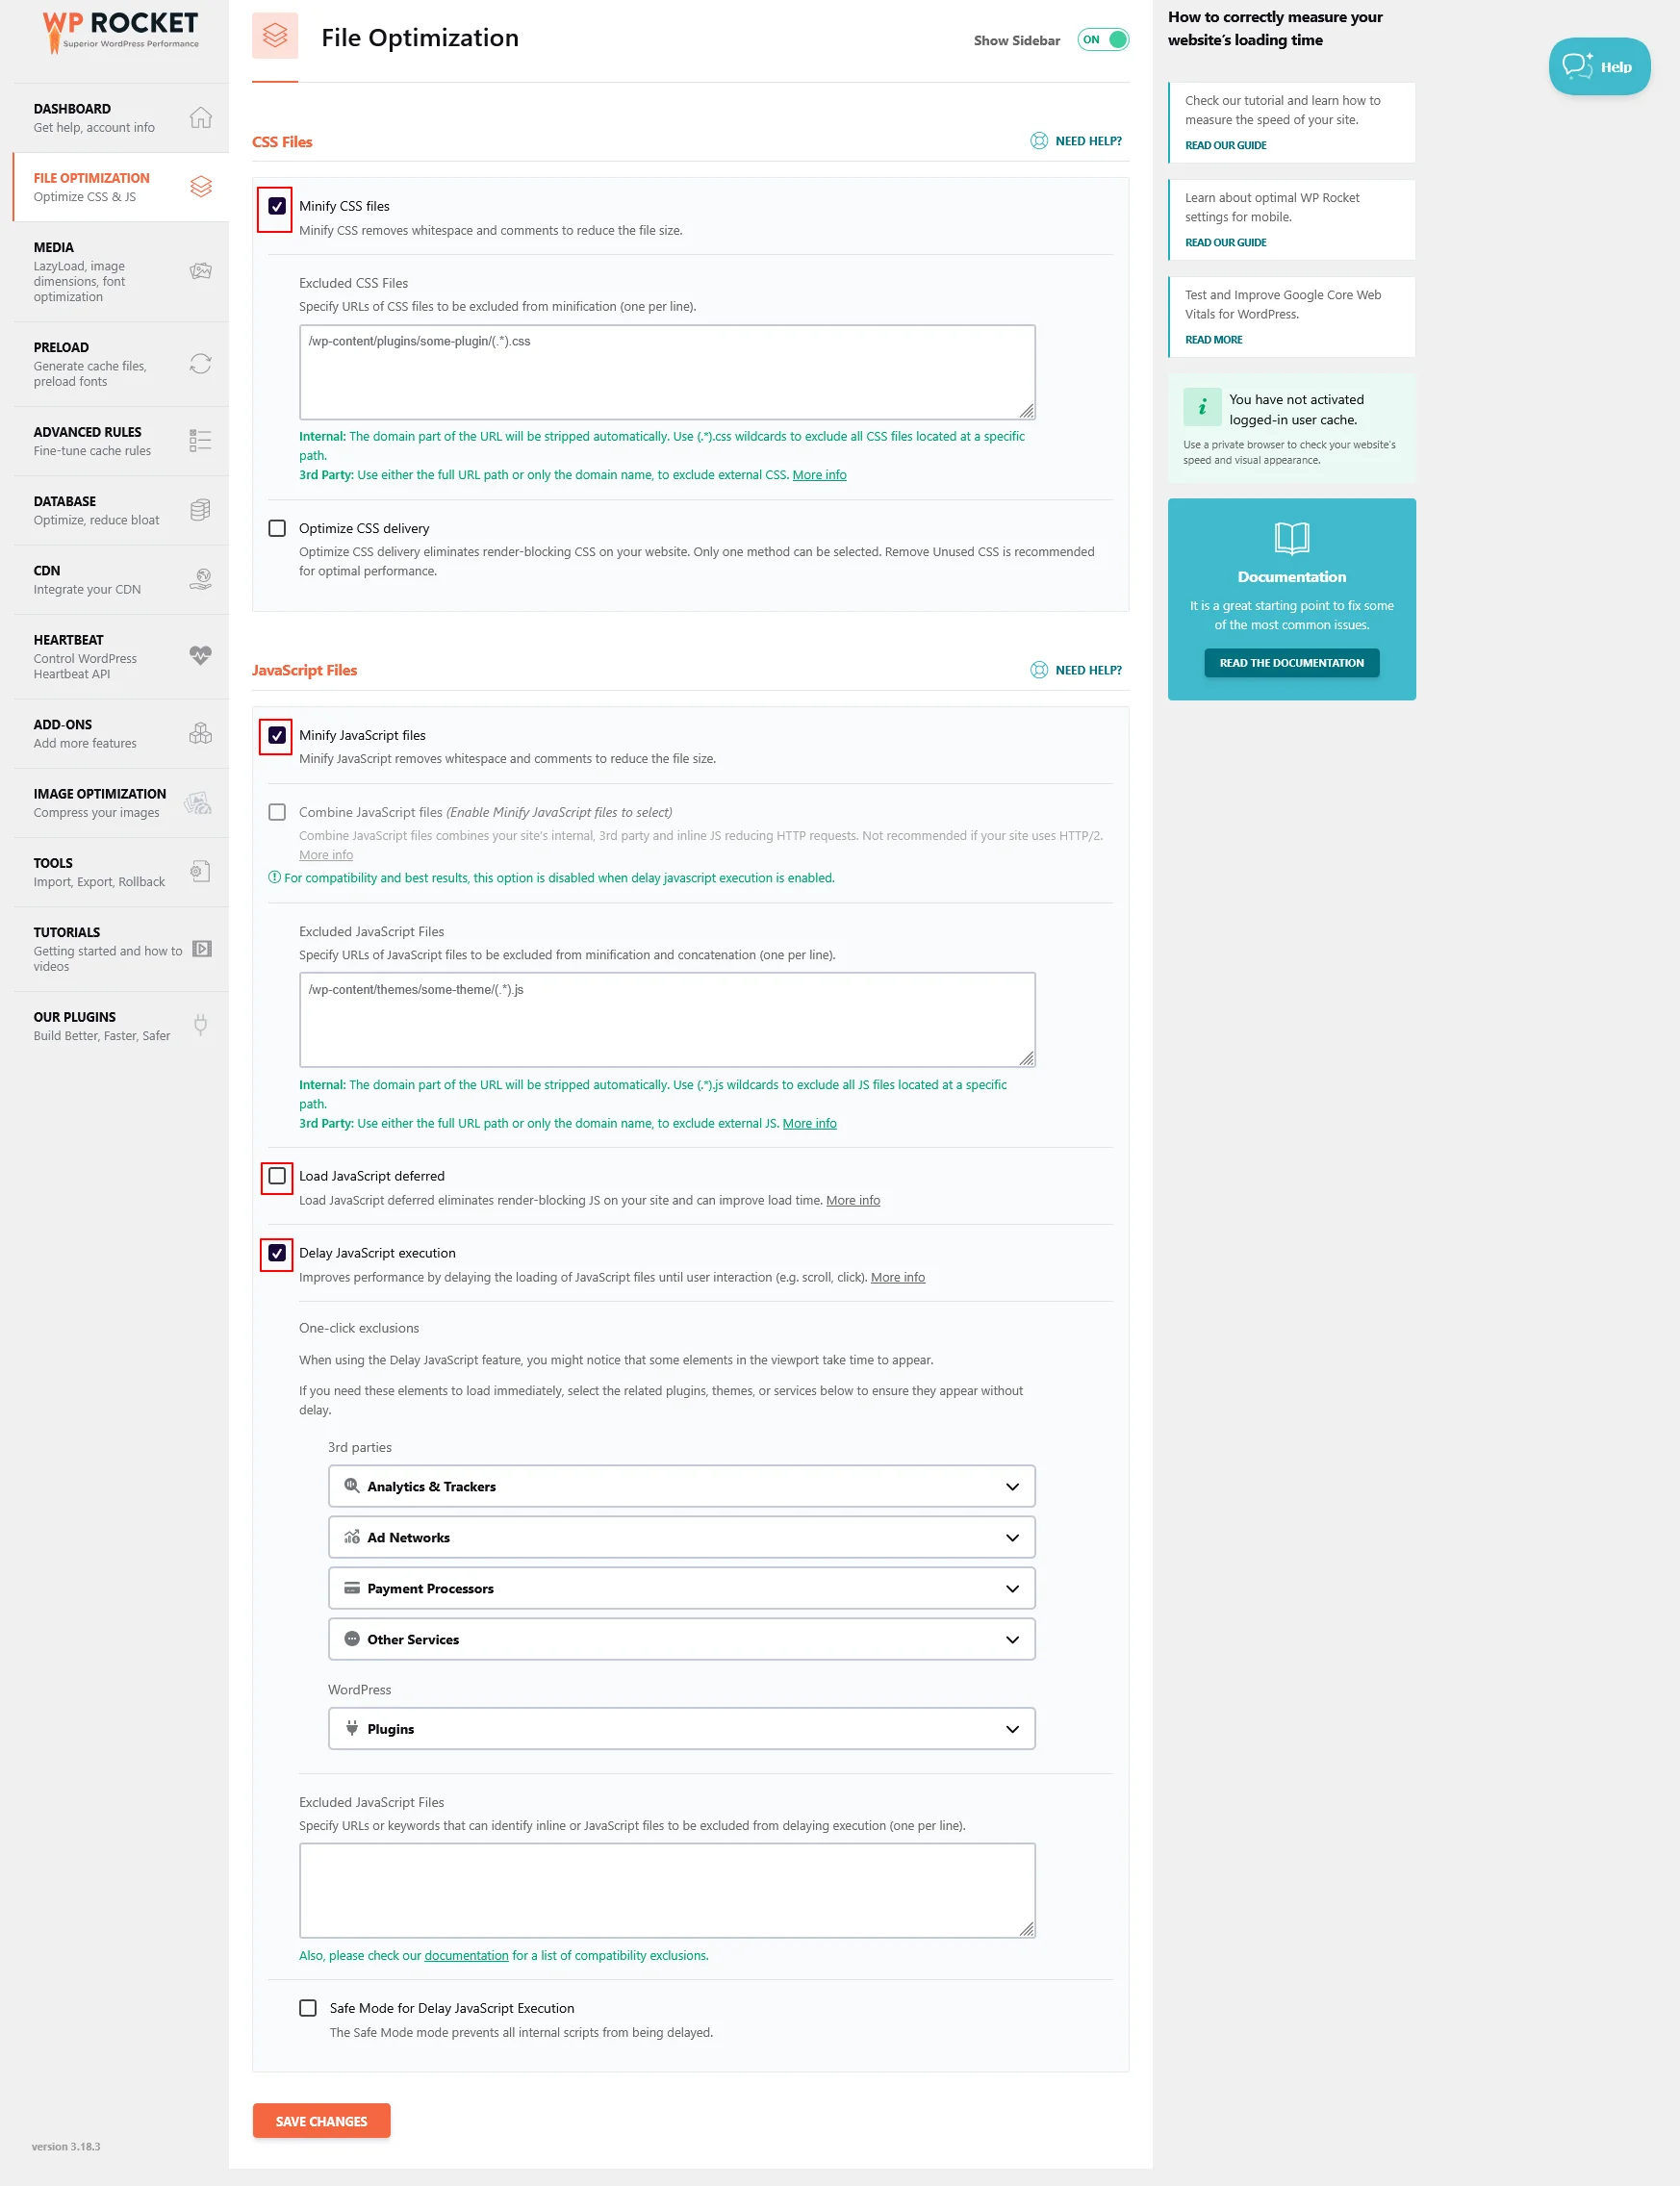
Step 4 : Disable CSS/JS Minification Temporarily
Minification plugins can break menus after core updates.
- If you used WordPress cache plugin (WP Rocket, LiteSpeed, W3 Total Cache, etc.)
Temporarily disable:
- CSS minify
- JS minify
- Combine files
- Defer JavaScript
- Load JS asynchronously
Then:
- Clear cache
- Test menus again
If fixed, re-enable options one by one.
Step 5 : Check Theme & Child Theme Compatibility
- Update your parent theme
- Update your child theme
- Check for:
- Outdated header.php
- Custom functions.php menu code
- Old navigation walkers
WooCommerce sites should also check:
WooCommerce → Status → Templates for outdated overrides.
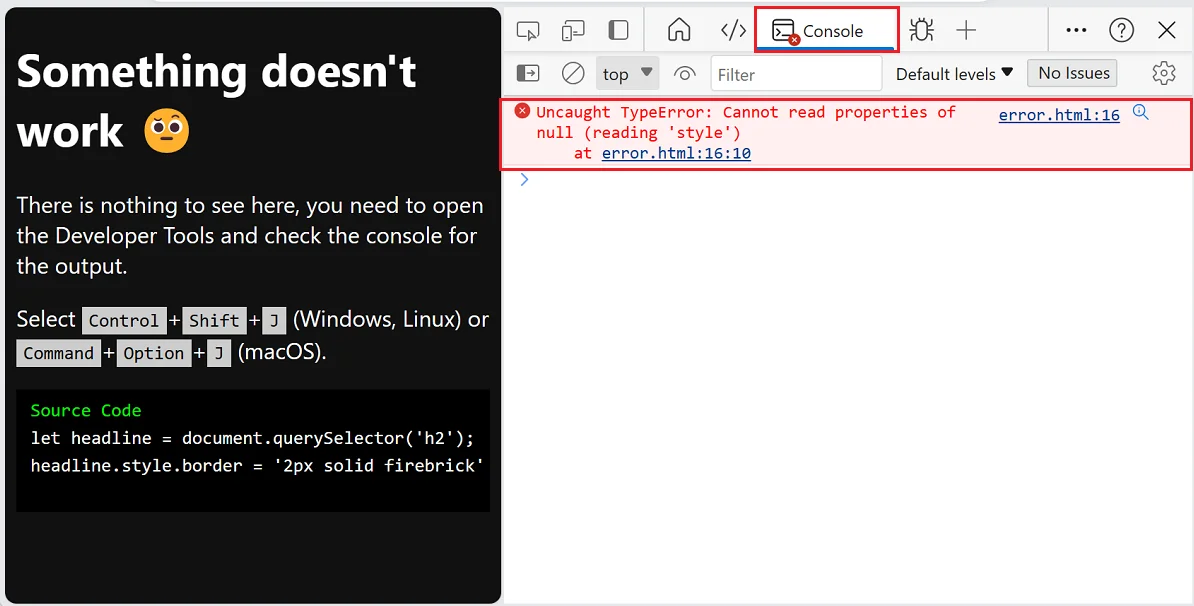
Step 6 : Inspect Console Errors (Advanced but Helpful)
Open browser DevTools:
- Right-click → Inspect → Console tab
Check errors and Fix :
- Uncaught TypeError
- Blocked by CORS
- Missing JS or CSS files (404)
Errors here often point directly to the broken menu script.
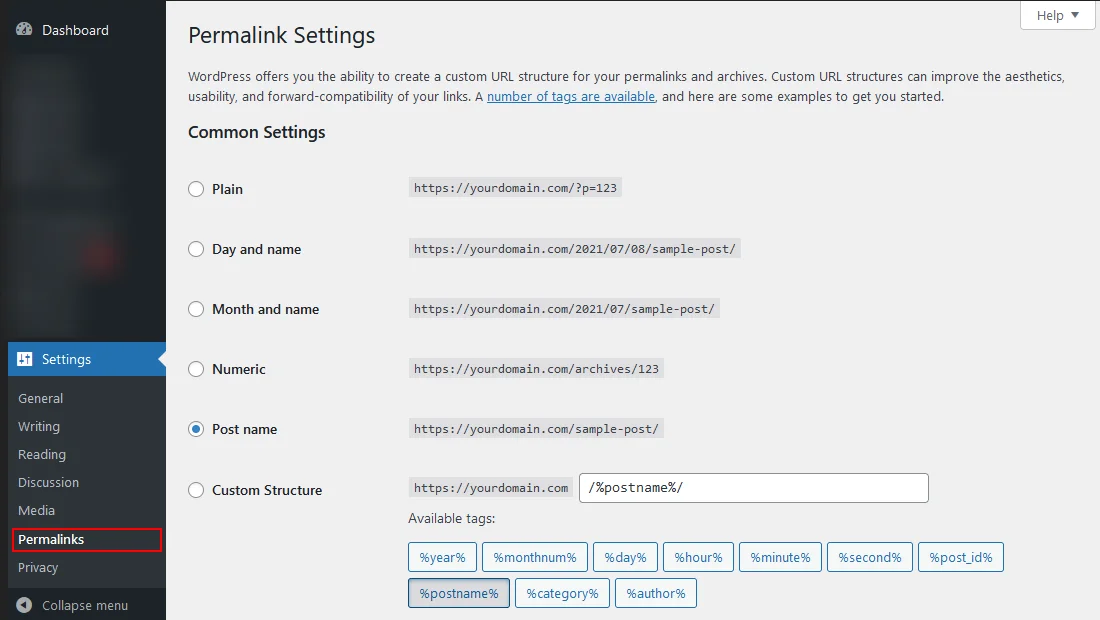
Step 7 : Reset Permalinks & Flush Rewrite Rules
- Go to Settings → Permalinks
- Click Save Changes (no edits needed)
This fixes menu links not opening or redirecting incorrectly.
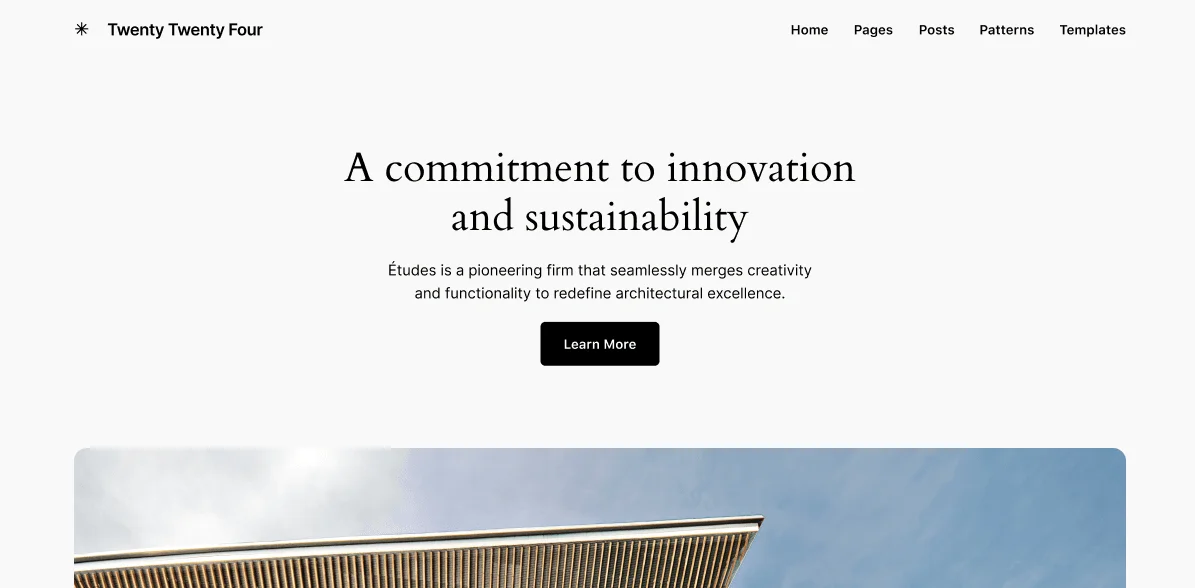
Step 8 : Test with Default Theme (Last Resort)
If nothing works:
- Switch temporarily to Twenty Twenty-Four
- Check if menus & styles work
If yes → issue is theme-specific
If no → issue is plugin or cache-related
Final Quick Checklist
- Cache cleared everywhere
- CSS & assets regenerated
- Menus re-saved & locations checked
- Theme updated
- Console errors reviewed
- Permalinks flushed
Pro Tip for Business & Client Websites
After major WordPress updates:
- Always regenerate CSS
- Never rely on old cache
- Test menus on mobile first
- Document fixes for client reporting
This avoids panic messages like “Menu not working after update”.
Website updates shouldn’t compromise performance, design, or user experience.
Partner with TechnoCrackers for reliable WordPress development, optimization, and long-term site stability.