Table of Contents
If you’re building websites with Divi and want your forms to automatically include the current page title and URL, this tutorial will help you do it—without using plugins.
This technique is especially useful for:
- Product pages
- Landing pages
- Service request forms
- Support or inquiry forms
Once set up, users can submit a form and you’ll automatically receive which page they sent it from — making communication faster and more organized.
Step 1 — Edit the Page Using Divi Builder
Open the page where you want this functionality and click:
Enable Visual Builder → Edit With Divi
Create a simple layout with:
- Section
- Row
- Heading Module
- Contact Form Module
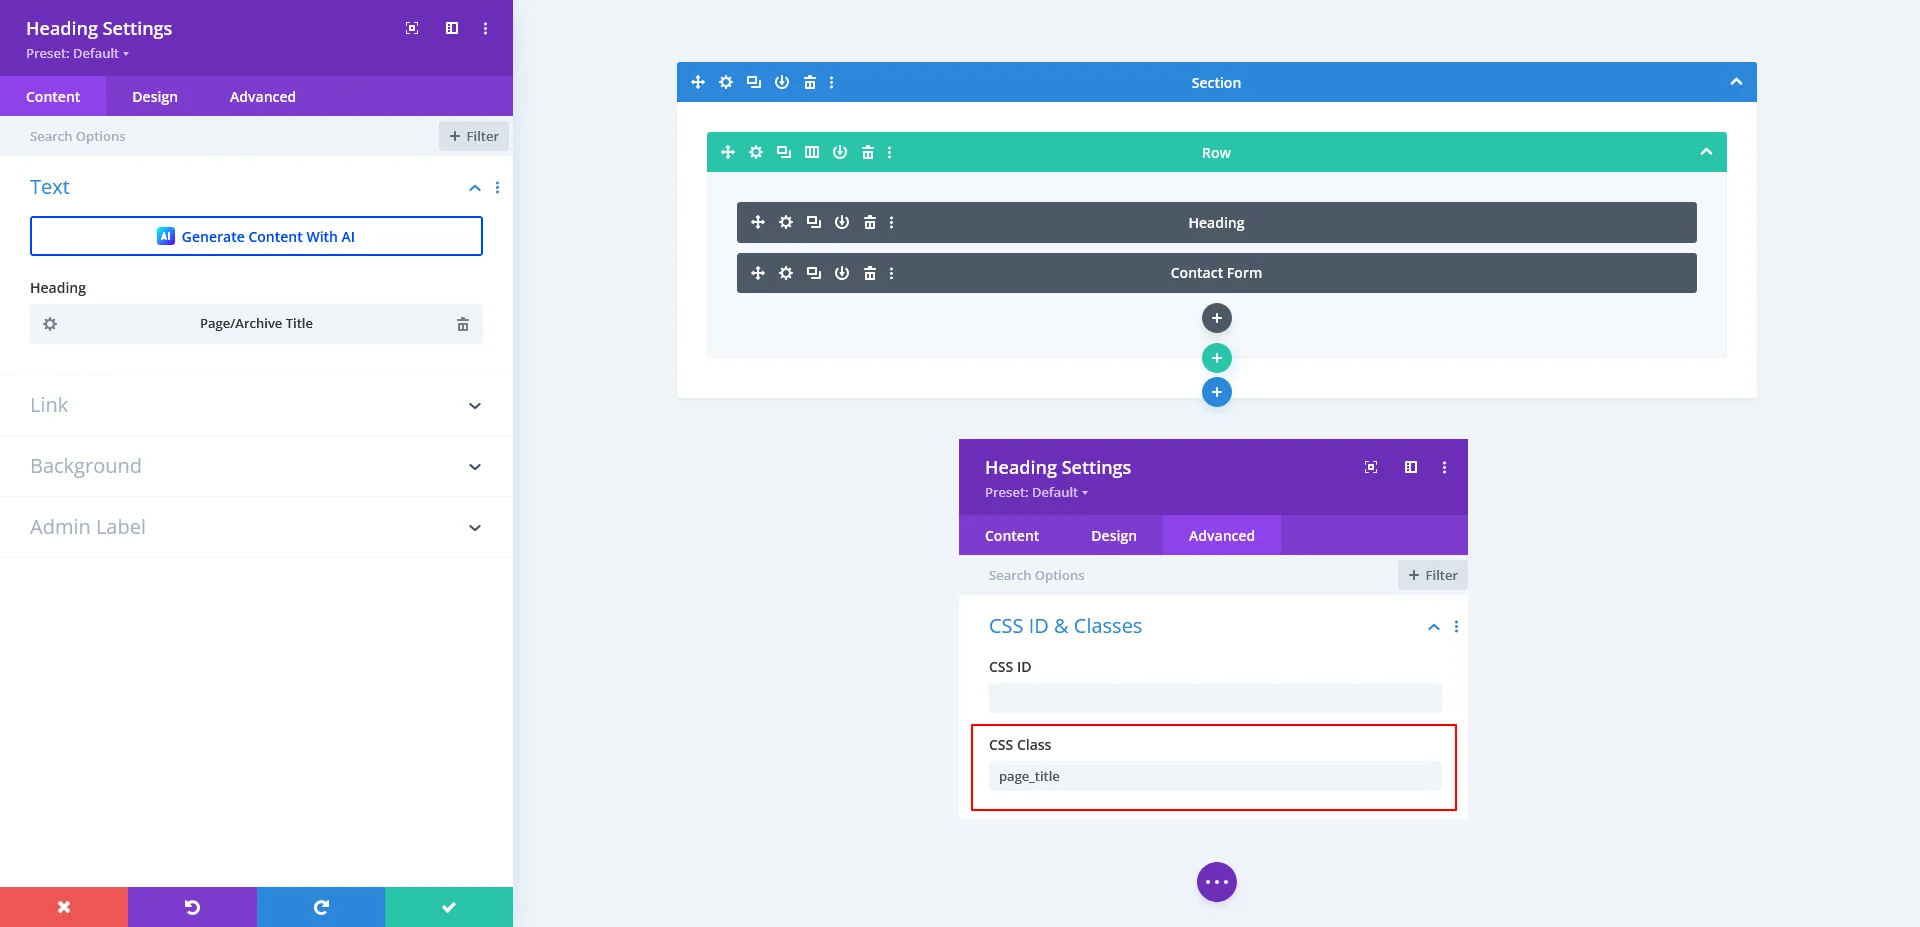
Step 2 — Add the Dynamic Page Title
In the heading module:
- Go to Content → Heading
- Select: Page/Archive Title (this pulls the current page title dynamically)
- Now go to: Advanced → CSS ID & Classes
- Add this class:
page_title
This class is important because our script will detect it and use its value.
Step 3 — Create the Divi Form Fields
Open the Contact Form module and add your normal inputs (Name, Email, Message, etc.)
Then add two additional hidden (or visible) fields:
| Field Name | Field ID |
| Page URL | page_url |
| Page Title | page_title |
Example message pattern:
Name: %%Name%%

Email: %%Email%%

Message: %%Message%%

Page Title: %%page_title%%

Page URL: %%page_url%%
This ensures the captured data appears in your submitted email.

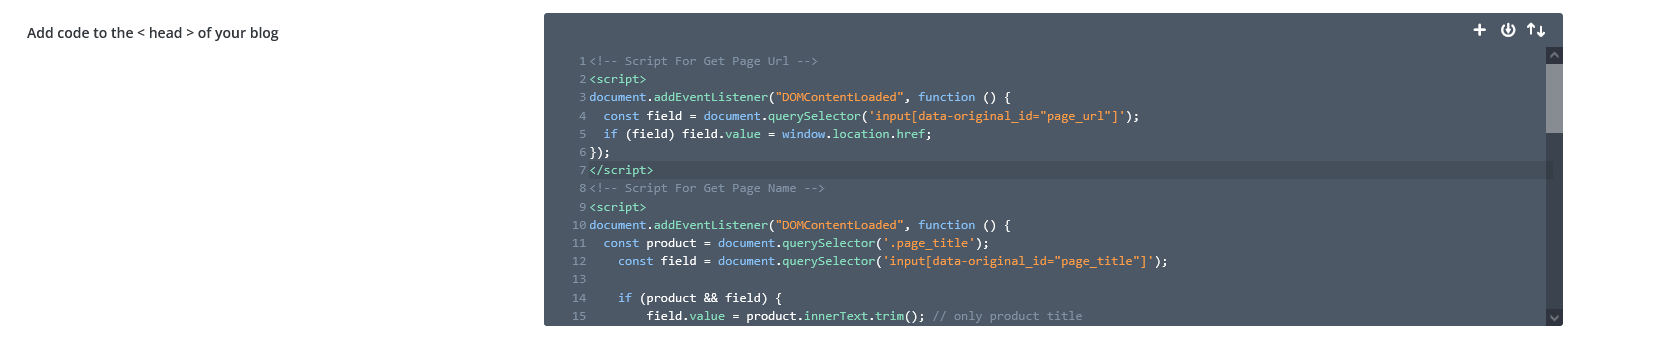
Step 4 — Add the Script in Divi Theme Options
Go to: Divi → Theme Options → Integration → Add Code to <head>
Paste the following scripts:
Script to Fetch Page URL :
<script>
document.addEventListener("DOMContentLoaded", function () {
const field = document.querySelector('input[data-original_id="page_url"]');
if (field) field.value = window.location.href;
});
</script>
Script to Fetch Page Title :
<script>
document.addEventListener("DOMContentLoaded", function () {
  const product = document.querySelector('.page_title');
  const field = document.querySelector('input[data-original_id="page_title"]');
  if (product && field) {
      field.value = product.innerText.trim();
      field.readOnly = true;
      field.style.cursor = "not-allowed";
  }
});
</script>
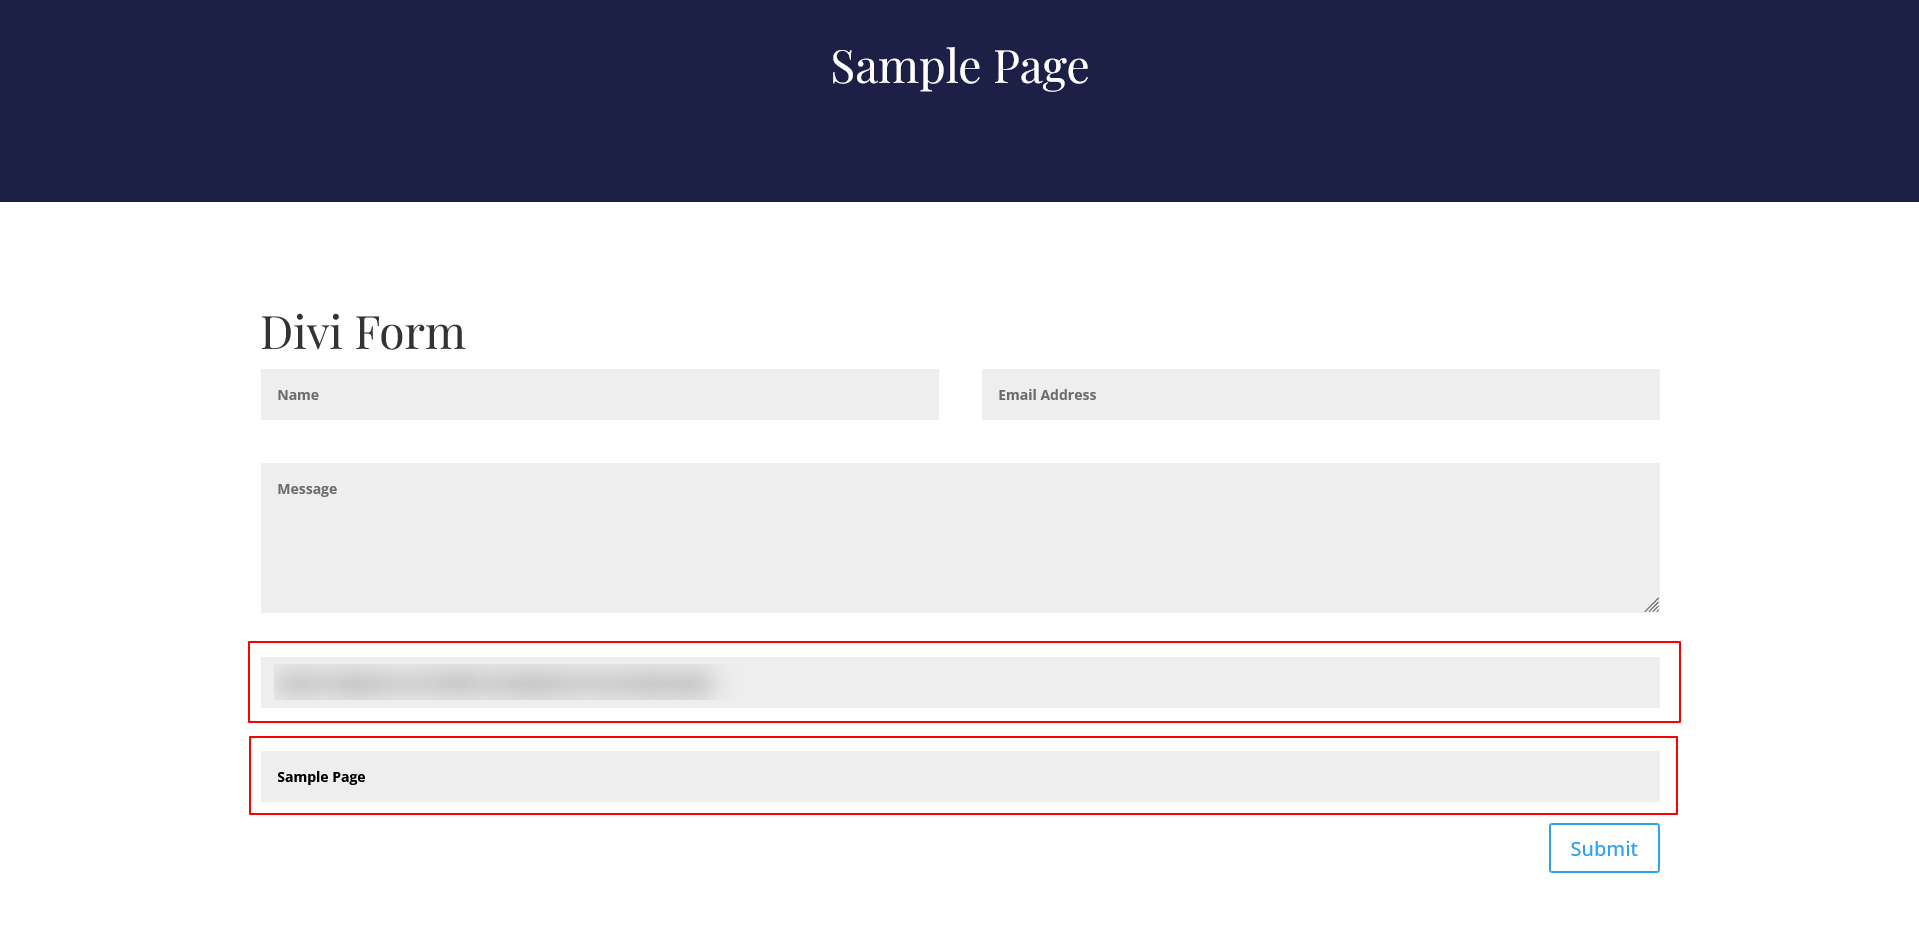
Step 5 — Test the Form
Now refresh the page and you’ll see:
- The page title fills automatically
- The page URL fills automatically
- The fields are locked so users can’t modify them
Example Front-End Result
Submit the form and check your email — you should now receive something like this:
Name: John Doe

Email: [email protected]

Message: I want more info.

Page Title: Sample Page

Page URL: https://example.com/sample-page/
Example Mail Result

Want This for WooCommerce?
You can use the same method on product pages — great for product inquiry forms.
Tip
If you want to hide the title/URL fields, simply hide fields via css.
If you’re planning a WordPress or WooCommerce project that involves Divi forms, dynamic product data, or custom automation, our team can handle the complete development—from planning and implementation to testing and launch.
You can Book a Free Project Consultation to discuss your goals, timelines, and how we can take full responsibility for building your solution.