Table of Contents
- What We’ll Create
- 1. Add a Button to Your Page
- 2. Create a New Canvas
- 3. Design Your Off-Canvas Popup
- 4. Add Content to the Popup
- 5. Make the Popup Fixed
- 6. Make the Popup Scrollable on Mobile
- 7. Hide the Popup by Default
- 8. Give the Popup an Admin Label
- 9. Connect the Button to the Popup
- 10. Add the Close Interaction
- 11. Test Your Popup
- Final Result
Want to create a slide-out popup in Divi 5 without using an additional popup plugin?
With Divi 5 Canvases, you can create a separate area for your popup and display it when a visitor interacts with a button. This is useful for services, contact information, additional content, menus, promotions, and more.
In this tutorial, we’ll create a simple off-canvas popup that opens when a visitor clicks a button and closes when they click a close icon.
What We’ll Create
Our example will have:
Button on the Page → Opens Off-Canvas Popup → Visitor Views Content → Close Icon → Popup Closes
The button will be placed directly on the page, while the popup itself will be created inside a Divi 5 Canvas.
1. Add a Button to Your Page
First, open the page where you want to display the off-canvas popup.
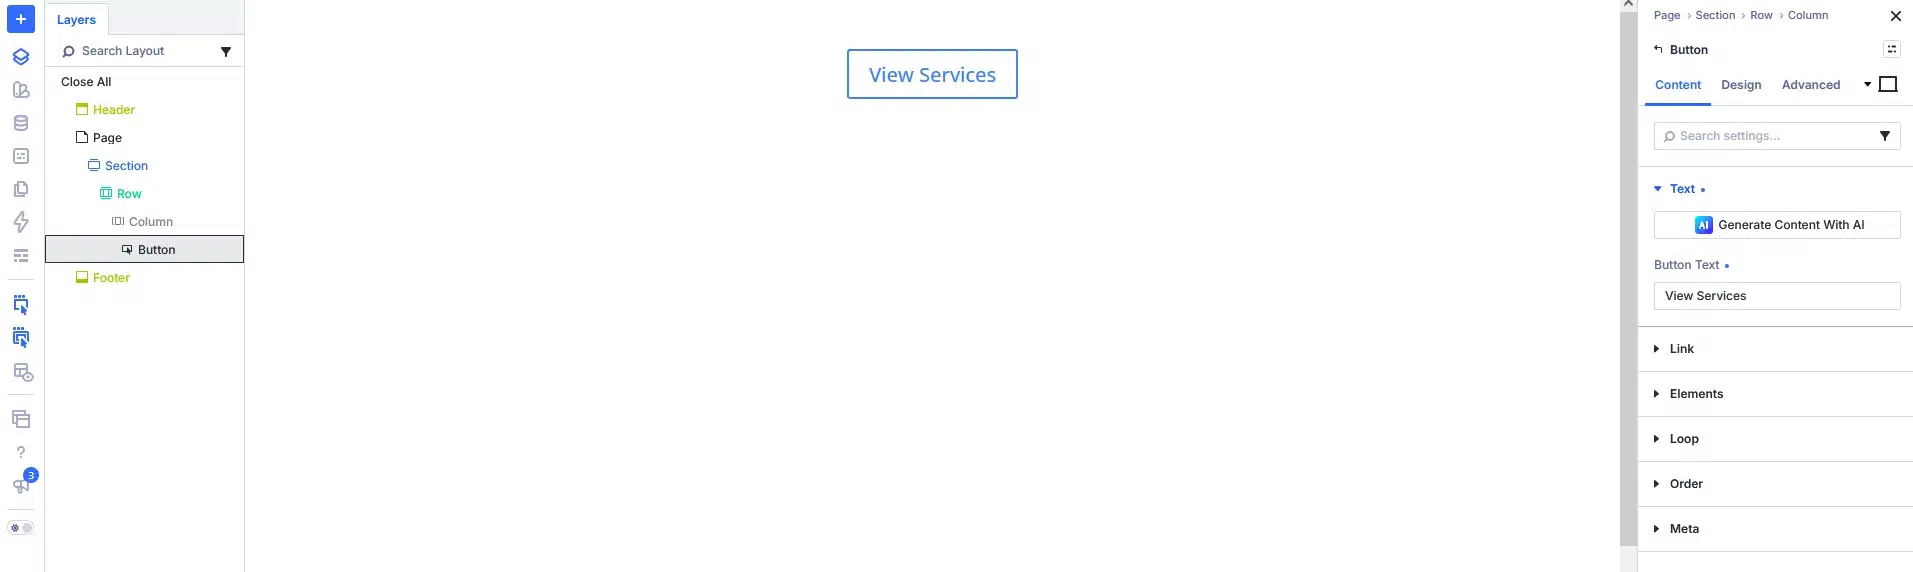
Add a Button module to the page.
For example, you could use:
View Services or: Learn More or: Contact Us
Style the button however you like.
This button will be used to open the popup.
2. Create a New Canvas
Now let’s create the popup.
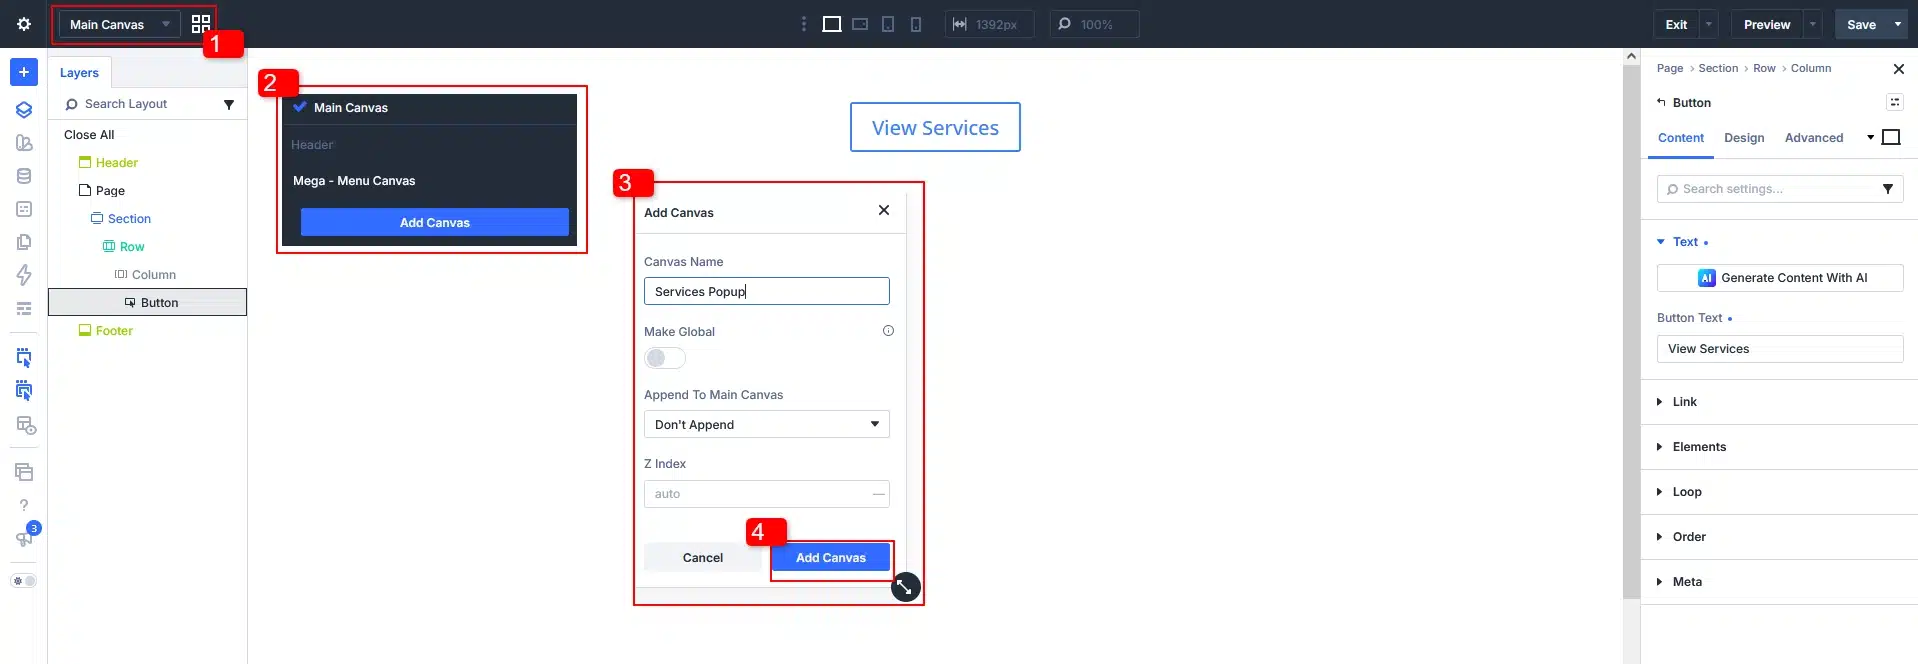
Open the Divi 5 Visual Builder and find the Canvas dropdown in the top bar.
Click:Add Canvas
Give your Canvas a name, such as: Services Popup
Then choose: Global or Local
For this tutorial, you can use Global if you want to reuse the popup across your website, or Local if the popup is only needed on this particular page.
Set the Canvas to: Don’t Append
Click Add Canvas.
Divi will open the new Canvas where you can build your popup.
3. Design Your Off-Canvas Popup
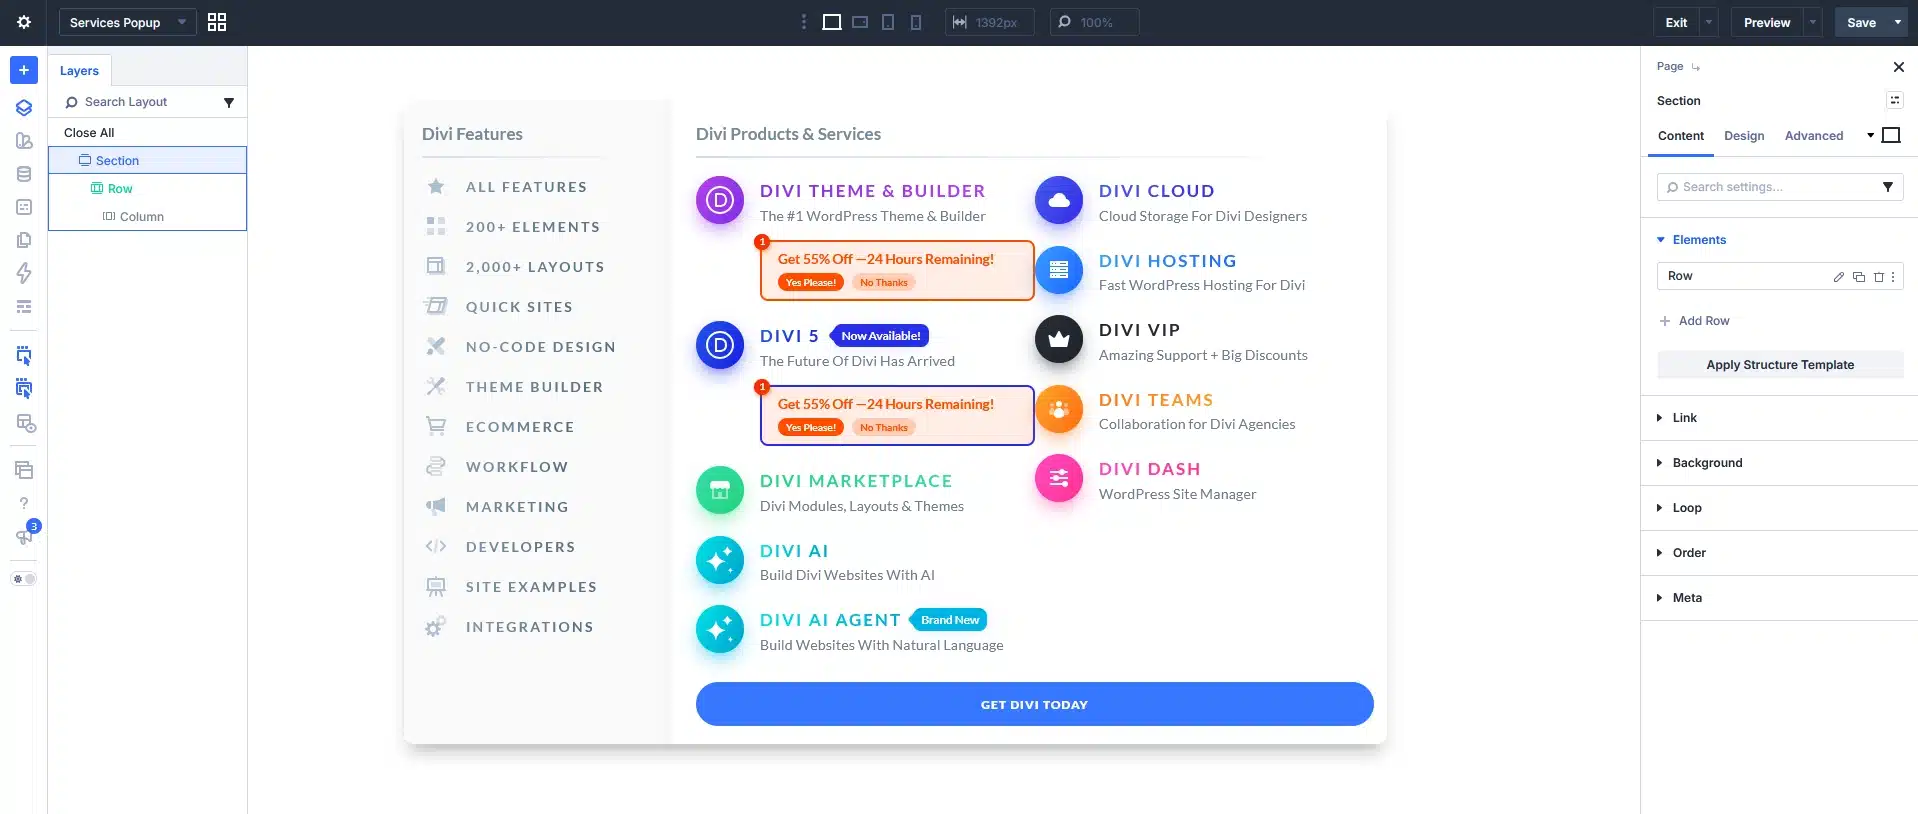
Now you can design the popup just like you design any other Divi layout.
Start by adding a Section.
You can give the section a dark background with some transparency to create an overlay effect.
For example:
Background: white
Opacity: 70%
Set:
Width: 100vw
Height: 100vh
This allows the overlay to cover the viewport when the popup opens.
4. Add Content to the Popup
Now add whatever content you want visitors to see.
For example, you could add:
Heading
Our Services
Close Icon
Add an Icon module that visitors can click to close the popup.
Content
You can add:
- Service information
- Images
- Text
- Buttons
- Contact information
- Links
For a services popup, you could also create multiple service cards using Blurb modules.
The Canvas is completely customizable, so you can create any popup layout you need.

5. Make the Popup Fixed
We want the popup to stay in place while the page behind it remains fixed.
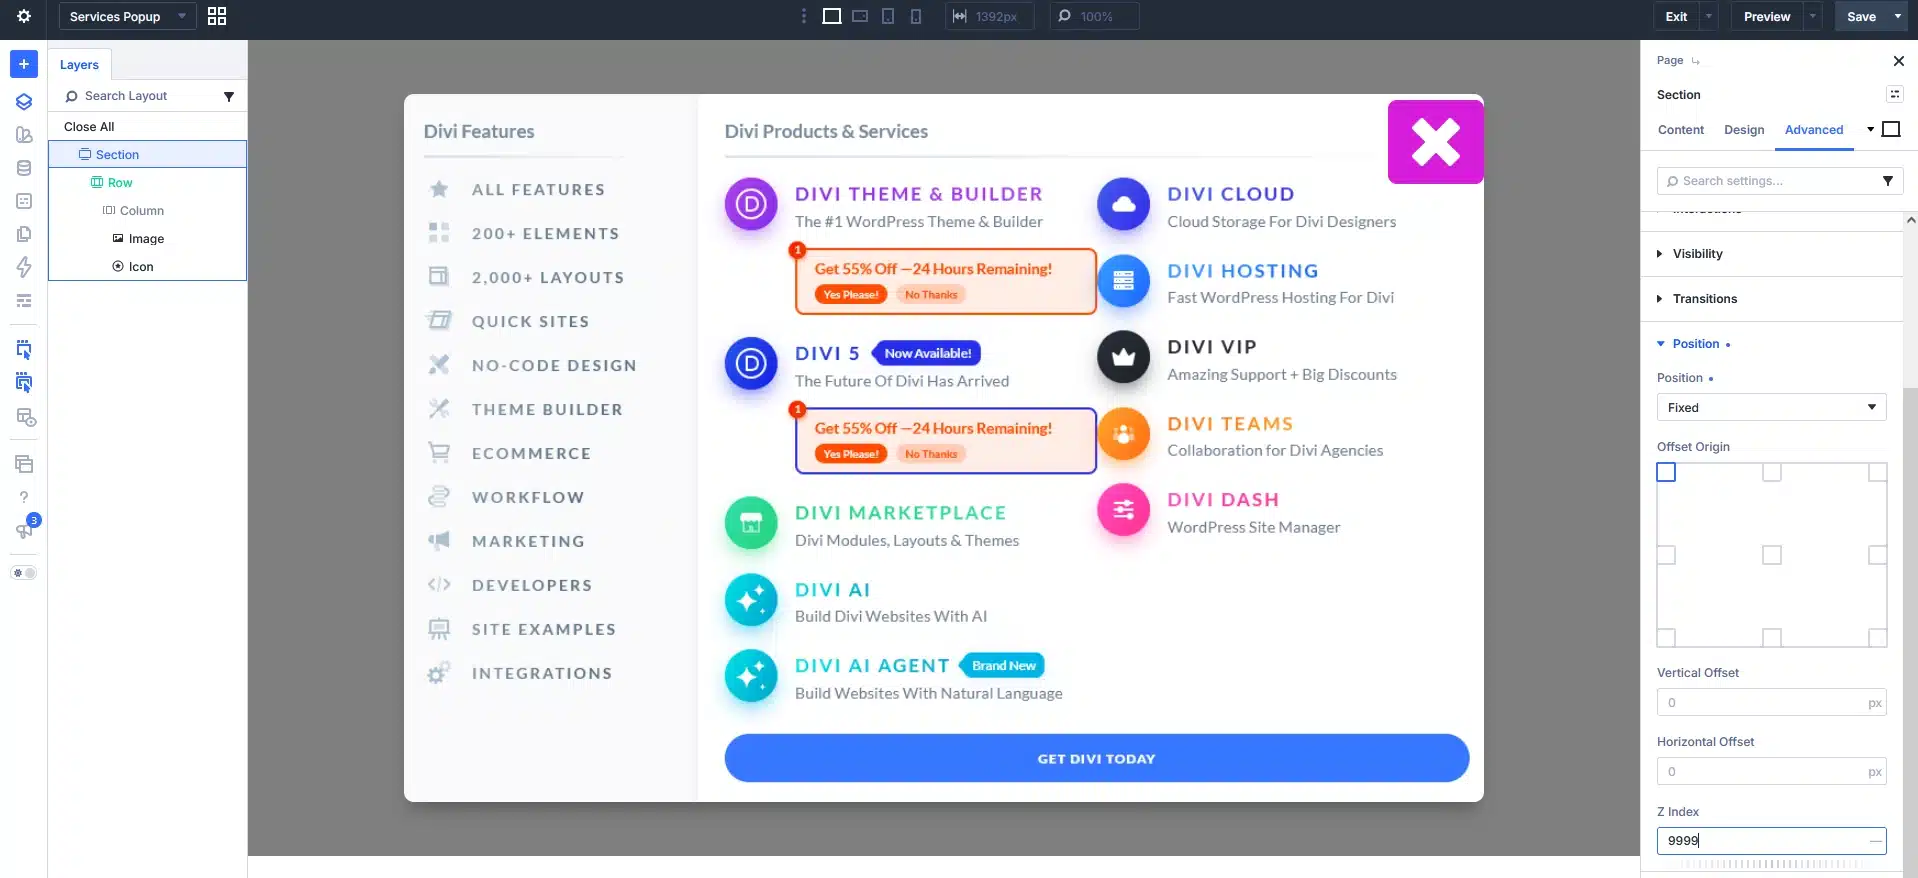
Select the popup Section.
Go to:
Advanced → Position
Set:
Position: Fixed
Then set a high Z Index, such as:
9999
This helps keep the popup above other page elements.
6. Make the Popup Scrollable on Mobile
If your popup contains a lot of content, it may not fit completely on a phone screen.
Select the Row containing your popup content.
Set:
Max Height: 80%
Then go to:
Advanced → Visibility → Vertical Overflow
Select: Scroll
Now the content inside the popup can scroll when it is taller than the available space.
This keeps the popup inside the viewport while still allowing visitors to access all of its content.
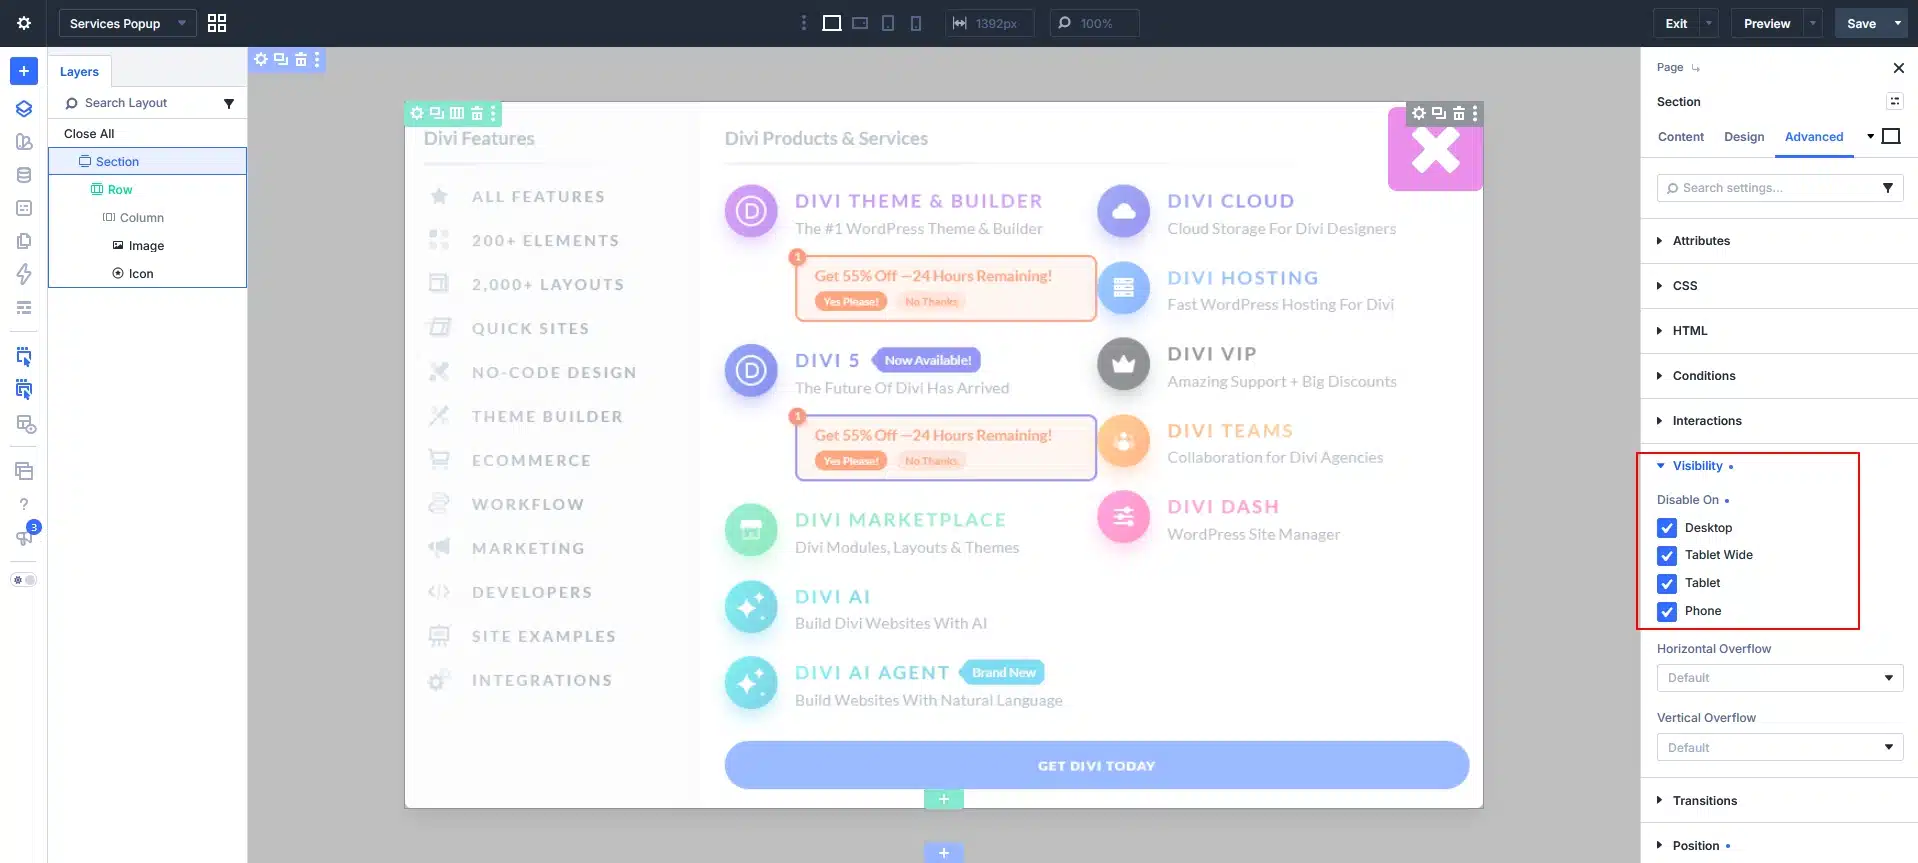
7. Hide the Popup by Default
The popup shouldn’t appear when visitors first load the page.
Select the popup Section.
Go to:
Advanced → Visibility
Disable the section on:
- Desktop
- Tablet
- Phone
This keeps the popup hidden until an interaction displays it.
8. Give the Popup an Admin Label
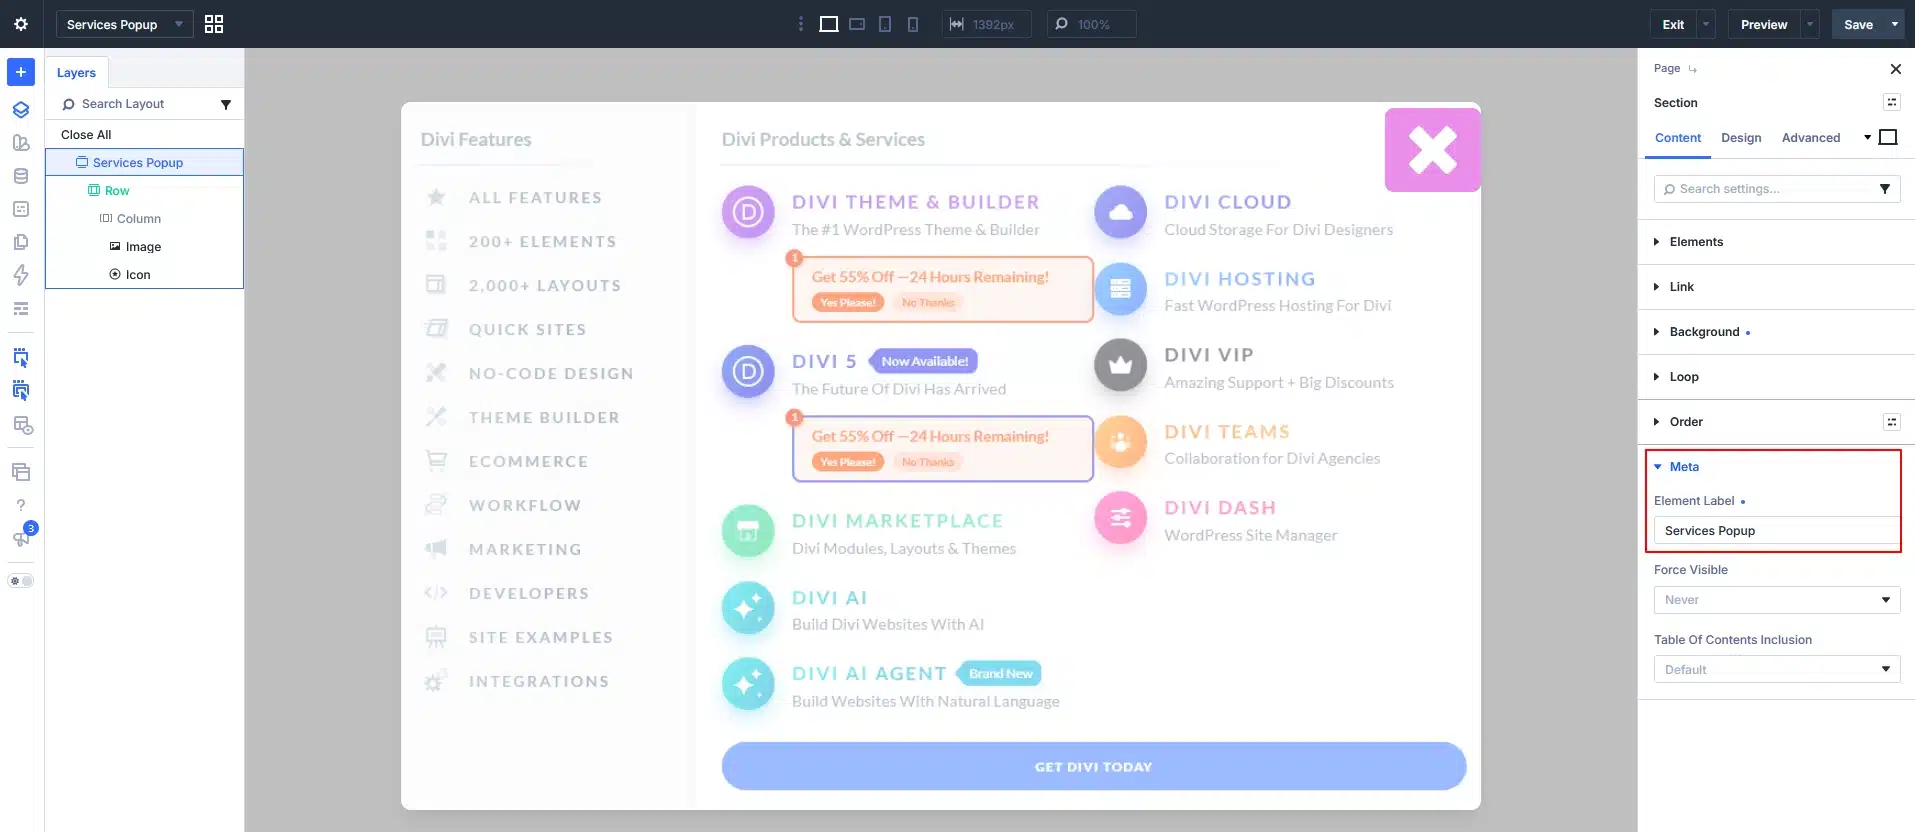
Before creating the interaction, give your popup section an easy-to-identify name.
Select the popup Section and go to:
Content → Admin Label
Enter: Services Popup
This makes it easier to find the popup when selecting the target for your interaction.
9. Connect the Button to the Popup
Now return to your main page using the Canvas dropdown.
Select the button you added in Step 1.
Go to: Advanced → Interactions
Click: Add Interaction
Set the options like this:
Trigger Event: Click
Effect Action: Show Element
Target: Services Popup
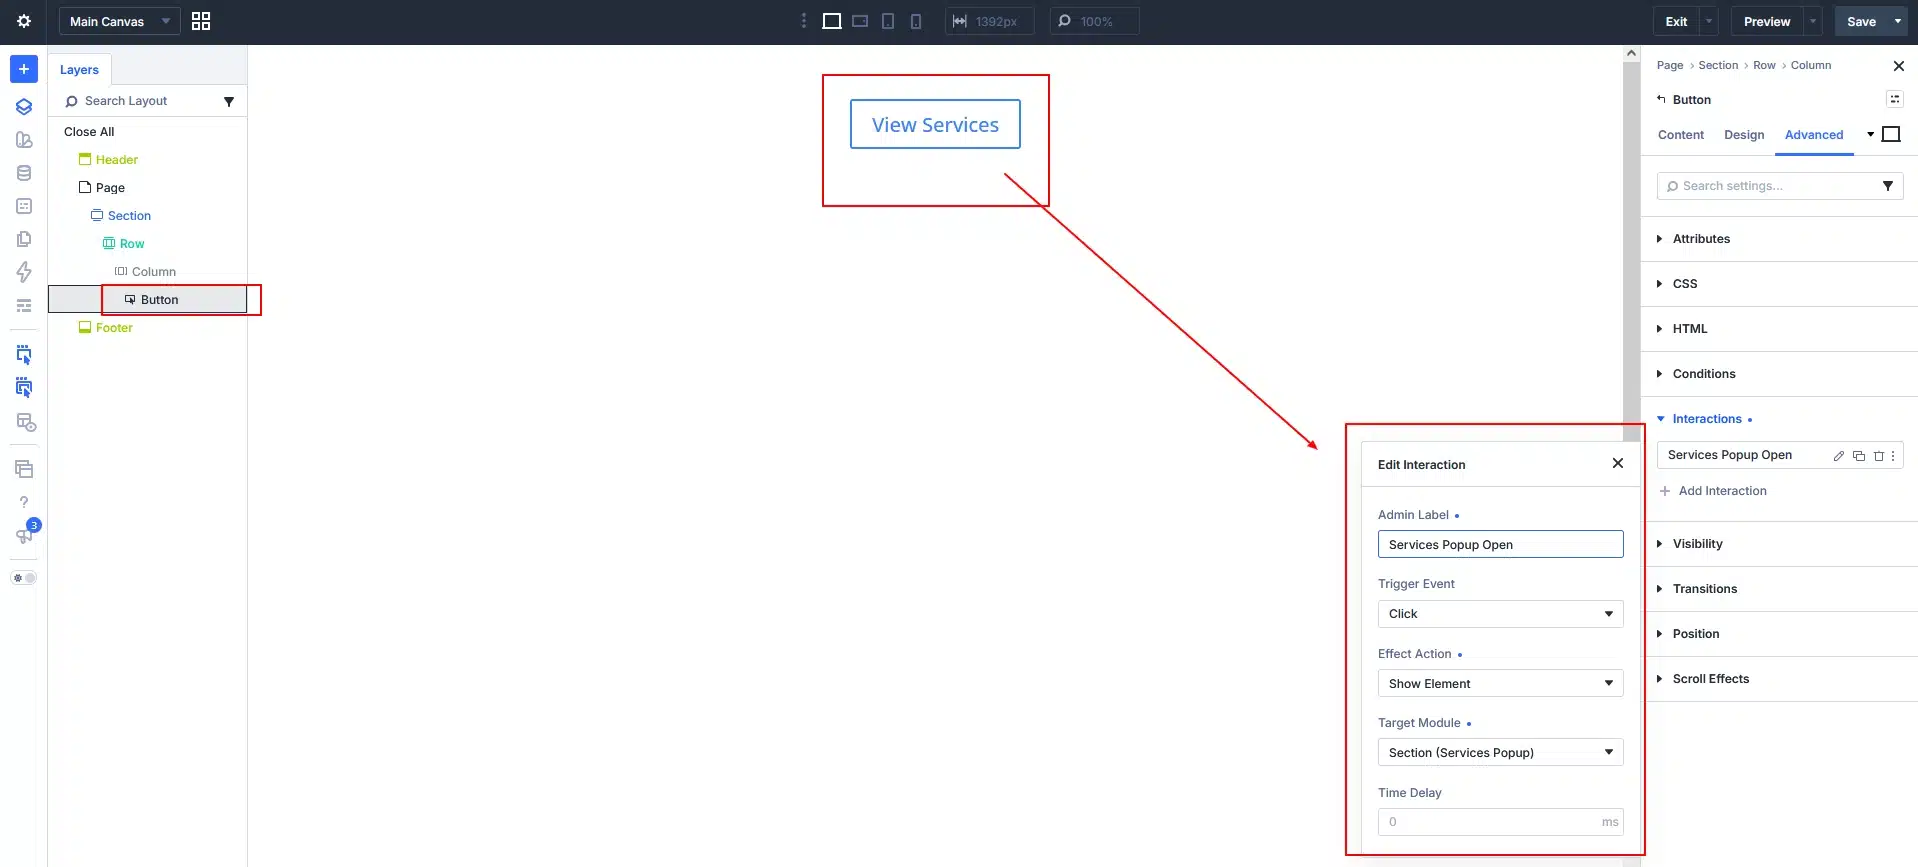
Save the interaction.
Now, when a visitor clicks your button, Divi will display the popup.
Divi’s interaction system connects the visitor’s action to an effect and a target element.
10. Add the Close Interaction
Now let’s make the close icon work.
Switch back to your Services Popup Canvas.
Select the close icon.
Go to: Advanced → Interactions → Add Interaction
Set:
Trigger Event: Click
Effect Action: Hide Element
Target: Services Popup
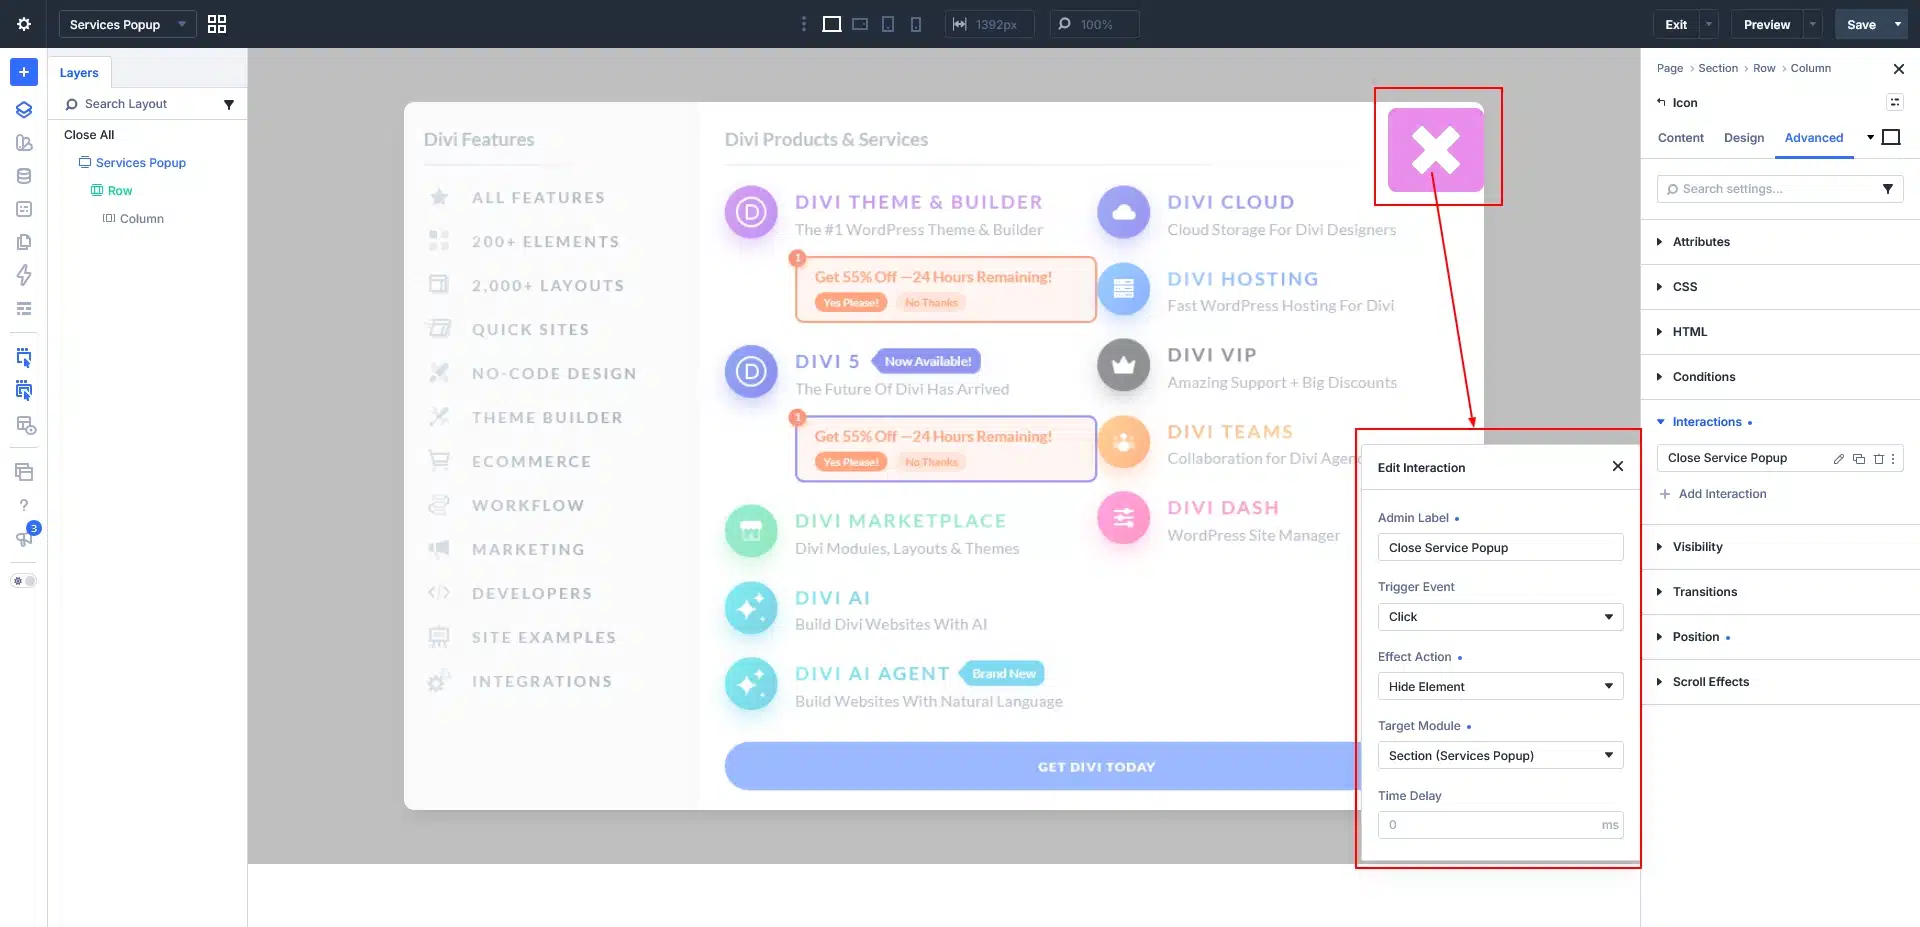
Save the interaction.
Now visitors can click the close icon to hide the popup.
11. Test Your Popup
Save your changes and open the page on the front end.
Click your button.
The off-canvas popup should appear over the page.
Then click the close icon to hide it.
Test on Desktop
Make sure:
- The popup opens when the button is clicked.
- It appears above the page content.
- It stays fixed while scrolling.
- The close icon works.
Test on Mobile
Make sure:
- The popup fits within the screen.
- Longer content can scroll.
- The close icon is easy to access.
Testing both desktop and mobile helps ensure the Canvas and interaction work properly across different screen sizes.
Final Result
Creating an off-canvas popup in Divi 5 is straightforward:
Add Button → Create Canvas → Design Popup → Set Fixed Position → Hide Popup → Add Open Interaction → Add Close Interaction
The button stays on your regular page, while the popup content lives separately inside the Divi 5 Canvas.
This approach can be used to create:
- Service popups
- Contact panels
- Information drawers
- Promotional panels
- Navigation menus
- Additional content sections
Once the basic setup is complete, you can customize the Canvas design and interaction behavior to create an off-canvas experience that fits your website.