Table of Contents
- Why Add Product Comparison to WooCommerce?
- What You Need
- Step 1: Install and Activate JetCompareWishlist
- Step 2: Add a Compare Button to Products
- Step 3: Add a Comparison Counter
- Step 4: Create a Comparison Page
- Step 5: Choose the Product Information to Display
- Step 6: Enable Comparison Actions
- Step 8: Add a Remove Product Option
- Step 9: Make the Comparison Table Responsive
- Step 10: Customize the Empty Comparison State
- Step 11: Test the WooCommerce Comparison Feature
- Conclusion
When an online store offers several similar products, customers often want to compare their features before deciding what to buy. A WooCommerce product comparison feature makes this process easier by allowing shoppers to select multiple products and view their details side by side.
With Crocoblock’s JetCompareWishlist plugin, you can add product comparison functionality to a WooCommerce store without building the entire system from scratch. Customers can add products to a comparison list, view the selected products in a comparison table, and identify important differences between them.
In this guide, we’ll walk through how to create a WooCommerce product comparison feature using Crocoblock.
Why Add Product Comparison to WooCommerce?
A comparison feature can make product selection much easier, particularly for stores selling products with similar specifications.
For example, an electronics store could allow customers to compare:
- Product prices
- Product images
- Product titles
- Specifications
- Features
- Ratings
- Other WooCommerce product information
Instead of opening several product pages in different browser tabs, shoppers can review the information in one place.
This can improve the shopping experience and help customers make purchasing decisions with more confidence.
What You Need
Before creating the comparison feature, make sure you have:
- A WordPress website
- WooCommerce installed and configured
- Elementor or another supported page builder
- Crocoblock’s JetCompareWishlist plugin
- WooCommerce products available for comparison
JetCompareWishlist provides three main widgets for this functionality: Compare Button, Compare Count Button, and Compare. Each widget has a different role in the comparison process.
Step 1: Install and Activate JetCompareWishlist
First, install the JetCompareWishlist plugin on your WordPress website.
After activation, open the Crocoblock or JetCompareWishlist settings and enable the product comparison functionality.
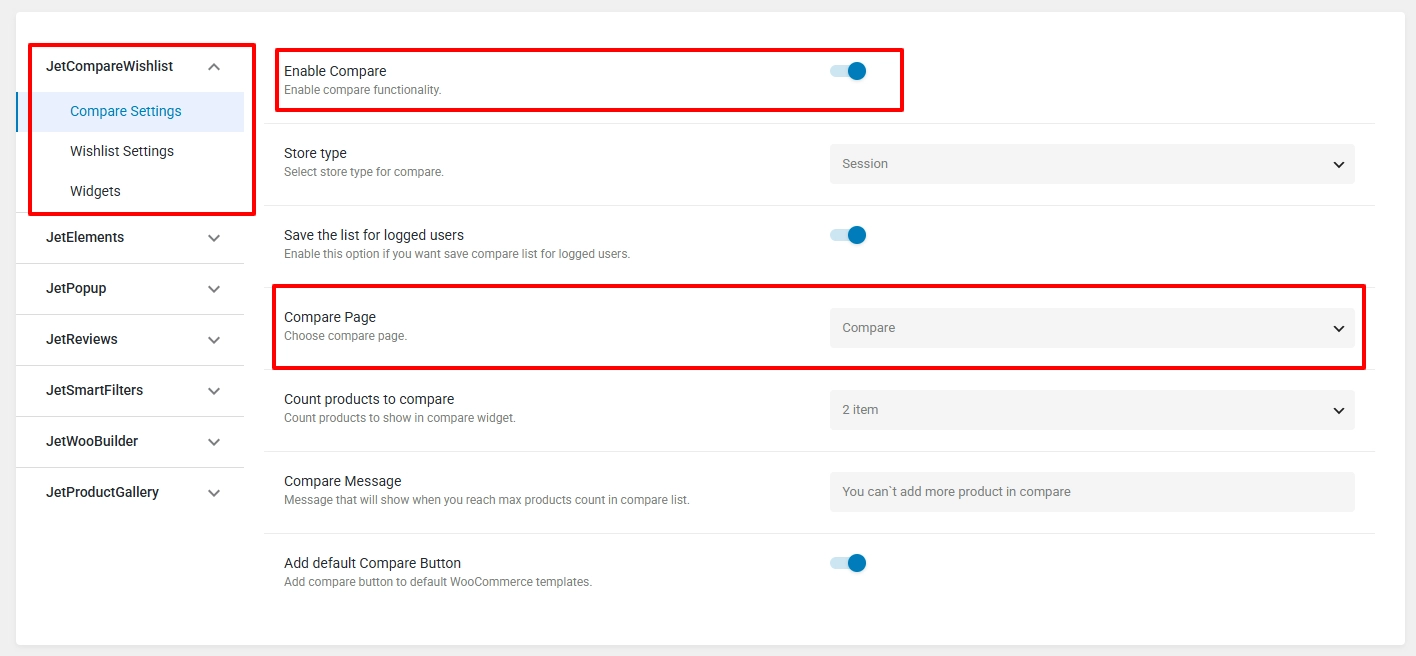
Once comparison is enabled, you can start configuring the interface that customers will use to select and compare products.
Step 2: Add a Compare Button to Products
The first part of the comparison system is giving customers a way to add products to their comparison list.
Open your WooCommerce product archive or single-product template in Elementor.
Add the Compare Button widget to the product layout.
This button can be placed inside:
- Product cards
- Shop/archive templates
- Single product layouts
- Custom product grids
The Compare Button allows shoppers to add a product to their comparison list. Its normal and added states can also display different labels or icons, making it clear whether a product has already been selected.
Customize the Compare Button
You can customize the button according to your store design.
For example, you can configure:
- Button icon
- Button label
- Icon position
- Normal-state appearance
- Added-state appearance
- Remove-button behavior
The added state can also be configured so that customers can click the same button to remove a product from the comparison list.
This creates a simple interaction:
Add to Compare → Product Added → Remove from Compare
Step 3: Add a Comparison Counter
After giving customers a way to select products, it is useful to show how many products they have added.
For this, add the Compare Count Button widget to your website.
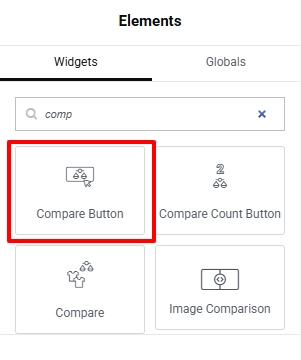
You can place it in a convenient location such as:
- Header
- Footer
- Main navigation
- Shop page
- Product archive
The widget displays the number of products currently selected for comparison and can link customers to the comparison page.
Configure the Counter
The Compare Count Button provides options for customizing:
- Button label
- Icon
- Icon position
- Product count
- Counter format
- Counter position
- Empty-state visibility
You can also enable Hide Empty so the counter doesn’t display when there are no products in the comparison list.
For example, your header could display:
Compare (3)
This immediately tells customers that three products are ready to compare.
Step 4: Create a Comparison Page
Now you need a dedicated page where customers can see the products they selected.
Create a new WordPress page, such as:
Product Comparison
Open the page with Elementor and add the Compare widget.
This widget generates the comparison table containing the selected WooCommerce products.
Make sure the page is easy to access from your Compare Count Button.
Step 5: Choose the Product Information to Display
One of the most important parts of a comparison table is deciding what information customers should see.
The Compare widget lets you configure the WooCommerce product data displayed in the table.
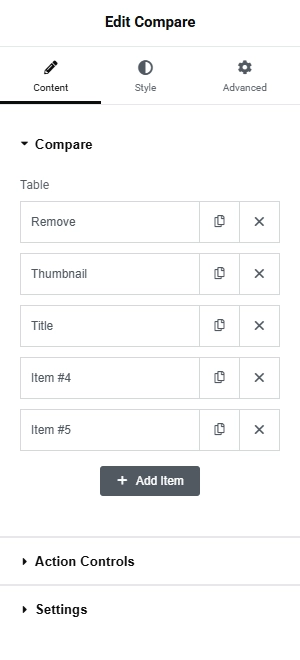
You can add or modify comparison items and define the information that should appear for each product.
Depending on your store, you might include:
- Product title
- Product image
- Price
- Description
- SKU
- Categories
- Attributes
- Stock information
- Product rating
- Other relevant product data
Avoid adding unnecessary information. A comparison table works best when it highlights the details that actually influence the customer’s buying decision.
Step 6: Enable Comparison Actions
A useful comparison table should give shoppers control over what they are viewing.
JetCompareWishlist provides several comparison actions, including:
- Clear Table
- Highlight Differences
- Differences Visibility
These options can help customers remove selected products or focus specifically on information that differs between products.
For stores with many product specifications, highlighting differences can be particularly useful because customers don’t have to manually scan every row.
Step 8: Add a Remove Product Option
Customers may change their minds after adding products to the comparison list.
You can include a remove button in the comparison table so individual products can be removed without starting the comparison process again.
The Compare widget supports a Remove Button data type, allowing you to customize its label and icon.
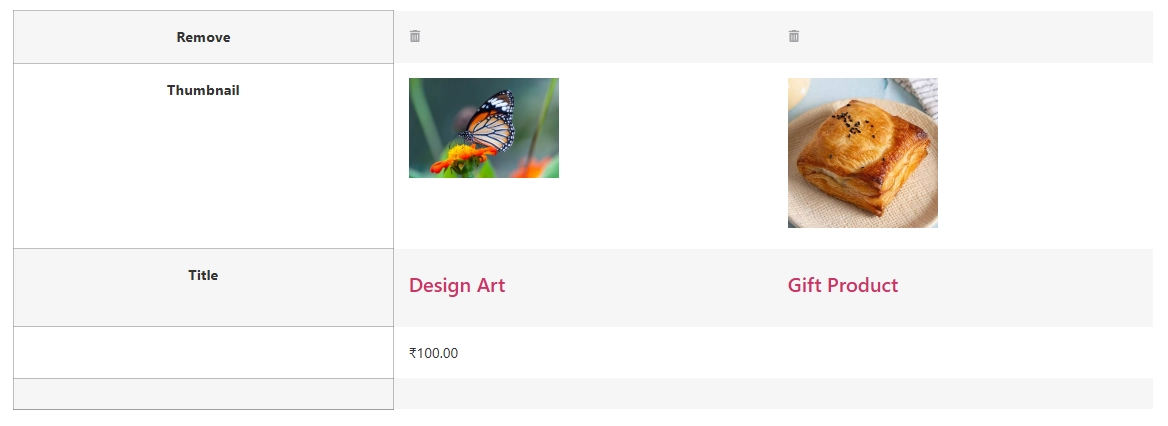
This makes it easier for shoppers to narrow the comparison down to their final choices.
Step 9: Make the Comparison Table Responsive
Comparison tables can become difficult to use on smaller screens because multiple products may require a lot of horizontal space.
JetCompareWishlist provides a Scrolled Table option that allows the comparison table to scroll horizontally. You can also specify which devices should use horizontal scrolling, including mobile, tablet, or desktop.
For mobile devices, horizontal scrolling is often a practical solution because it prevents the table from becoming too compressed.
Before publishing, test the comparison page on:
- Desktop
- Tablet
- Mobile
Make sure product information remains readable and comparison controls are easy to use.
Step 10: Customize the Empty Comparison State
You should also consider what customers see before they add any products.
The Compare widget includes an Empty Compare Text option that lets you provide a message when the comparison list doesn’t contain any products.
Instead of leaving an empty page, you could display a helpful message such as:
“You haven’t added any products to compare yet. Browse our products and select the items you’d like to compare.”
This gives shoppers a clear next step.
Step 11: Test the WooCommerce Comparison Feature
Before making the feature available to customers, test the complete process.
Open your WooCommerce shop and check the following:
- Add a product to the comparison list.
- Confirm that the compare button changes to its added state.
- Add another product.
- Check that the comparison counter updates.
- Open the comparison page.
- Verify that the selected products appear correctly.
- Check the displayed product information.
- Test the highlight differences functionality.
- Remove an individual product.
- Clear the comparison table.
- Test the comparison page on mobile and tablet.
If everything works correctly, your WooCommerce store is ready to provide customers with a side-by-side product comparison experience.
Conclusion
Adding product comparison functionality can make WooCommerce stores easier to navigate, especially when customers need to choose between similar products.
With Crocoblock’s JetCompareWishlist plugin, you can create this functionality using dedicated comparison widgets instead of developing a custom comparison system. The Compare Button lets customers select products, the Compare Count Button keeps track of their selections, and the Compare widget displays the selected products in a customizable comparison table.
By combining these widgets with clear product information, comparison actions, and a responsive layout, you can create a convenient shopping experience that helps customers evaluate products and make better purchasing decisions.