Table of Contents
Connecting content types is essential when building dynamic WordPress websites—whether you’re creating a directory, real estate portal, course platform, portfolio site, or any advanced content system. With Crocoblock’s JetEngine, you can easily create relationships between two Custom Post Types (CPTs) and display related data anywhere on your site.
In this guide, you’ll learn exactly how to create CPT relationships, assign related items, and display them using Elementor, Gutenberg, or JetEngine listings.
What Are Relationships in JetEngine?
A relationship defines how two different post types connect to each other. JetEngine supports:
1. One-to-One
Each item from the first CPT relates to exactly one item from the second CPT.
2. One-to-Many
One post can connect to multiple items from another CPT.
3. Many-to-Many
Both CPTs allow multiple connections—useful for complex relational data.
Example:
- Projects ↔ Team Members
- Courses ↔ Instructors
- Agents ↔ Properties
- Books ↔ Authors
JetEngine makes it easy to build these relations visually, without writing any code.
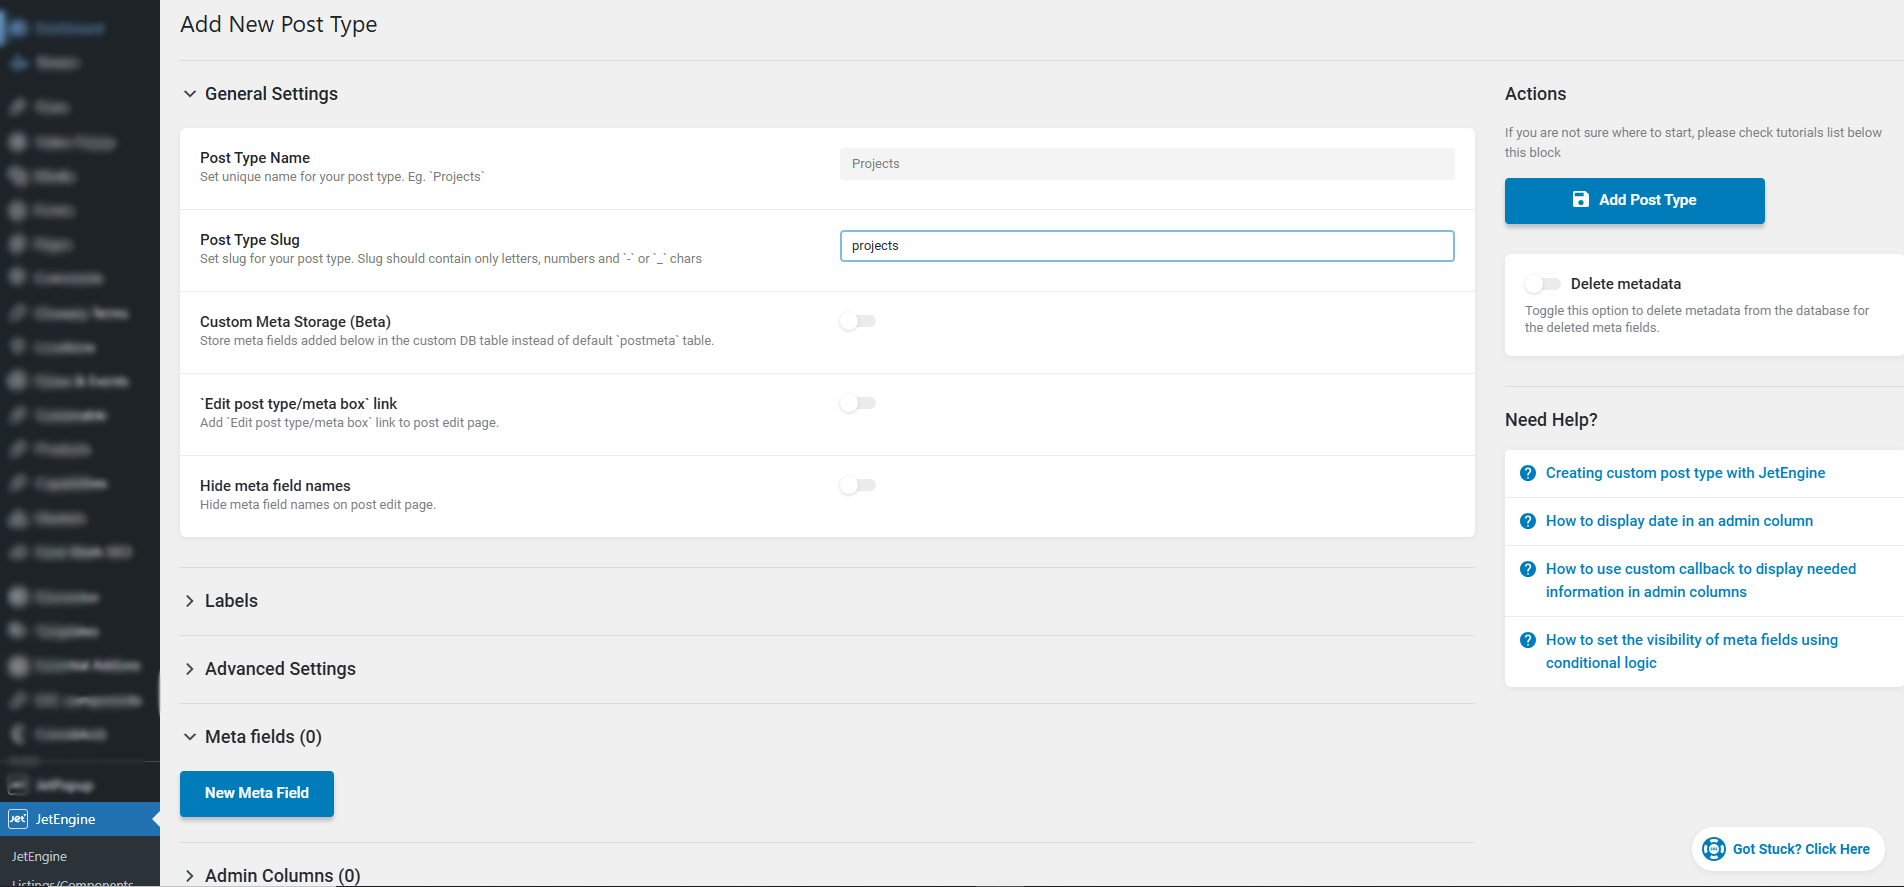
Step 1 — Create the Custom Post Types
You need two post types:
- Go to JetEngine → Post Types → Add New
- Enter:
- Post Type Name: Projects
- Slug: projects
- Click Add Post Type
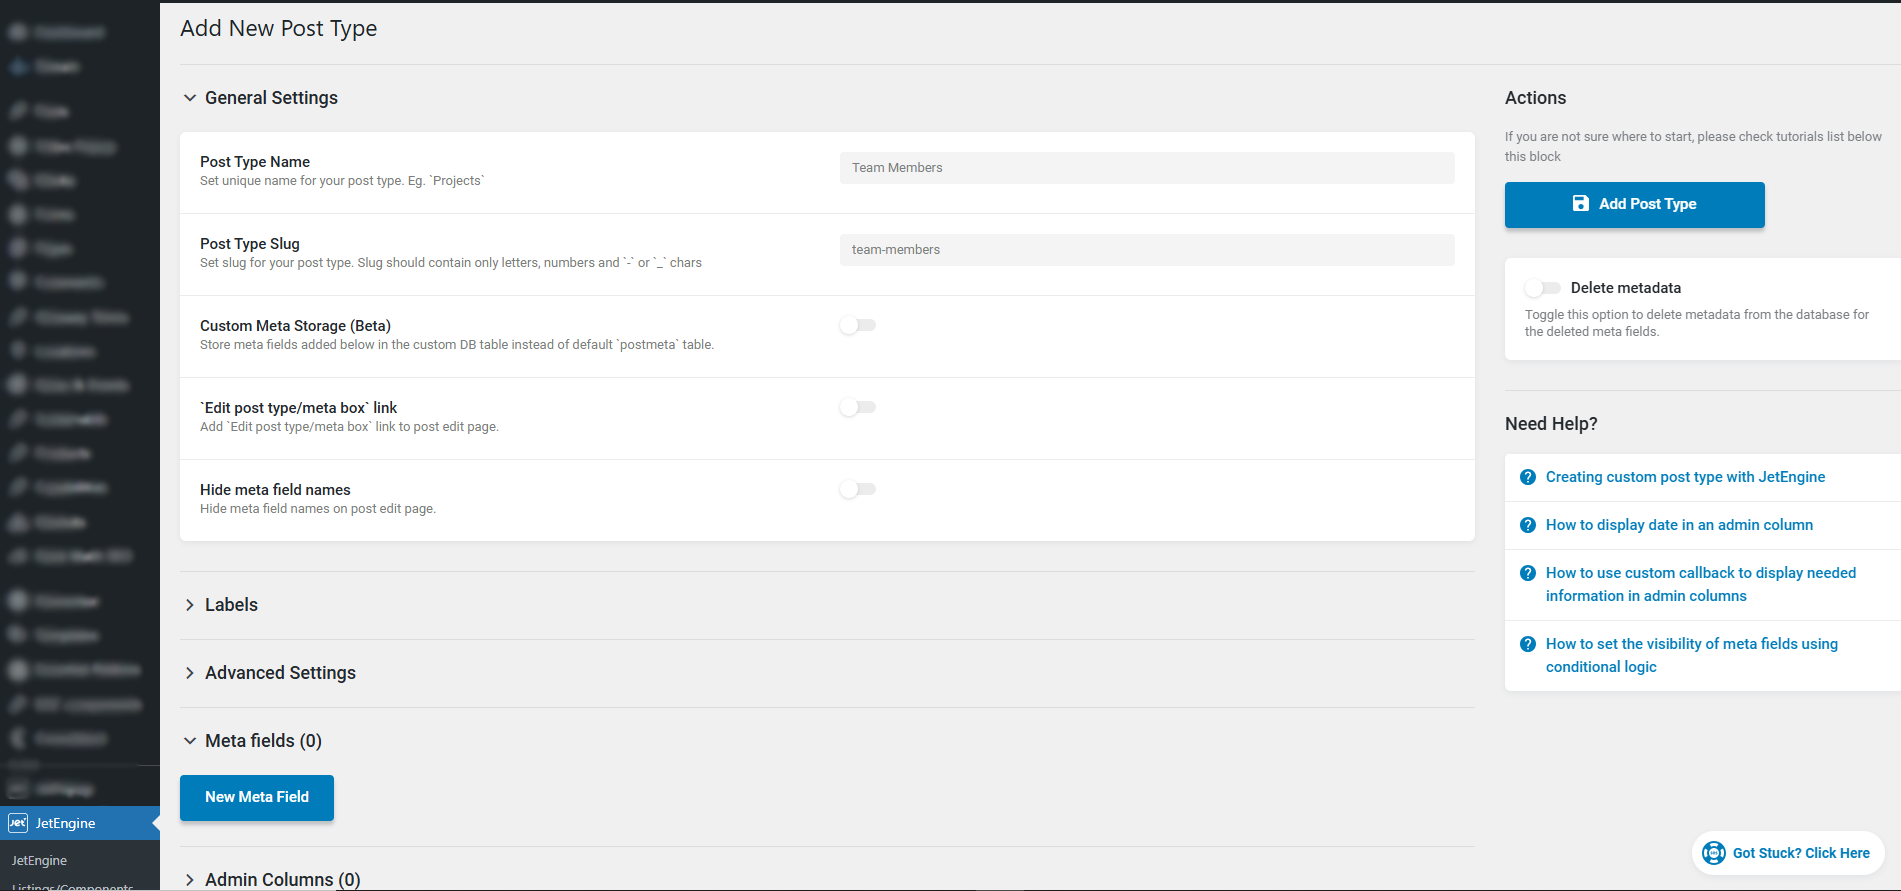
- Repeat the same steps to create:
- Post Type Name: Team Members
- Slug: team-members
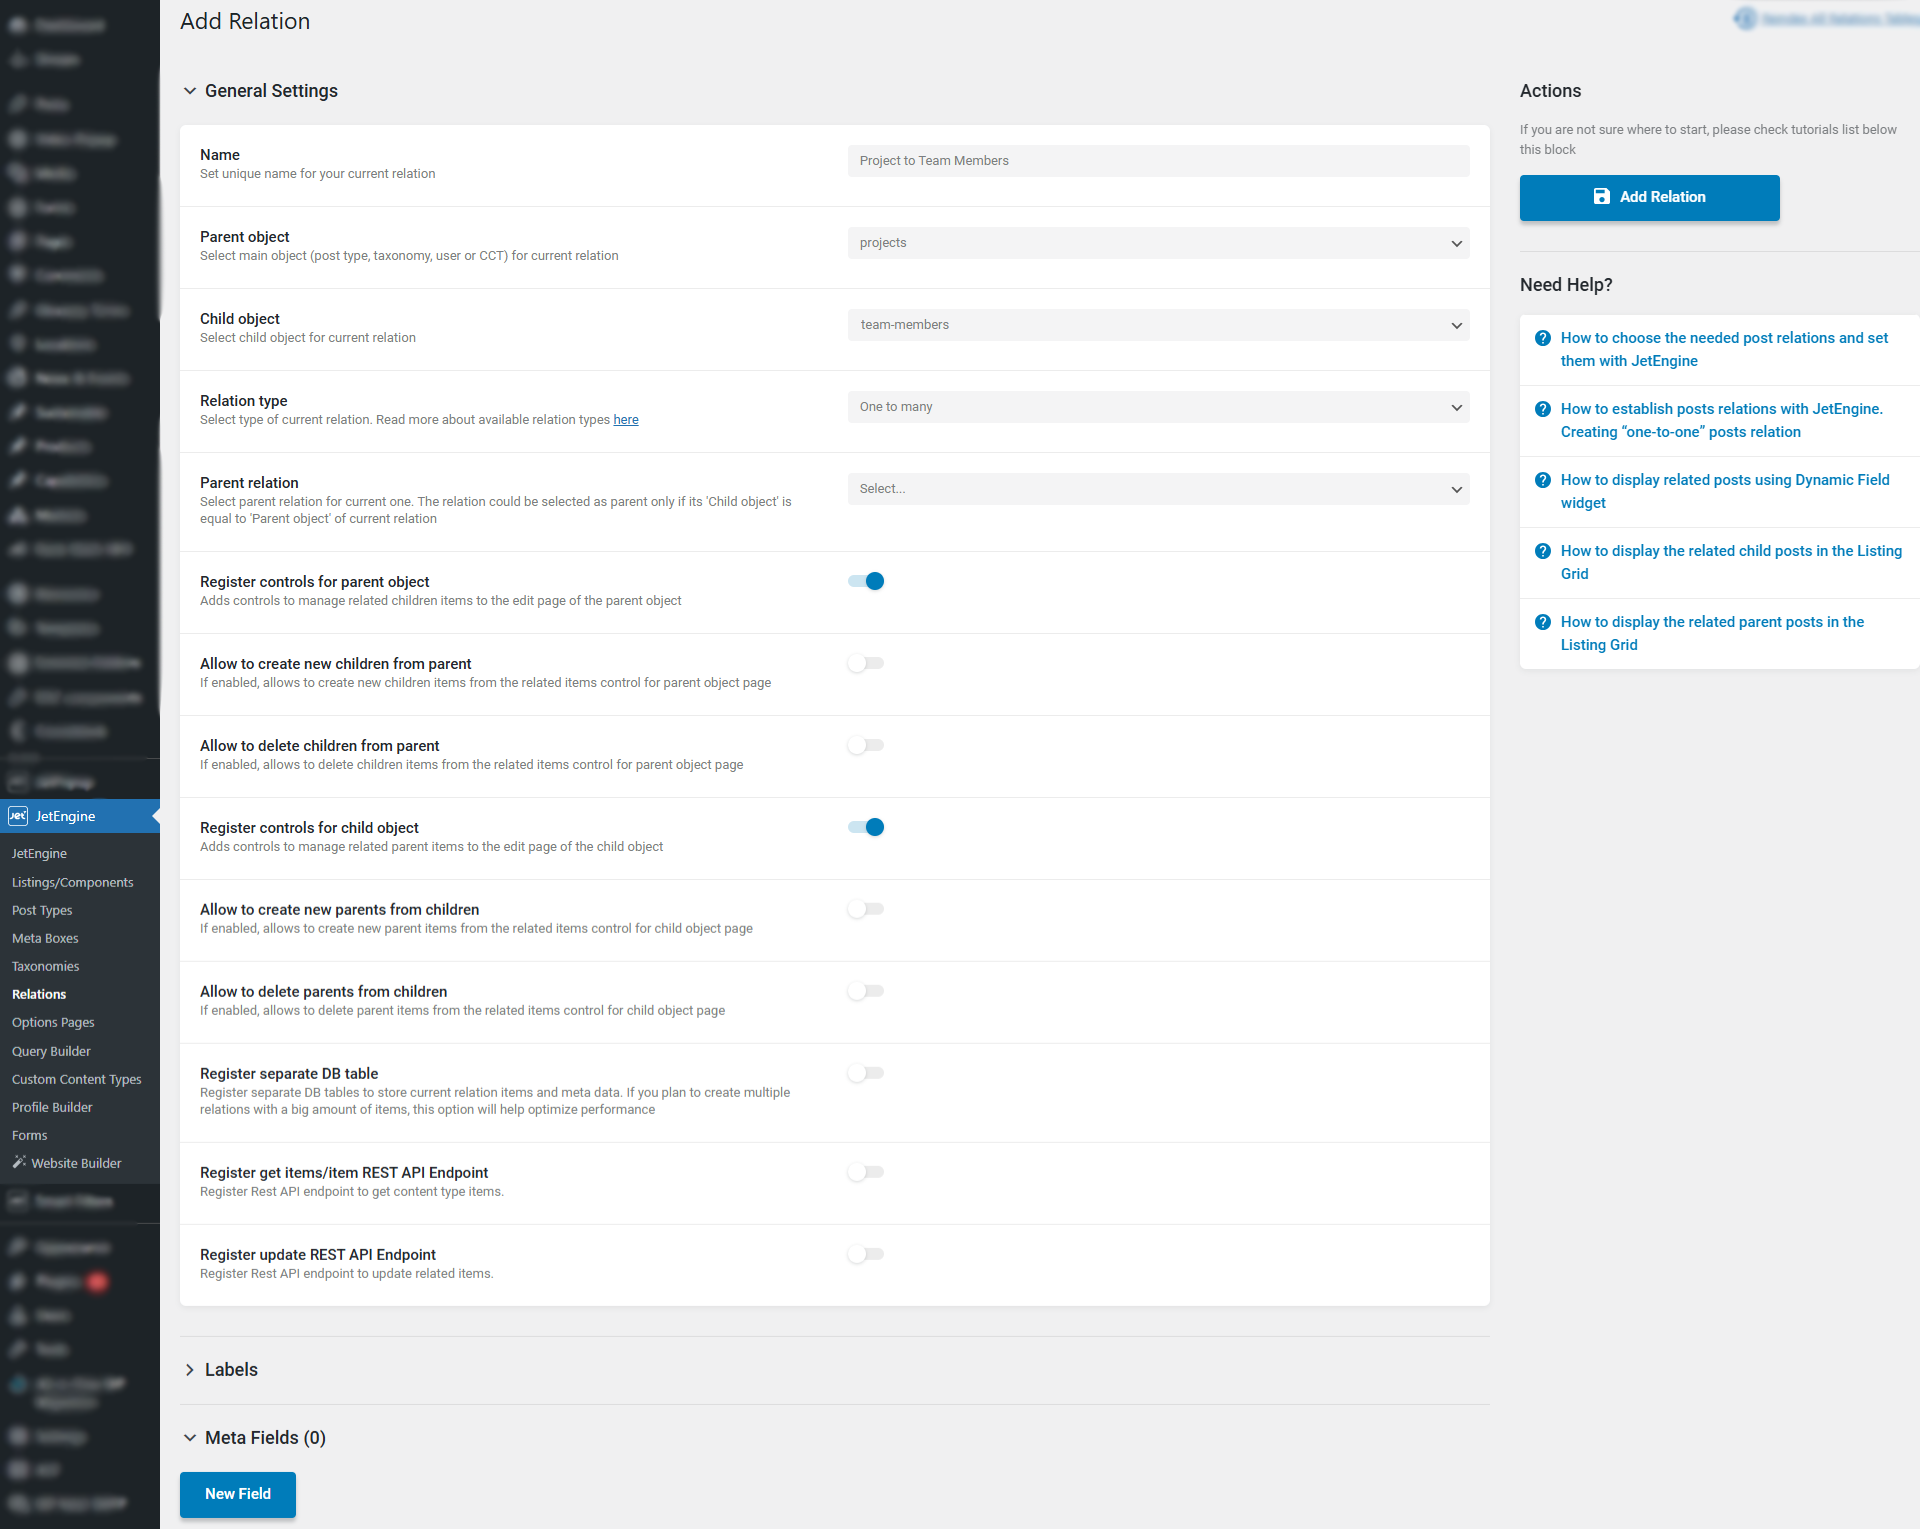
Step 2 — Create the Relationship
Now you will link Projects → Team Members.
Steps:
- Go to JetEngine → Relations → Add New
- Enter a Relationship Name:
Project to Team Members - Choose:
- Parent: Projects
- Child: Team Members
- Under Relationship Type, choose:
One-to-Many (One project has many team members) - Leave other options as default
- Click Add Relation
Step 3 — Add Team Members and Projects
Now you will add some content.
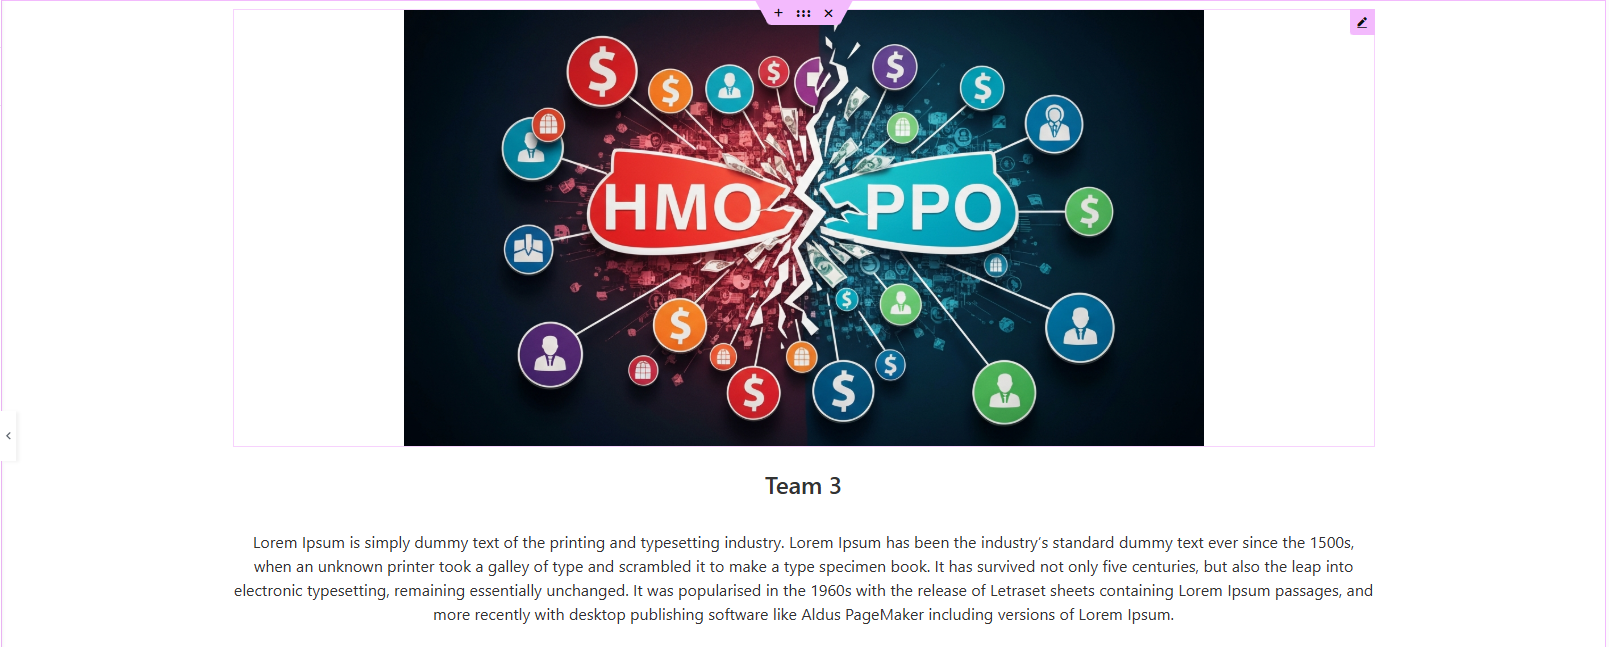
Add Team Members:
- Go to Team Members → Add New
- Add Name, Photo, Role, Description
- Click Publish
Add Projects:
- Go to Projects → Add New
- Add Project Title, Description, and Featured Image
- Scroll down to the Related Team Members box
- Select the team members who worked on the project
- Click Publish
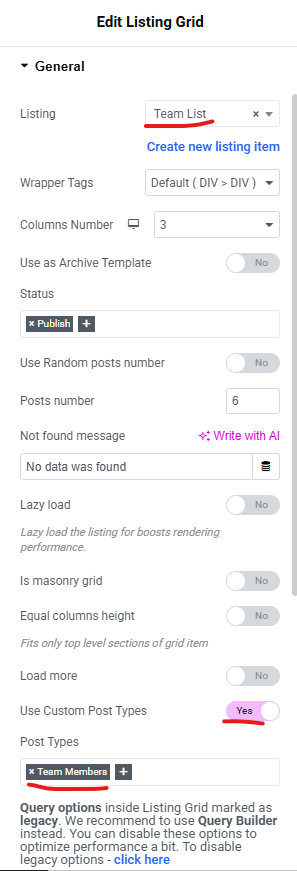
Step 4 — Create the Team Members Card (Listing Template)
This is the design for each team member shown on the project page.
Steps:
- Go to JetEngine → Listings → Add New
- Choose:
- Listing Source: Posts
- Post Type: Team Members
- Design the card:
- Add Team Member Photo
- Add Name
- Add Role
- Add Description or Link
- Click Publish
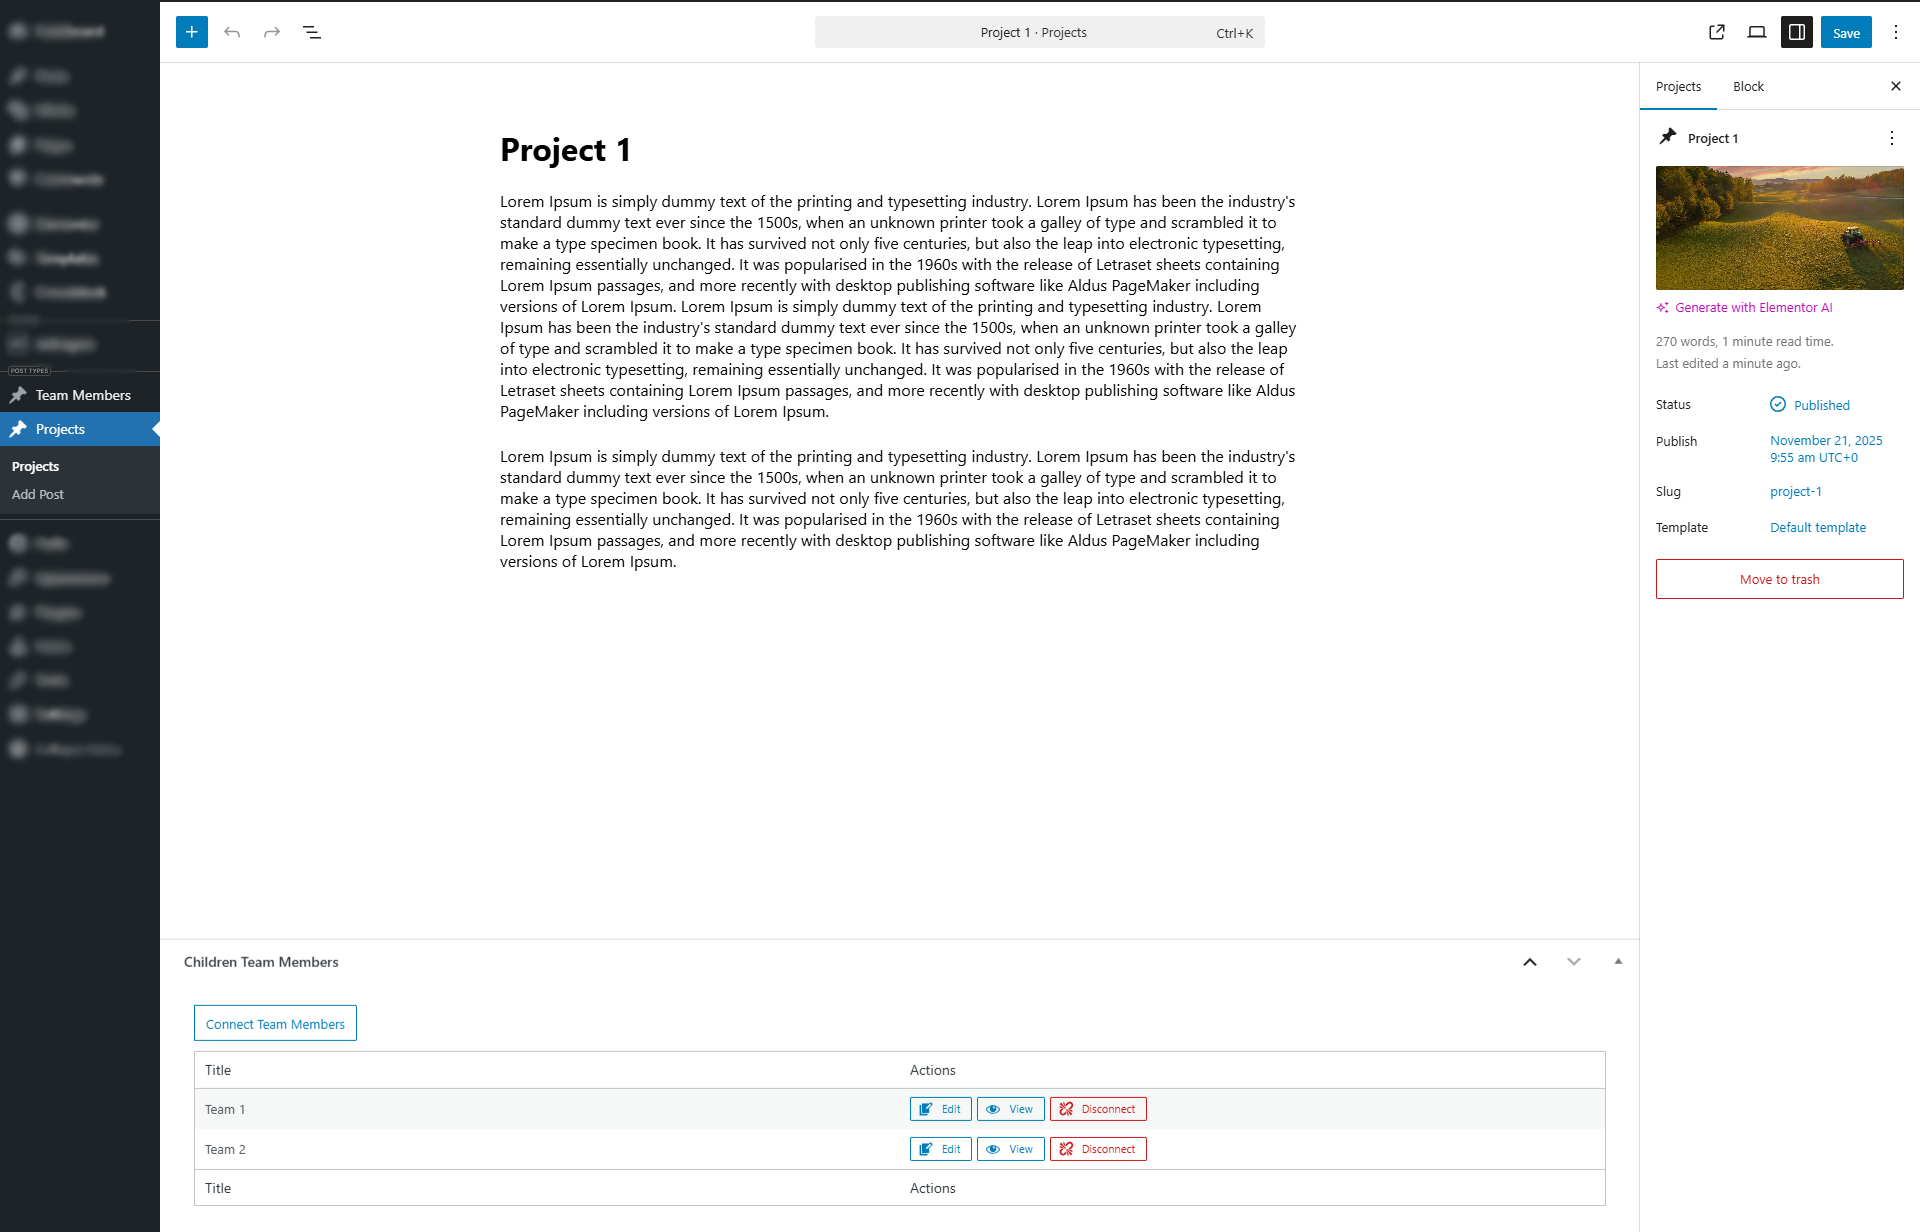
Step 5 — Display Related Team Members on the Project Page
You will now show the connected Team Members on each single Project page.
Steps (Elementor):
- Go to Templates → Theme Builder → Single Project
- Edit with Elementor
- Drag Listing Grid widget onto the page
- Settings:
- Listing: Add listing which you created
- Use Custom post types: Team Members
- Post Query: select Posts & Author Parameters and use Marcos
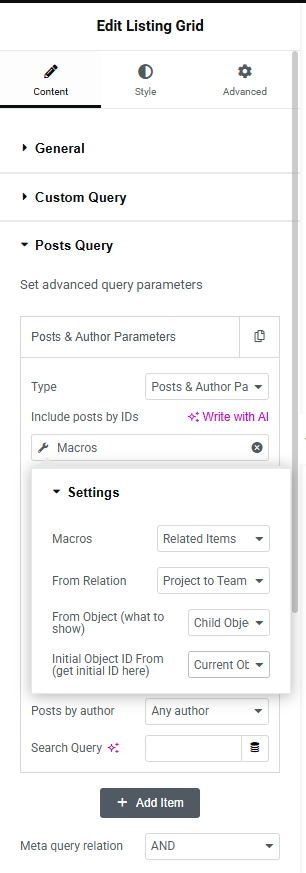
- Save the template
- View any Project — you will now see the Team Members listed beautifully.
Conclusion
Setting up relationships between custom post types with Crocoblock helps you build smarter, more dynamic WordPress websites. If you’re planning a new site or want expert development for advanced CPT features, Book a Free Consultation.