Table of Contents
- Why Build Popups Without Plugins?
- Step-by-Step Guide to Creating a Popup in Divi
- Step 1: Create and Configure the Popup Section
- Step 2: Configure Two Rows Inside the Popup Section
- Step 3: Hide the Popup on Page Load
- Step 4: Add jQuery to Enable Popup Actions
- Step 5: Add Popup Trigger Button
- Test Now Popup Is Ready!
- Final Thoughts
Popups are a great way to display offers, lead forms, promotions, or important messages. Most Divi users rely on third-party popup plugins, but the truth is—you can build a fully custom popup in Divi using only the Theme Builder, CSS, and a tiny line of jQuery.
The best part?
- No extra plugins
- Lightweight and fast
- 100% design freedom
- Works with any Divi page
This tutorial will walk you through creating a fully functional popup in Divi step-by-step.
Why Build Popups Without Plugins?
Using Divi alone gives you some big advantages:
- Better page speed (no extra plugin loading)
- Full control of styling with the Divi Visual Builder
- No plugin conflicts
- Reusable popup design for multiple pages
- Works for WooCommerce, landing pages, and blog posts
Step-by-Step Guide to Creating a Popup in Divi
Follow these steps to build your custom popup from scratch:
Step 1: Create and Configure the Popup Section
- Open the page in Divi and enable the Visual Builder.
- Add a new Section where your popup will appear and design it with your content (text, image, form, button, blurb, etc.).
- Add Two rows Inside Section
Apply the following settings to the section:
- Section Class : popup-modal
- Section Background : transparent
- Position (Advanced → Position) :
- Position = Fixed
- Z-Index = 9999
This section now acts as your main popup container and stays above all page content.

Step 2: Configure Two Rows Inside the Popup Section
Inside the popup section, create:
- Row 1 → Popup Content
- Row 2 → Overlay Background
Configure Row 1 (Popup Content)
Add your content modules such as:
- Text or heading
- Image
- Button
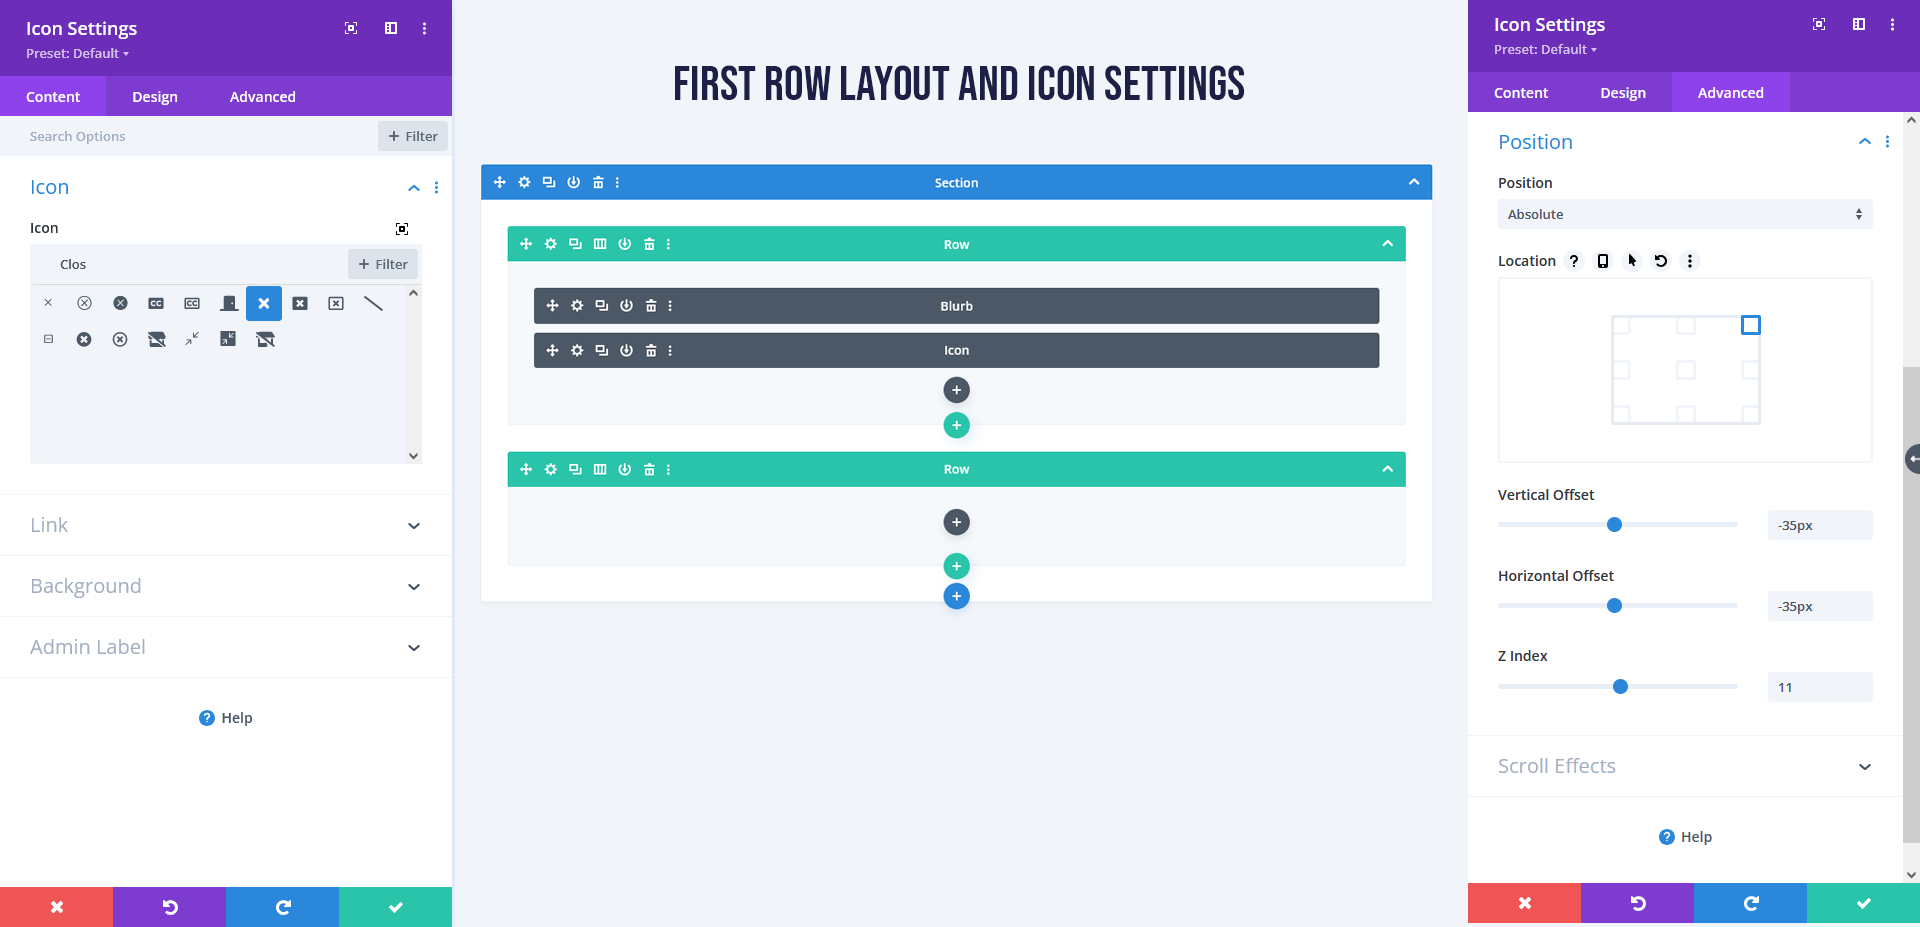
Now add a close icon ( Divi Icon):
Set Icon Settings:
- Icon Class : popup-trigger
- Position (Advanced → Position) :
- Position = Absolute
- Z-Index = 11
- Vertical/Horizontal Offset = 0px ( Set as per your need )
This positions the close icon on top of the popup.
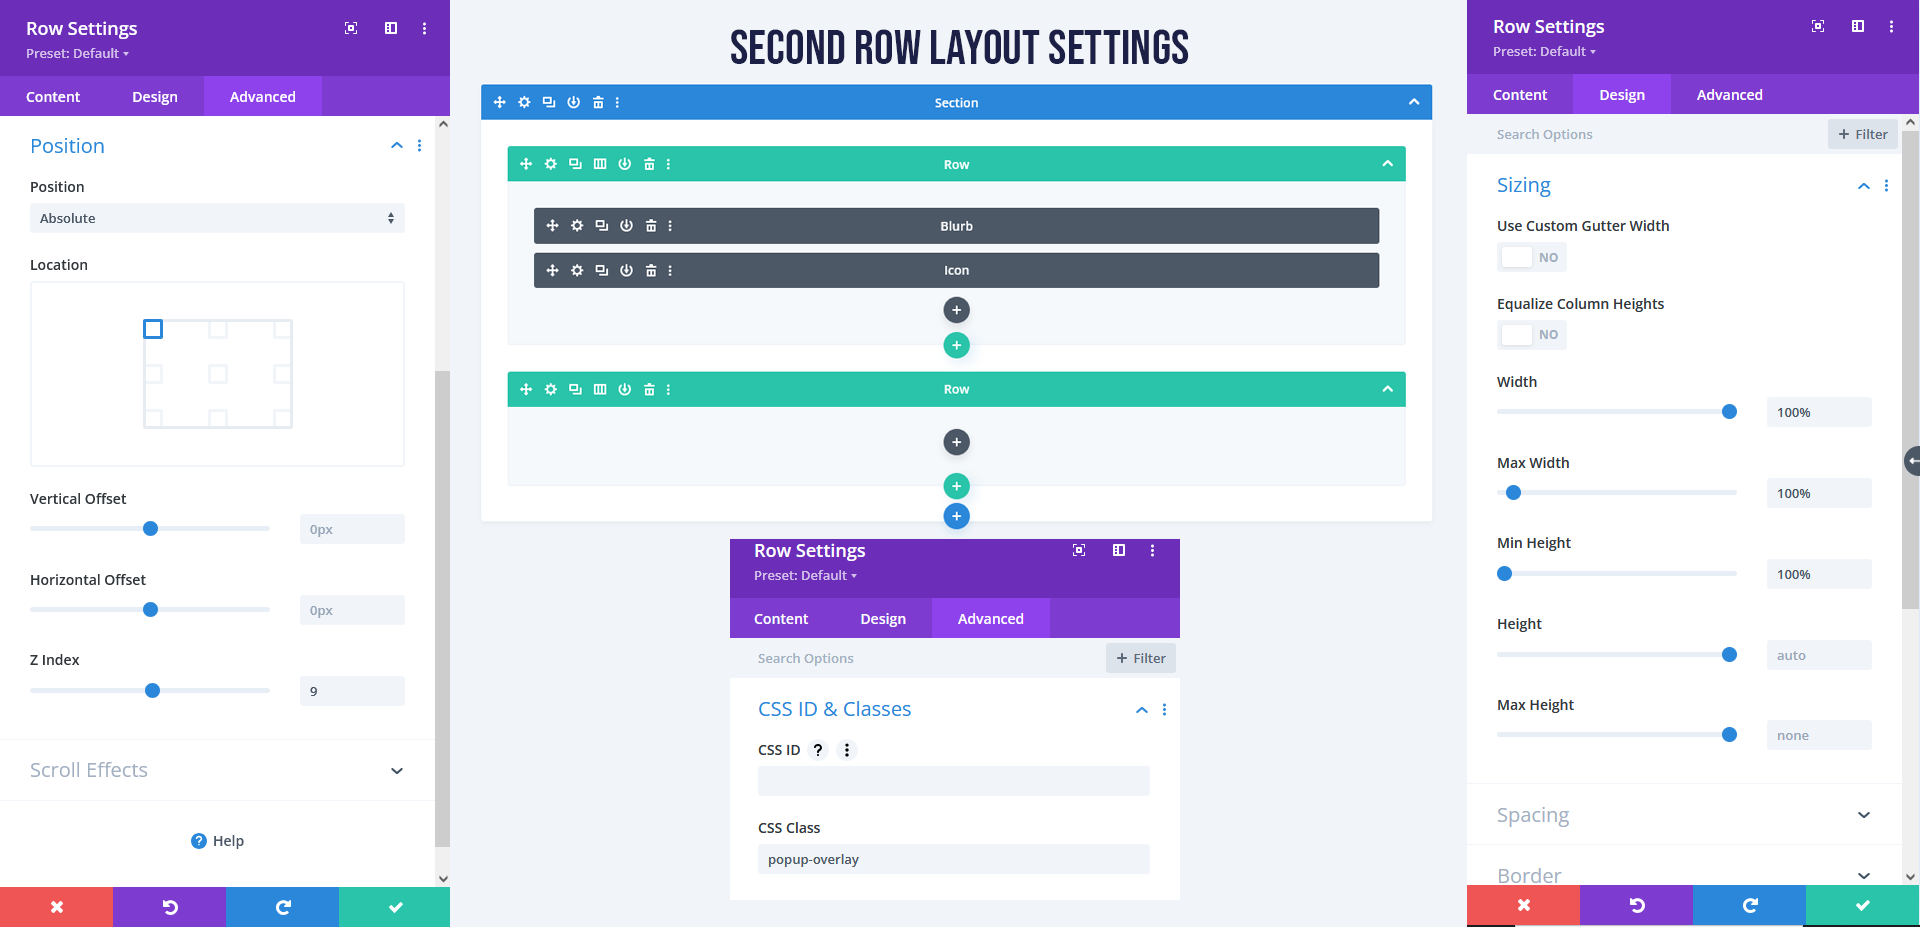
Configure Row 2 (Overlay Background)
This will act as the background overlay to fade out the rest of the page.
Go to Row Settings and add:
- Row Class : popup-overlay
- Position (Advanced → Position) :
- Position = Absolute
- Z-Index = 9
- Width = 100%
- Height = 100%
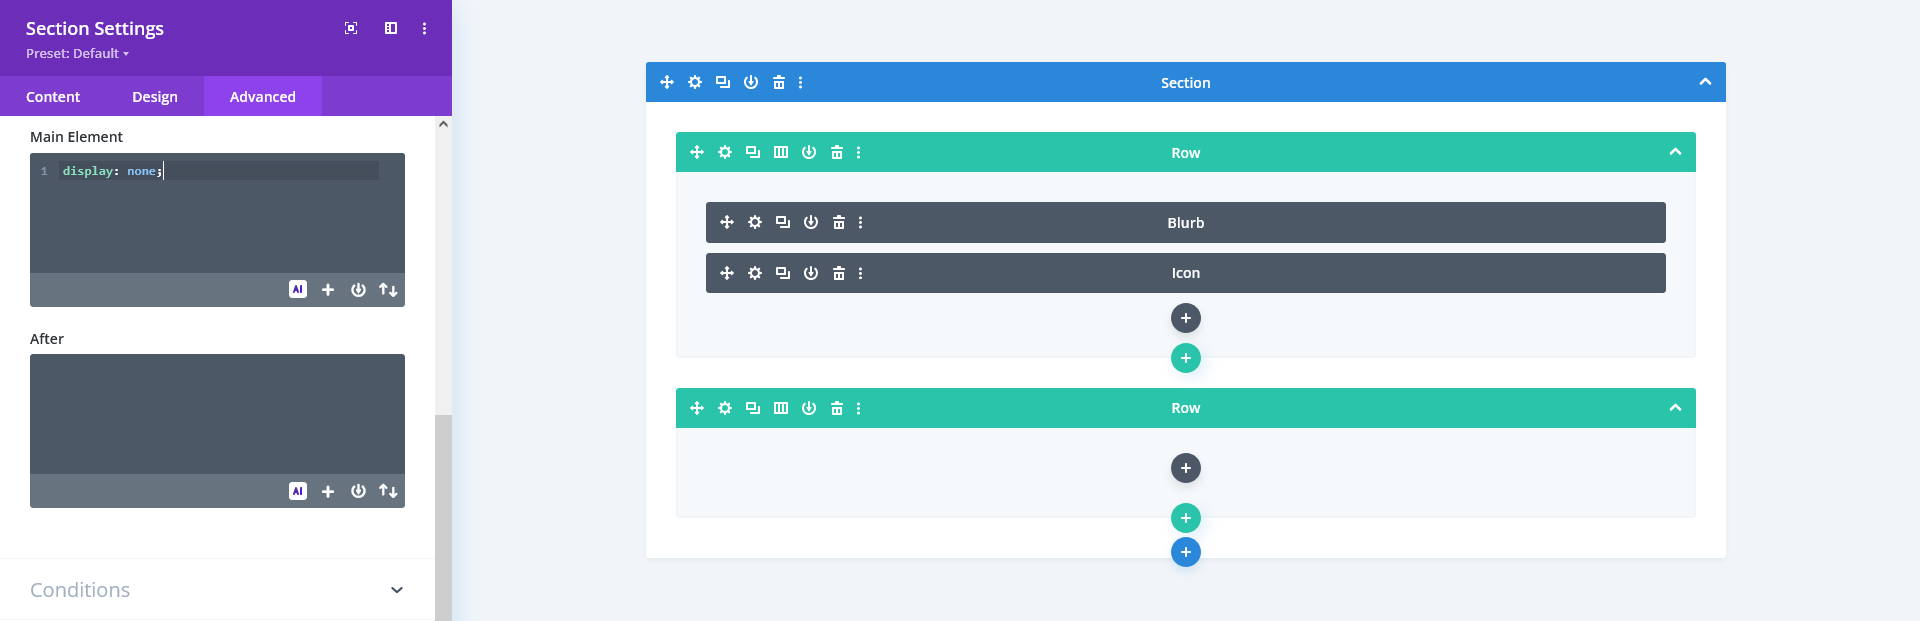
Step 3: Hide the Popup on Page Load
Go to: Section Settings → Advanced → Custom CSS → Main Element
Add: display: none;
This keeps the popup hidden until triggered.
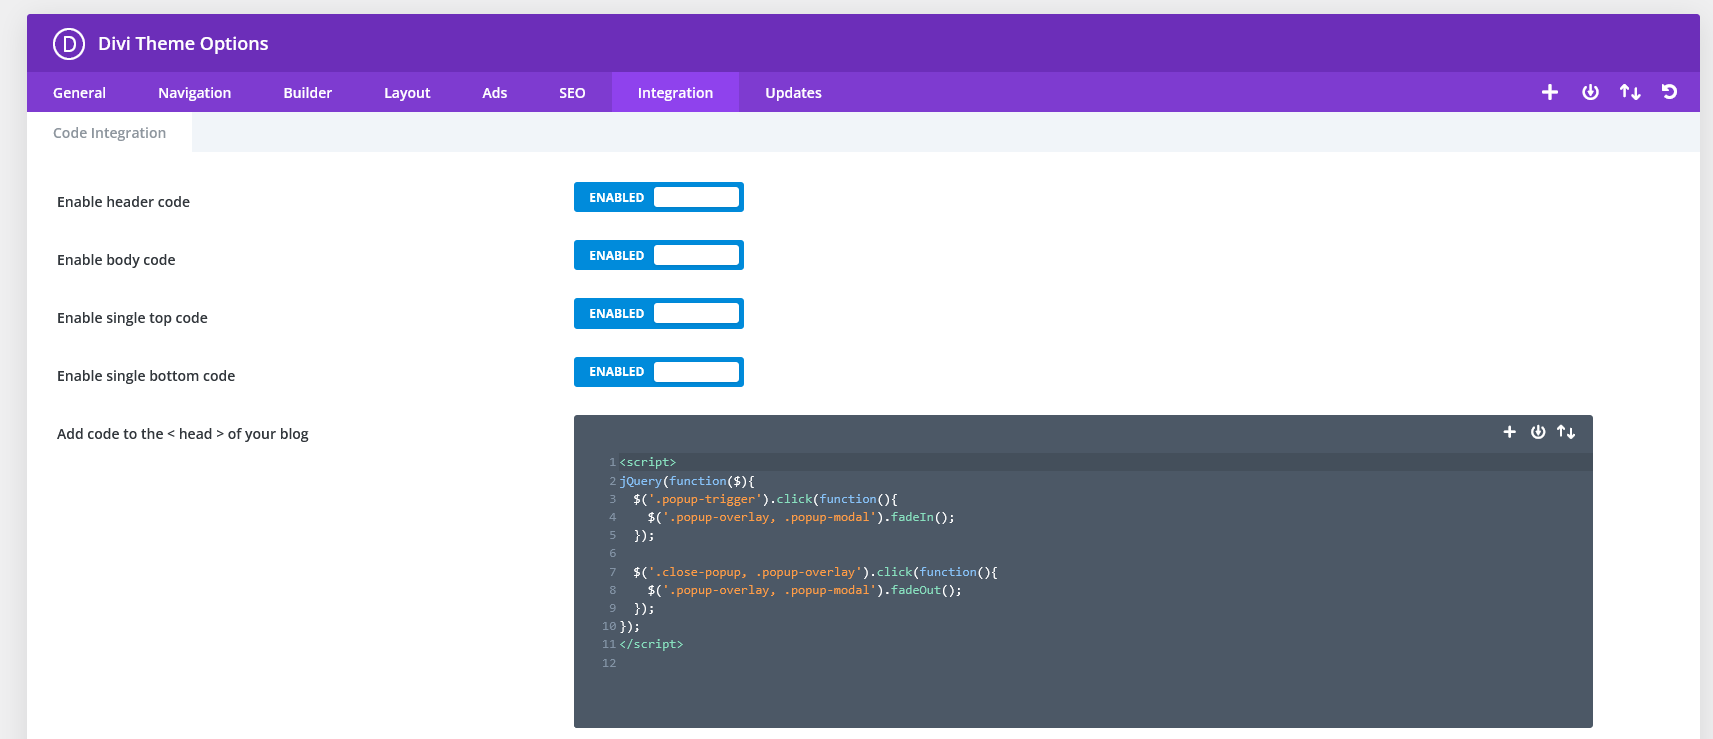
Step 4: Add jQuery to Enable Popup Actions
Go to: Divi → Theme Options → Integration → Add code to <head>
Paste:
<script>
jQuery(function($){
  $('.popup-trigger').click(function(){
    $('.popup-overlay, .popup-modal').fadeIn();
  });

  $('.close-popup, .popup-overlay').click(function(){
    $('.popup-overlay, .popup-modal').fadeOut();
  });
});
</script>
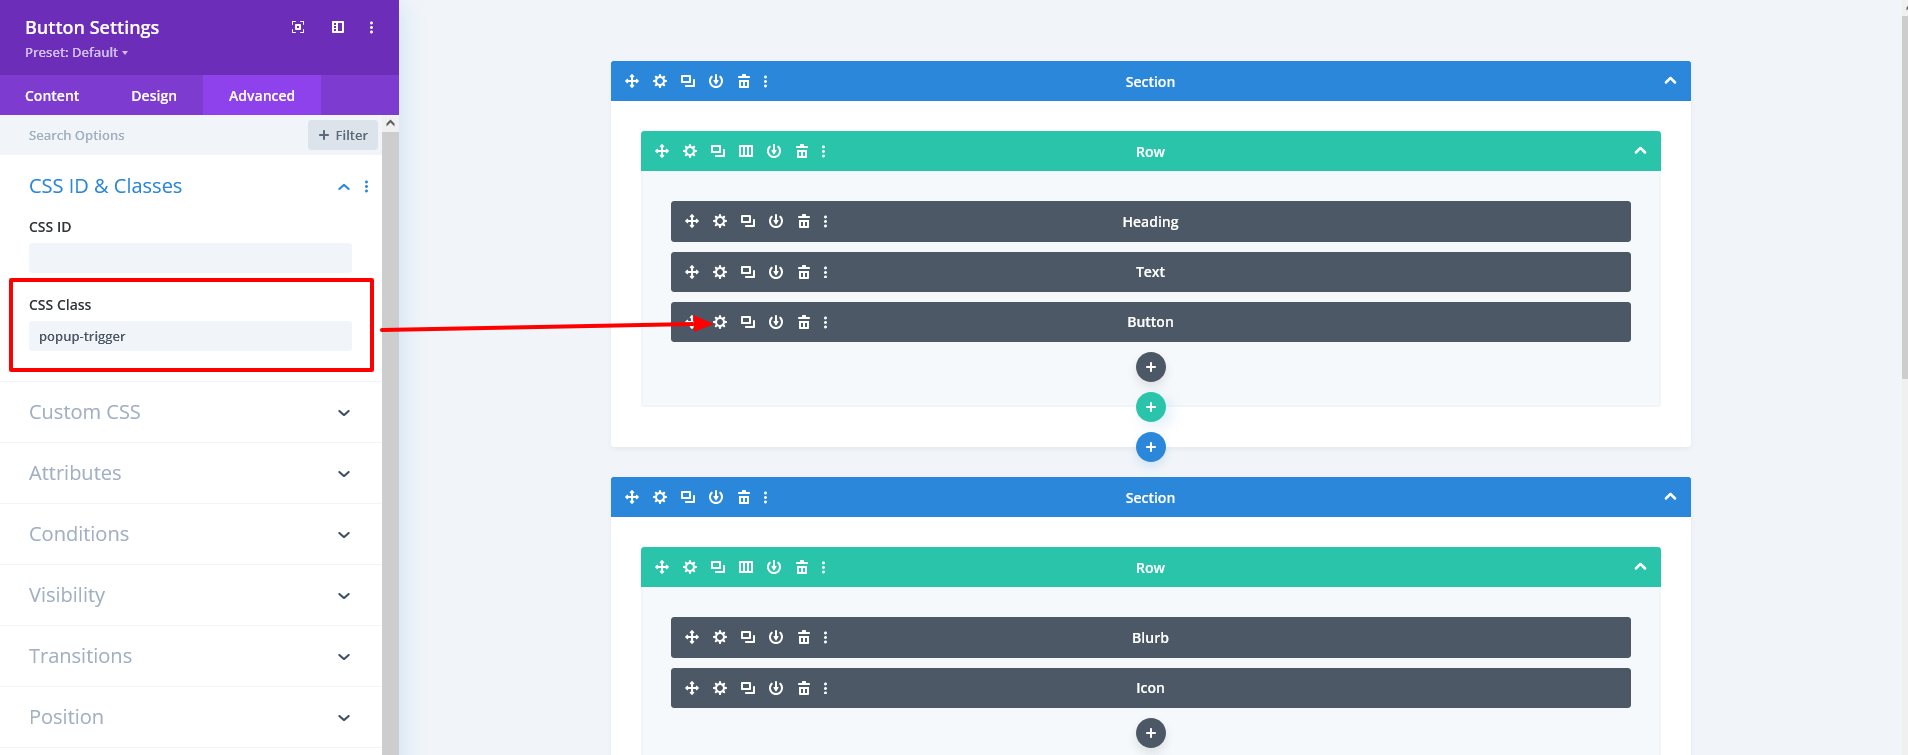
Step 5: Add Popup Trigger Button
Finally, add a button anywhere on the page and give it this class: popup-trigger
This button will open the popup when clicked.
Test Now Popup Is Ready!
Now your popup will:
- Open when the trigger button is clicked
- Close when clicking the close icon
- Close when clicking outside (overlay background)

Final Thoughts
Creating a popup in Divi without plugins gives you full flexibility and keeps your site lightweight. Once you’ve finished styling and testing, you can duplicate the layout and reuse it across multiple pages.
Custom popups built with Divi’s Theme Builder let you improve conversions without relying on heavy plugins. For a high-performing, professionally developed website, Book a Free Consultation.