Table of Contents
- Why Use This Method?
- What We Are Building
- Step-by-Step Guide
- Step 1: Create or Edit a Page with Divi Builder
- Step 2: Add the Tabs Module
- Step 3: Add Shortcode to Each Tab Content
- Step 4: Create Gallery Modules (Outside the Tabs)
- Step 5: Save Each Gallery to Divi Library
- Step 6: Copy the Gallery Module ID
- Step 7: Connect Gallery ID to Tabs
- Step 8: Design and Style the Tabs
- Step 9: Test Your Portfolio-Style Tabbed Gallery
- Key Benefits of This Approach
- Final Thoughts
If you are using the Divi Builder and want to create a portfolio-style tabbed gallery—without installing any extra plugins or writing custom CSS/JS—this guide is for you.
In this tutorial, we’ll show you how to build a clean, professional tabbing gallery layout using only Divi’s default modules and Divi Library. This method is perfect for showcasing portfolio items, projects, services, product categories, or image collections in an organized and user-friendly way.
Why Use This Method?
Most tabbed gallery solutions rely on:
- Third-party plugins
- Custom JavaScript
- Advanced CSS
This approach avoids all of that and offers:
- No plugins required
- No custom code
- 100% Divi-native solution
- Easy to update and reuse
- Lightweight and fast
What We Are Building
We will create:
- A tab module that acts as category navigation
- Separate gallery modules for each tab
- A portfolio-style tabbed gallery layout
- Fully reusable galleries using Divi Library
Step-by-Step Guide
Step 1: Create or Edit a Page with Divi Builder
- Open the page where you want the tabbed gallery.
- Click Enable Divi Builder.
- Choose Build on the Front End or Back End Editor (either works).
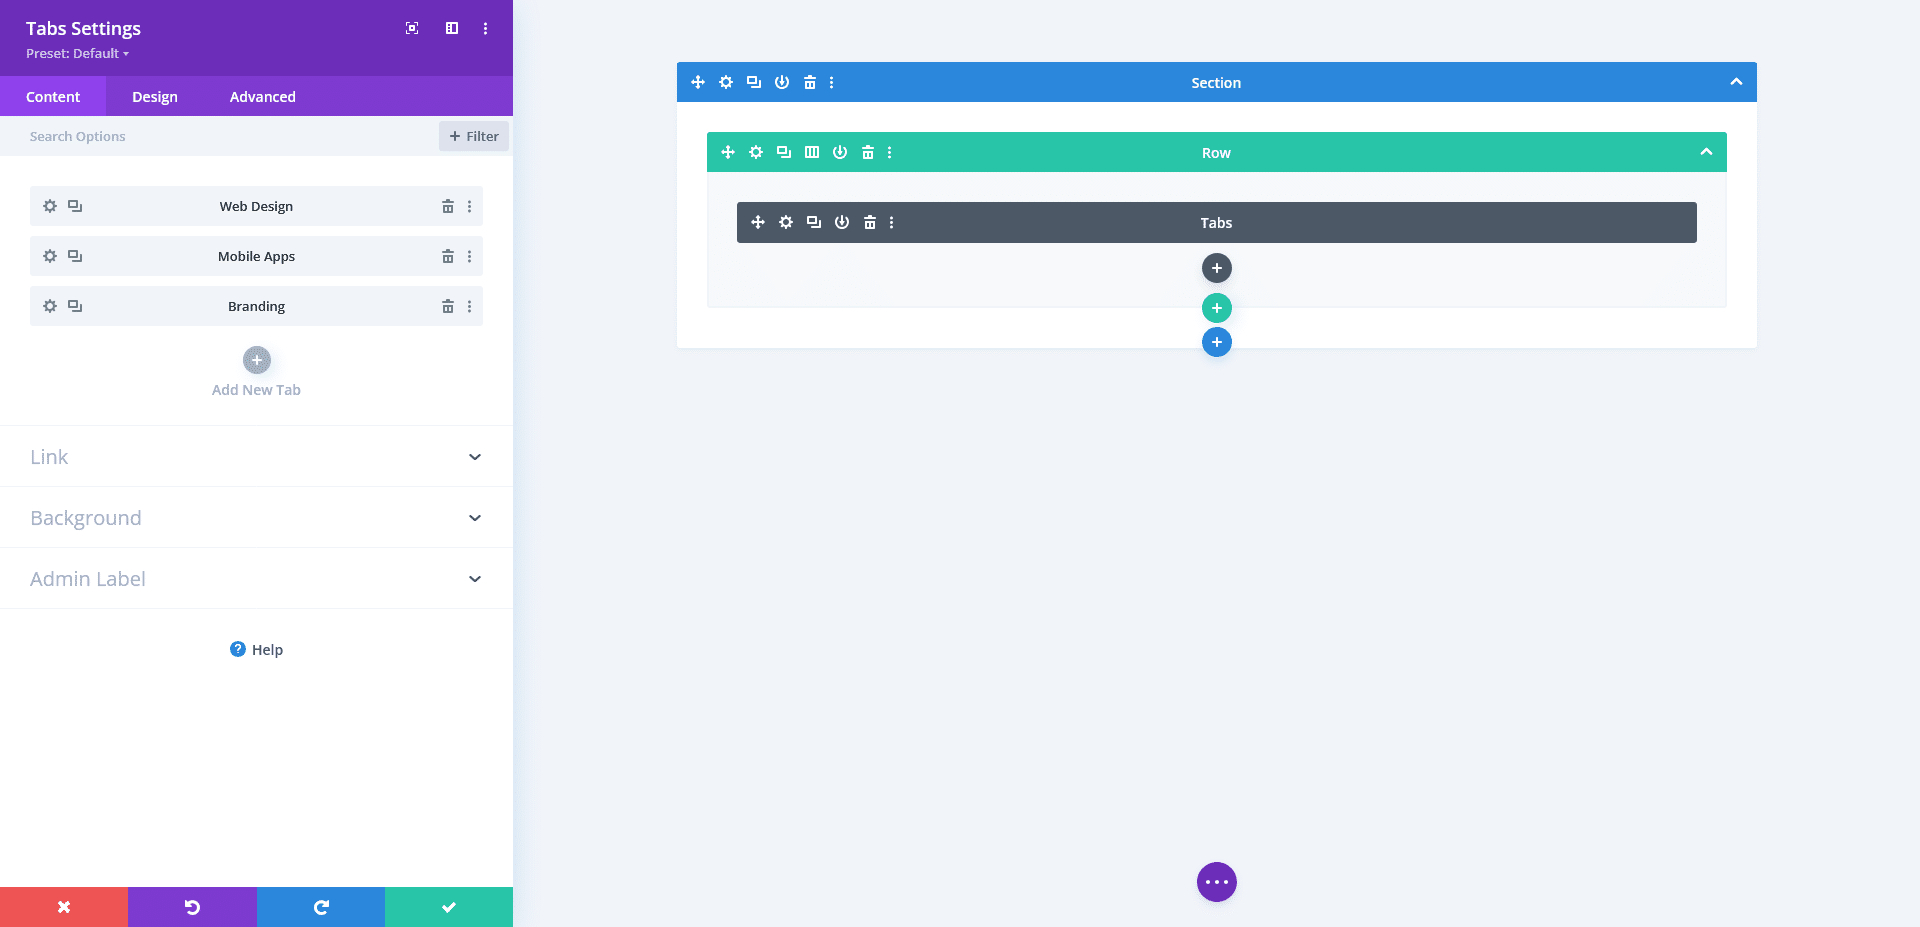
Step 2: Add the Tabs Module
- Add a new Section
- Insert a Row
- Add the Tabs Module
Inside the Tabs module:
- Create tab titles (example: All, Web Design, Mobile Apps, Branding)
- These titles will act like portfolio category filters
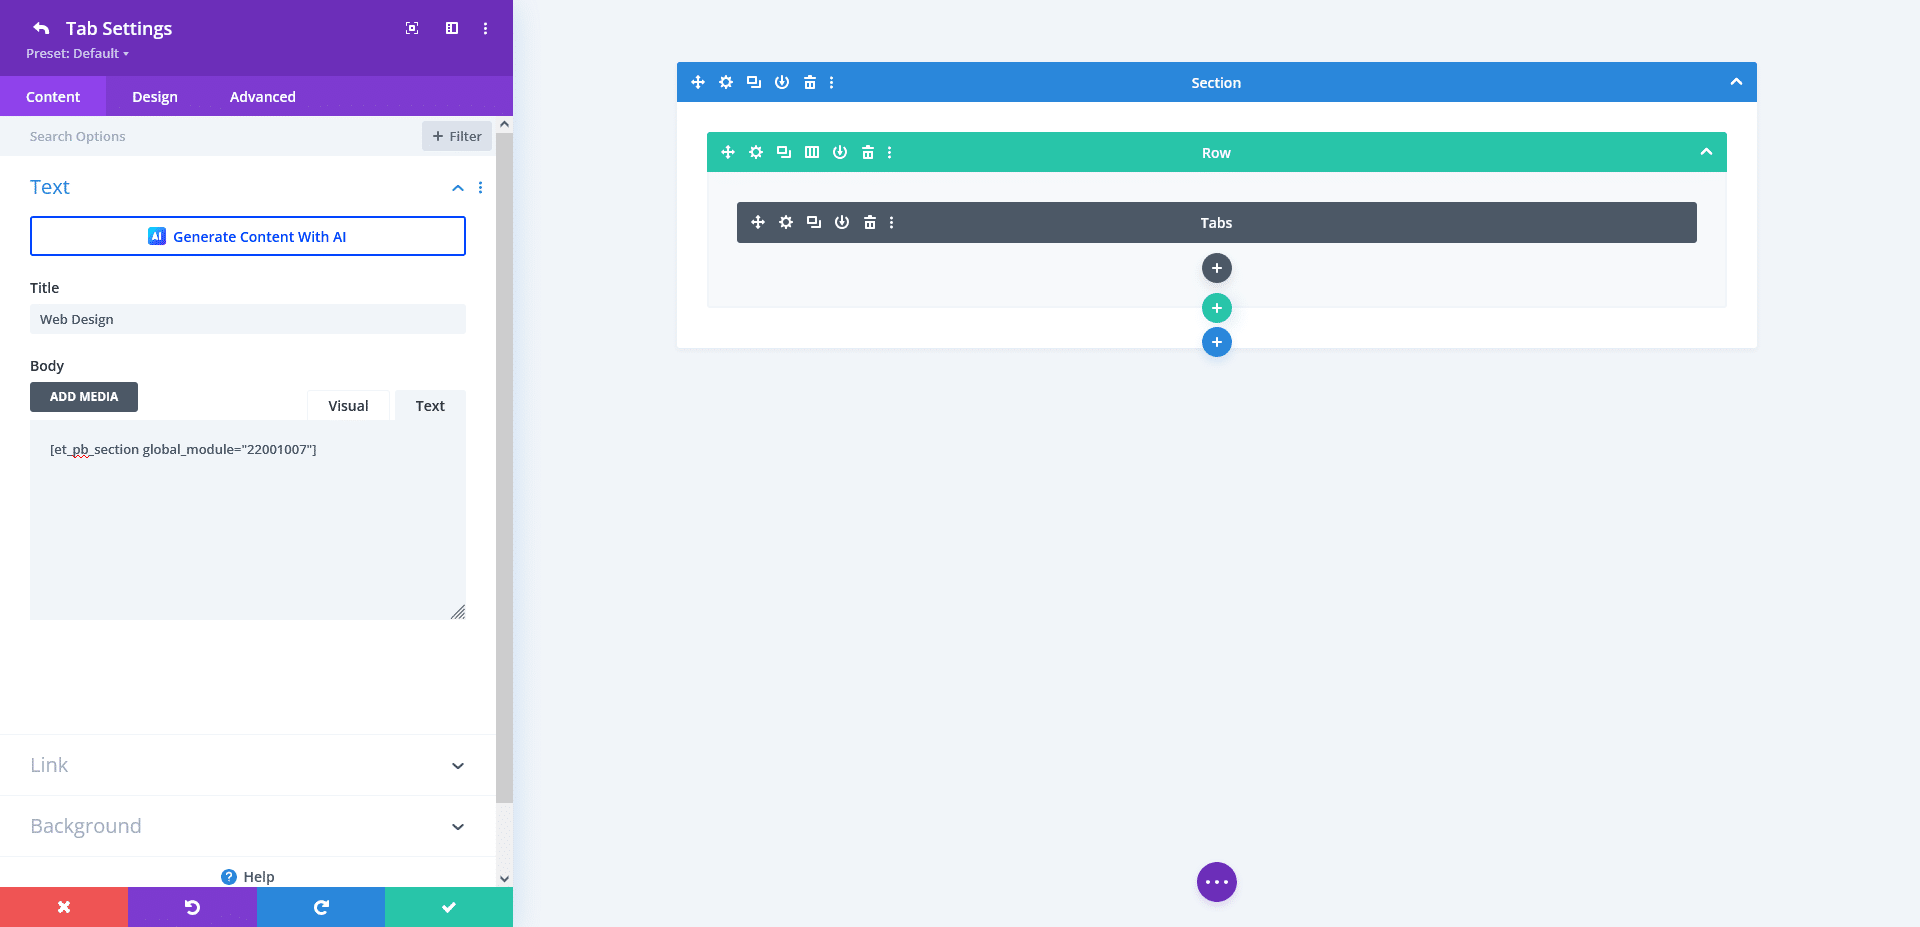
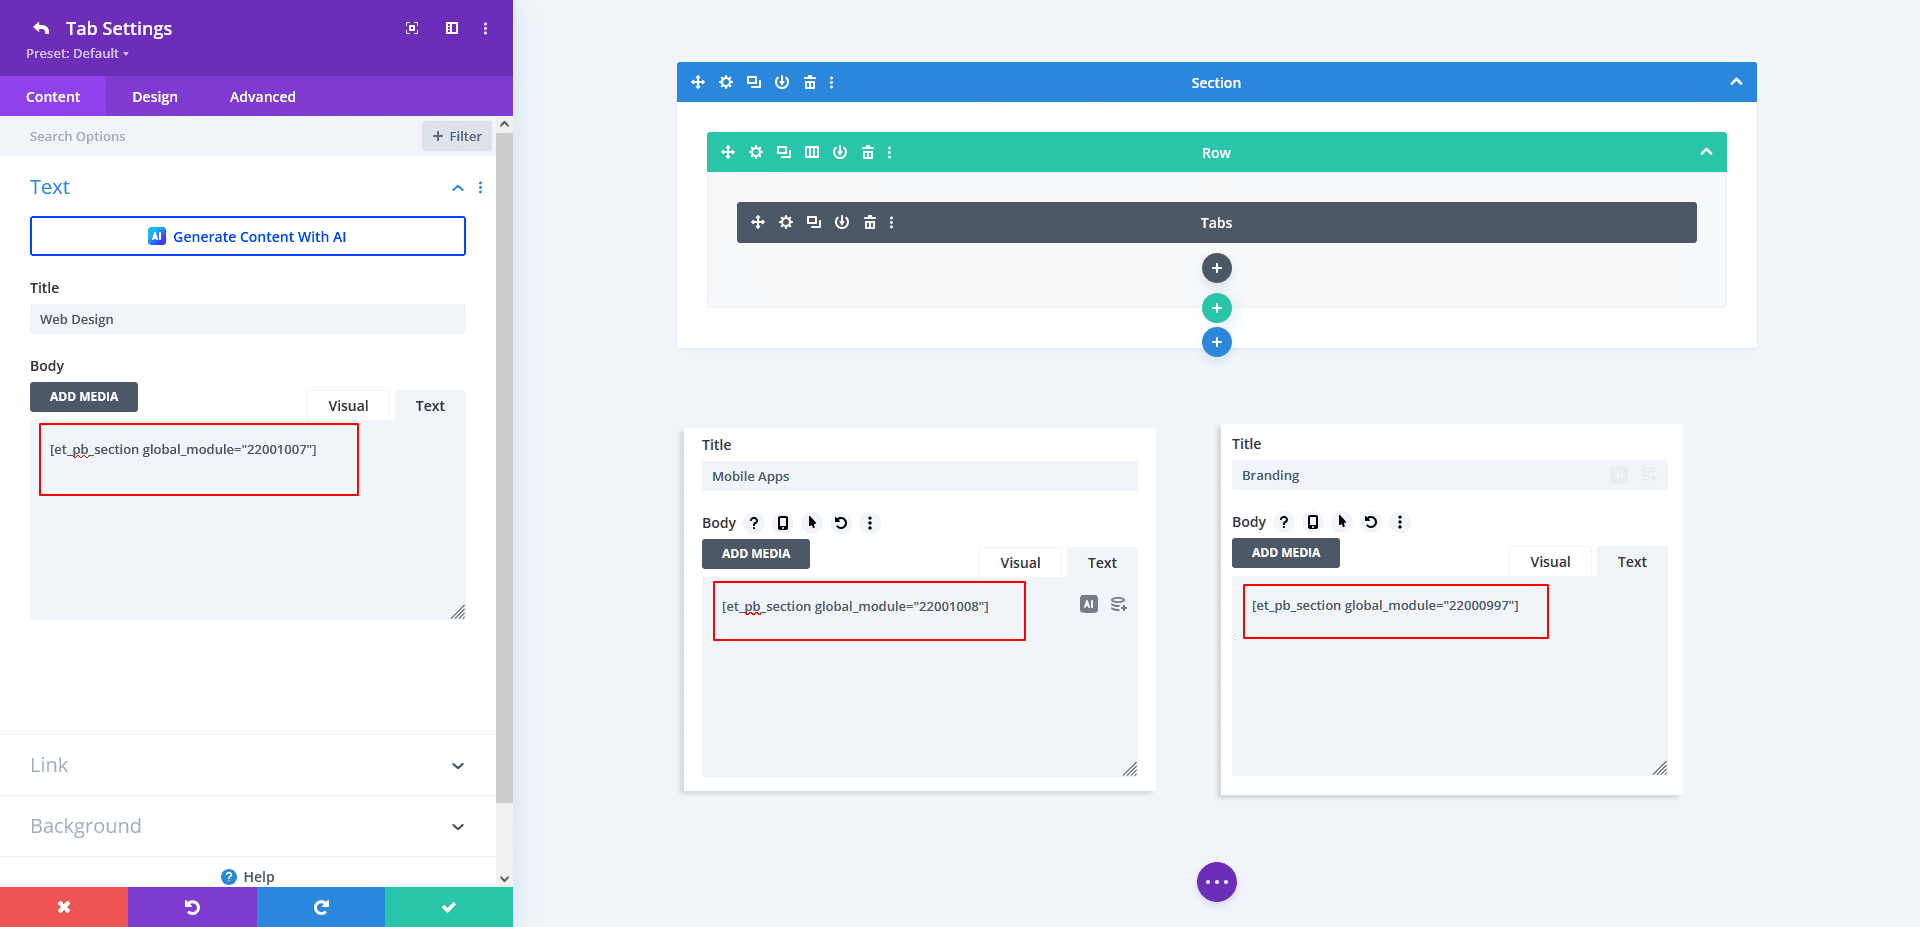
Step 3: Add Shortcode to Each Tab Content
In each tab’s Content area, paste the following shortcode:
[et_pb_section global_module="enter_your_module_id"]
Important:
At this stage, you don’t know the module ID yet.
We will replace enter_your_module_id later.
Step 4: Create Gallery Modules (Outside the Tabs)
Now we create the actual galleries.
- Add another Section below the Tabs
- Add a Row
- Insert a Gallery Module
- Upload images related to one category
- Style the gallery (columns, spacing, hover effects, etc.)
Repeat this step to create 3–4 different gallery modules, one for each tab/category.
Example:
- Gallery 1 → Web Design
- Gallery 2 → Mobile Apps
- Gallery 3 → Branding
- Gallery 4 → UI/UX

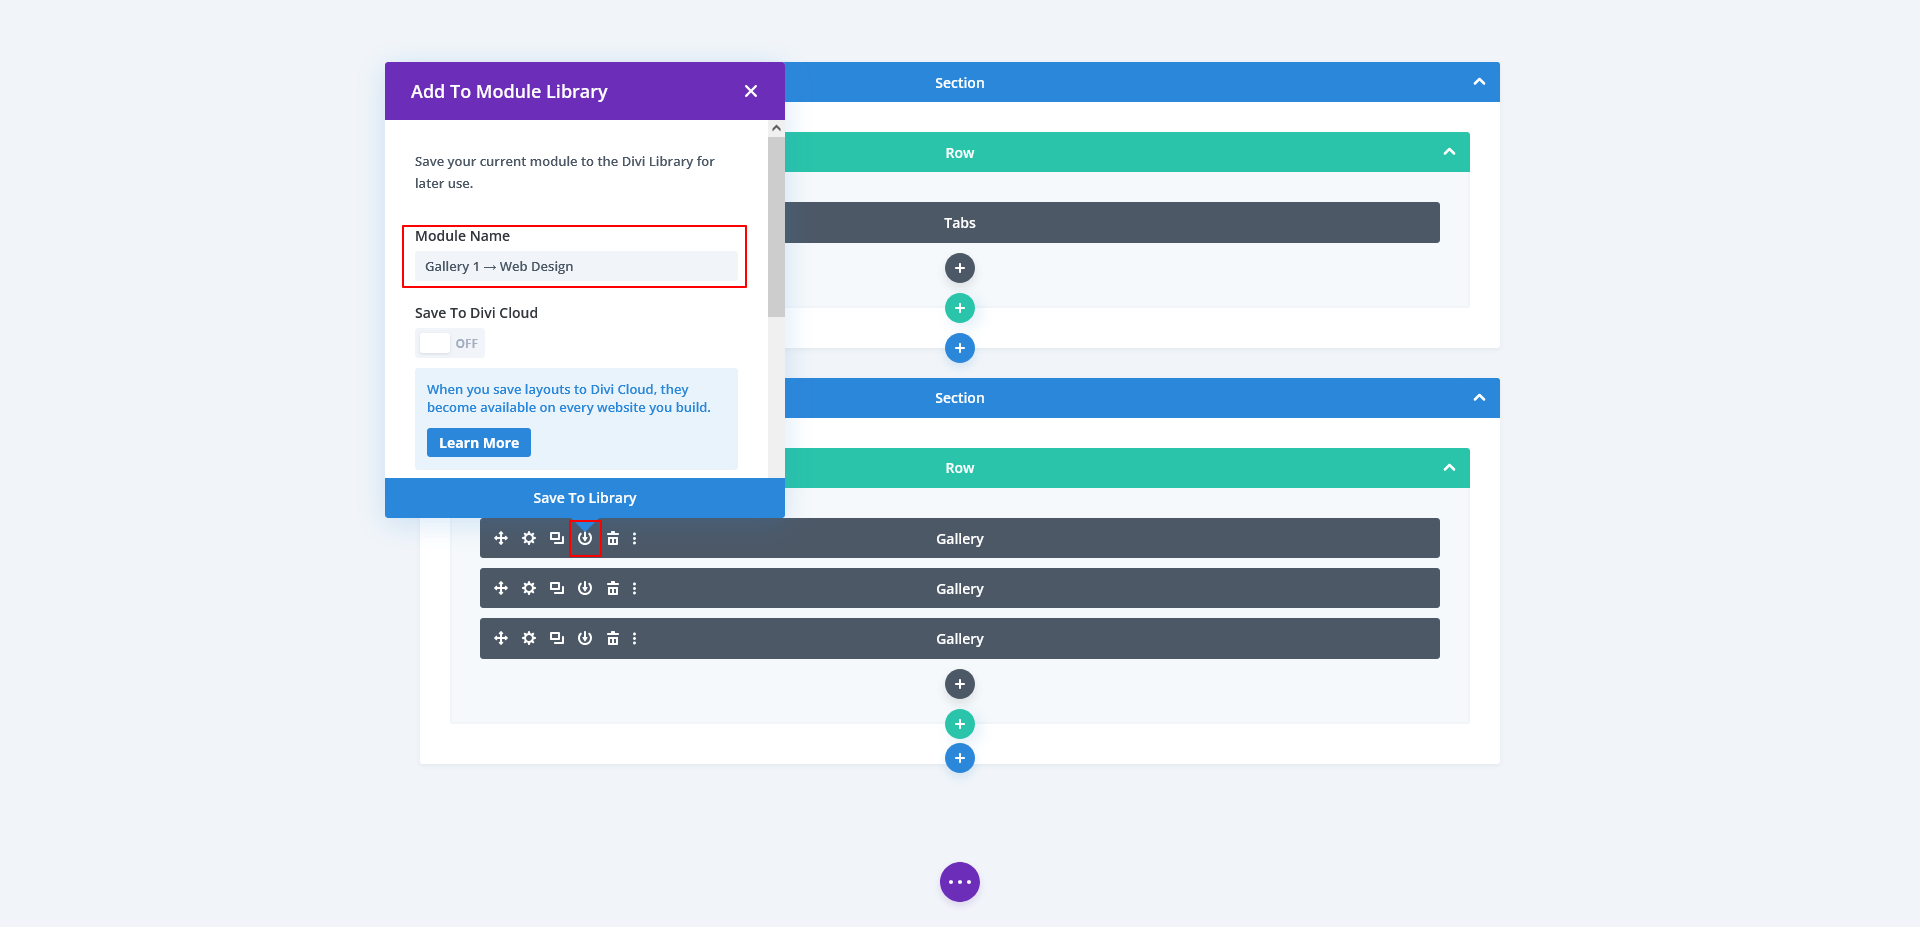
Step 5: Save Each Gallery to Divi Library
For each Gallery Module:
- Open the gallery settings
- Click Save to Library
- Give it a clear name (example: Portfolio – Web Design)
- Save as Module (not layout or section)
This allows Divi to generate a unique Module ID.
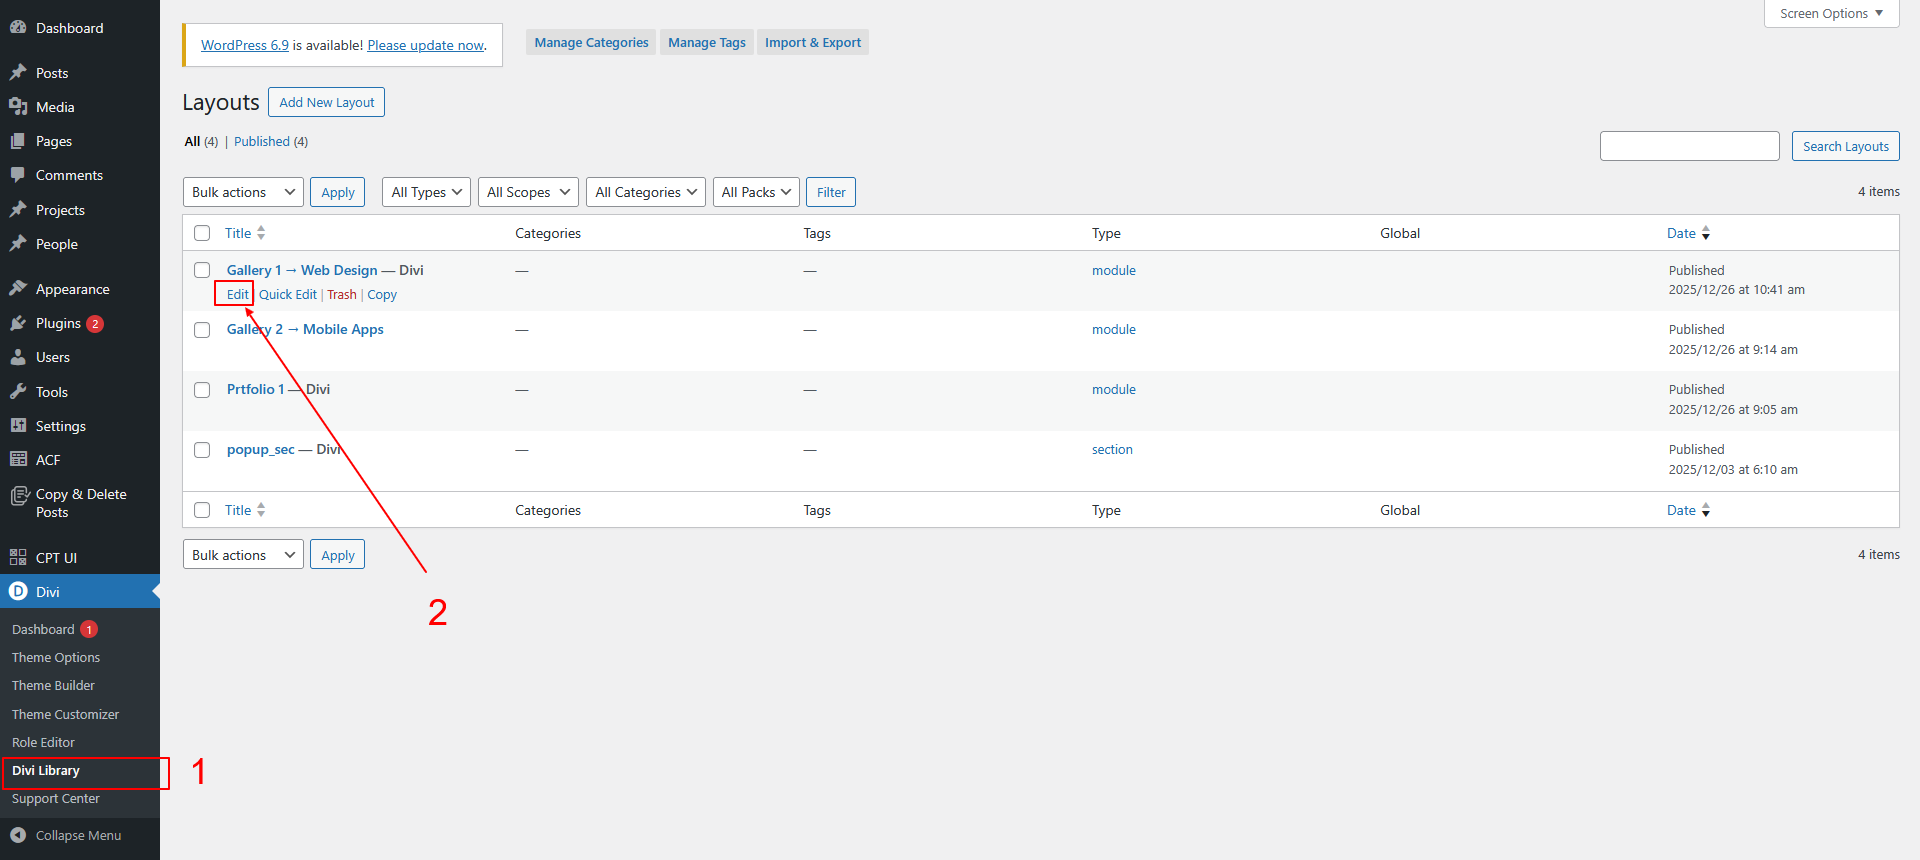
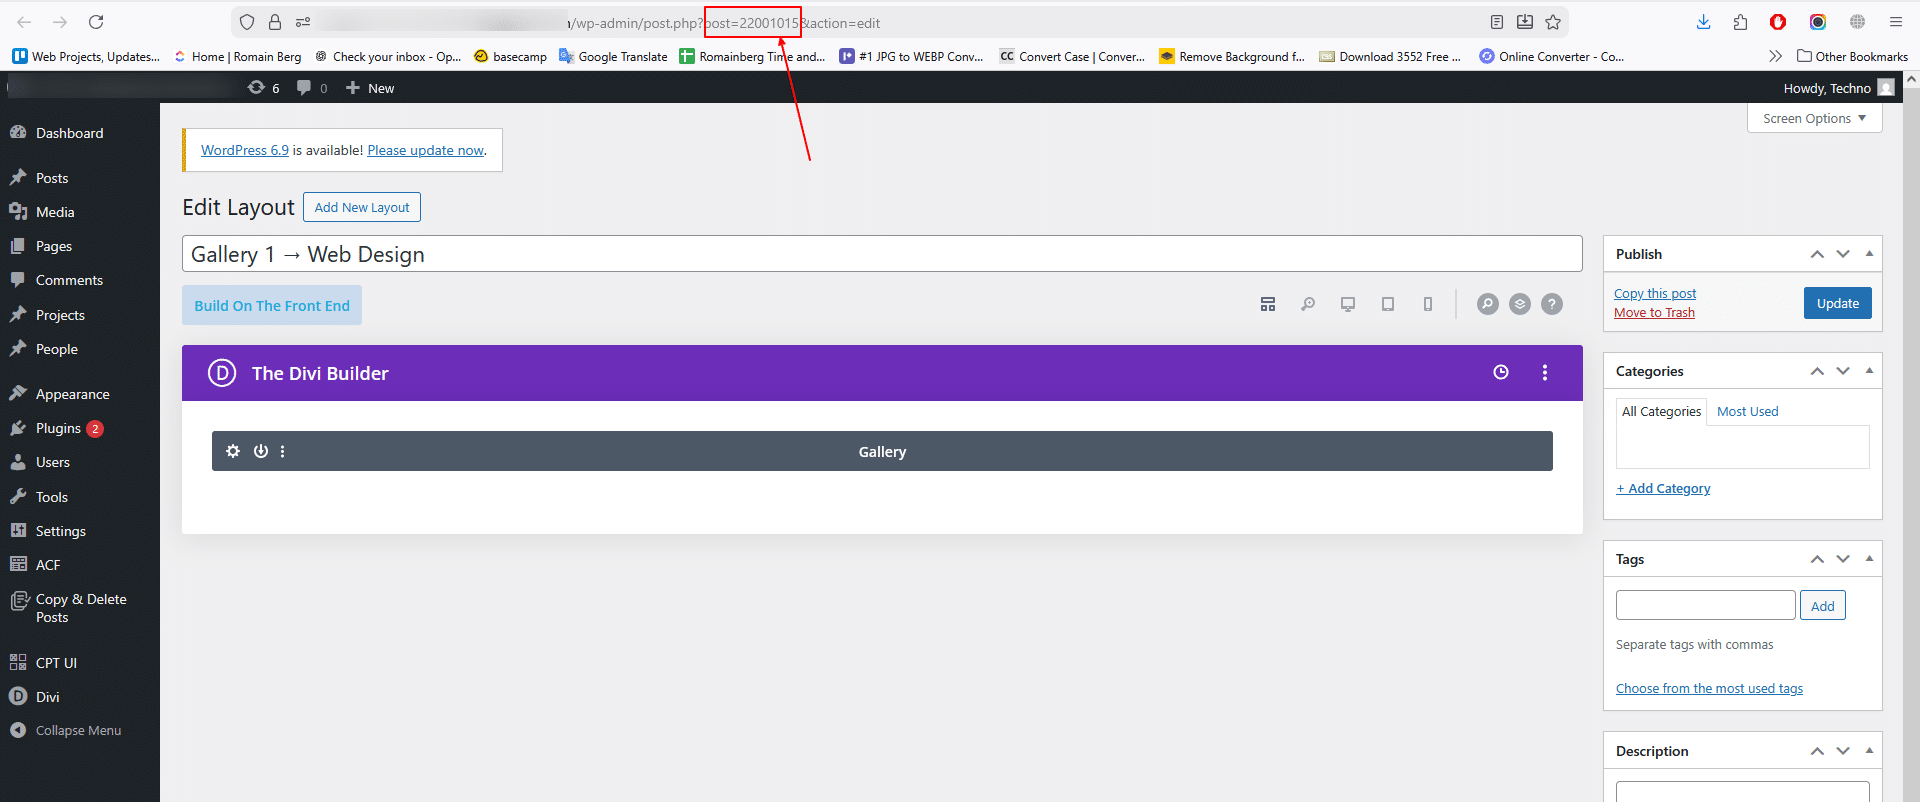
Step 6: Copy the Gallery Module ID
Now we need the module IDs.
- Go to Divi → Divi Library
- Click Edit on a saved gallery module
- Look at the browser URL
Example:
post=22000997
That number (22000997) is your gallery module ID.
Step 7: Connect Gallery ID to Tabs
Go back to your Tabs Module.
Replace the placeholder shortcode in each tab with the correct ID.
Example:
[et_pb_section global_module="22000997"]
Match each gallery to its appropriate tab:
- Web Design tab → Web Design gallery ID
- Branding tab → Branding gallery ID
- etc.
Step 8: Design and Style the Tabs
Now style your tabs to look like a portfolio filter:
- Adjust tab alignment
- Customize active tab colors
- Add borders or underline styles
- Control spacing for a clean layout
Because the galleries load dynamically, the layout stays consistent and professional.
Step 9: Test Your Portfolio-Style Tabbed Gallery
Finally:
- Click each tab
- Ensure the correct gallery loads
- Check responsiveness on tablet and mobile
Your portfolio-style tabbed gallery in Divi is now ready!

Key Benefits of This Approach
- Reusable galleries via Divi Library
- Easy to update images anytime
- No impact on site performance
- Perfect for agencies, designers, and IT companies
- Clean structure for client presentations
Final Thoughts
With a little creativity and Divi’s built-in features, you can build advanced layouts without plugins or custom code. This tabbed portfolio gallery method is stable, scalable, and ideal for long-term projects.
Looking to add advanced Divi features or custom WordPress elements with no plugins?
Partner with TechnoCrackers for complete WordPress development delivered white-label.