Table of Contents
- What Is a Video Popup?
- Why Use JetPopup for Video Popups?
- What You Need
- Step 1: Create a New Popup
- Step 2: Add a Video Element
- Step 3: Customize the Video Layout
- Step 4: Configure the Popup Settings
- Step 5: Publish the Popup
- Step 6: Add a Button to Trigger the Popup
- Step 7: Connect the Button to JetPopup
- Step 8: Customize the Button and Popup Interaction
- Step 9: Make the Video Popup Responsive
- Step 10: Test the Video Popup
- Conclusion
Video content is an effective way to explain products, demonstrate services, share tutorials, and engage website visitors. However, embedding videos directly into a page can take up valuable space and make the layout feel crowded. A video popup provides a practical alternative by allowing visitors to open and watch a video in an overlay without leaving the current page.
With JetPopup by Crocoblock, you can create a popup in WordPress and configure it to display a video when a visitor clicks a button, image, or other interactive element. This approach helps keep your page layout clean while making video content accessible whenever visitors need it.
In this guide, you’ll learn how to create a video popup using JetPopup, configure its trigger, customize its appearance, and test the result on your WordPress website.
What Is a Video Popup?
A video popup is an overlay that displays a video when a visitor interacts with a particular element on a webpage. Instead of placing a video player directly within the page content, you can open it in a popup window.
For example, a business website might include a “Watch Video” button in its hero section. When visitors click the button, a popup opens and plays a company introduction video.
Video popups can be useful for:
- Product demonstrations
- Service introduction videos
- Customer testimonials
- Tutorial videos
- Promotional campaigns
- Online course previews
- Brand introduction videos
Why Use JetPopup for Video Popups?
JetPopup is a Crocoblock plugin that allows you to create customizable popups for WordPress websites. When used with Elementor, it provides visual controls for designing popup layouts and configuring the conditions that trigger them.
Using JetPopup for video content offers several advantages:
- Display videos without permanently occupying page space.
- Open videos through buttons, images, or other supported triggers.
- Customize the popup layout to match your website design.
- Control popup dimensions and positioning.
- Create a more focused viewing experience.
- Use different popup designs for different videos or campaigns.
What You Need
Before getting started, make sure you have:
- A WordPress website.
- Elementor installed and activated.
- JetPopup installed and activated.
- A video hosted on a supported platform, such as YouTube or Vimeo, or a compatible self-hosted video file.
For this tutorial, we’ll create a popup that opens when a visitor clicks a button.
Step 1: Create a New Popup
First, create the popup that will contain your video.
- Open your WordPress dashboard.
- Navigate to JetPopup → Add New Popup.
- Enter a descriptive name, such as “Video Popup.”
- Create the popup and open it in Elementor.
You can use a blank popup template or start with an existing layout if one is available.
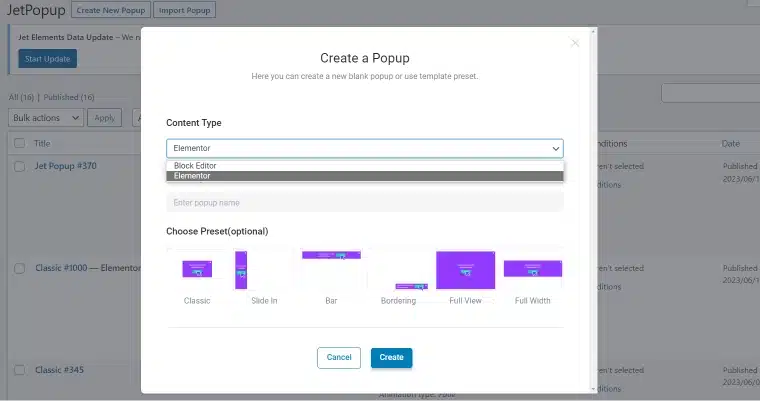
Once the Elementor editor opens, you can begin building the popup content.
Step 2: Add a Video Element
Next, add the video content to the popup.
In the Elementor editor, search for the Video widget and drag it into the popup layout.
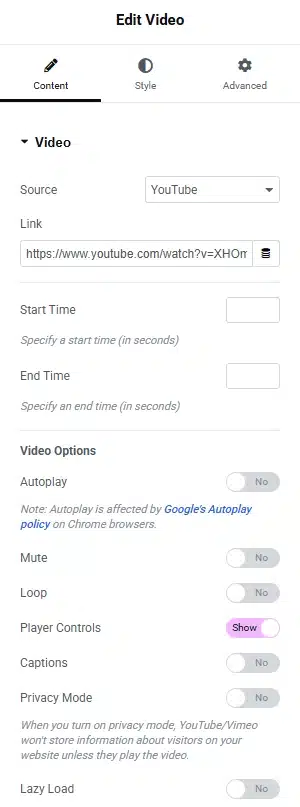
Select the widget to access its content settings.
Depending on your video source, you can configure the video using a supported source such as YouTube, Vimeo, or a self-hosted file.
For example, if your video is hosted on YouTube, select YouTube as the source and enter the video URL.
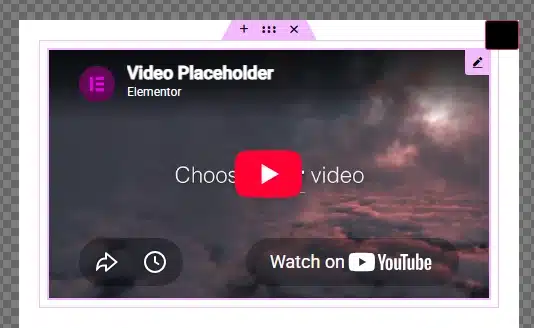
You can also configure available playback options, such as:
- Autoplay
- Mute
- Player controls
- Video start and end times, where supported
- Privacy-enhanced settings, where supported
Tip: Browser autoplay policies may prevent videos with sound from starting automatically. If you want the video to play immediately when the popup opens, test the autoplay and mute settings in your target browsers.
Step 3: Customize the Video Layout
After adding the Video widget, adjust its appearance to fit the popup.
Consider the following settings:
Width: Set the video width so it fits comfortably inside the popup.
Aspect ratio: Use a suitable ratio, such as 16:9 for most standard landscape videos.
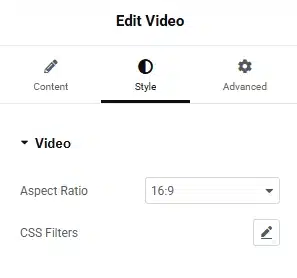
Alignment: Center the video within the popup.
Spacing: Adjust padding and margins to prevent the video from touching the popup edges.
Background: Choose a background color that complements the video and your website’s design.
For a simple video popup, a dark background often works well because it keeps the visitor’s attention on the video.
Step 4: Configure the Popup Settings
Once the video is in place, configure the popup itself.
Open the popup settings using the settings icon in the Elementor editor.
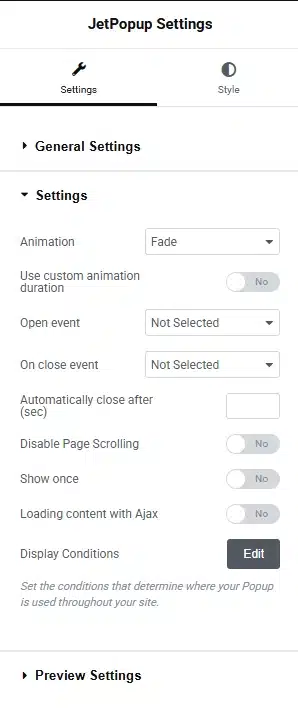
Review the available options for positioning, dimensions, and display behavior.
For example, you can configure:
- Popup width
- Popup height or minimum height
- Horizontal and vertical positioning
- Overlay appearance
- Close button visibility
- Entrance and exit animations, where available
Choose a size that accommodates the video without making it difficult to close the popup or navigate the page.
For desktop screens, a wider popup may be appropriate. For smaller screens, make sure the video remains within the available viewport.
Save or update the popup when you’re satisfied with the layout.
Step 5: Publish the Popup
After designing the popup, publish it.
Depending on your JetPopup version and setup, you may be prompted to configure display conditions or popup settings during publication.
Choose the appropriate conditions for where the popup should be available.
For example, if the popup is intended for a specific landing page, make sure it is available on that page rather than unnecessarily loading it across the entire website.
If your setup uses a manually triggered popup, you can configure the popup to open from a designated page element instead of automatically displaying it on page load.
Step 6: Add a Button to Trigger the Popup
Now you need an element that visitors can click to open the video.
Open the page where you want the video popup to appear and select Edit with Elementor.
Add a Button widget to the relevant section.
You can use button text such as:
- Watch Video
- Play Introduction
- View Demo
- Watch Tutorial
For example, you could add a “Watch Video” button beneath a heading in your homepage hero section.
Customize the button’s typography, background, border, and spacing to match the rest of your website.
Step 7: Connect the Button to JetPopup
After adding the button, select it in Elementor.
Open the Advanced tab and locate the JetPopup settings.
Enable the popup functionality for the selected widget, if required by your version.
Next, configure the popup trigger:
- Select the popup you created earlier.
- Choose the appropriate trigger type.
- Select a click-based trigger, such as Click on Widget, where available.
- Save the settings.
The exact labels and available trigger options may vary depending on the JetPopup and Elementor versions installed on your website.
The intended behavior is straightforward: when a visitor clicks the button, JetPopup opens the video popup.
Step 8: Customize the Button and Popup Interaction
Once the trigger is configured, refine the interaction to make it easy for visitors to use.
For example, you can:
- Add a play icon to the button.
- Use a recognizable “Watch Video” label.
- Add a hover effect to indicate that the button is clickable.
- Choose a suitable popup entrance animation.
- Make the close button easy to identify.
- Keep the video centered within the popup.
Avoid using an animation that distracts from the video itself. A subtle entrance effect usually works well for informational or promotional videos.
Step 9: Make the Video Popup Responsive
Your video popup should work on desktop, tablet, and mobile devices.
In Elementor, switch between the responsive preview modes and check the popup layout at different screen sizes.
Pay attention to the following:
- The video fits within the viewport.
- The popup does not extend beyond the screen.
- The close button remains visible.
- The video maintains its aspect ratio.
- The button is easy to tap on mobile.
- There is enough space around the popup content.
If necessary, adjust the popup width and padding for smaller devices.
Remember that mobile visitors generally interact through touch rather than a mouse, so make the trigger and close controls sufficiently easy to use.
Step 10: Test the Video Popup
Before making the page available to visitors, test the popup on the front end.
Check that:
- The button opens the correct popup.
- The video loads successfully.
- Playback controls work as expected.
- The popup can be closed easily.
- The video fits the popup correctly.
- The popup works on desktop and mobile.
- The video does not continue playing after the popup is closed.
The final point is especially important. Depending on the video source and how the popup is configured, you may need to verify that playback stops when the popup closes.
If you experience issues, check the popup trigger, video URL, display conditions, and any caching or optimization plugins that might affect scripts.
Conclusion
Adding a video popup to WordPress with JetPopup is a practical way to present video content without permanently occupying space on your page. By creating a popup, adding a Video widget, connecting it to a click-triggered button, and adjusting the responsive settings, you can provide visitors with an interactive viewing experience.
Whether you want to showcase a product demonstration, introduce your business, explain a service, or share a tutorial, JetPopup gives you a visual way to integrate video popups into your Elementor layouts.
Keep the design simple, use a clear trigger, optimize playback, and test the popup across devices to deliver a smooth experience for your website visitors.