Creating a standard grid in Divi is easy, but sometimes you need more flexibility to create unique layouts with different item sizes, column spans, and row arrangements.
With Divi 5’s new CSS Grid Editor, you can build these custom layouts visually without writing custom CSS. You can enable Loop on a Group or Column, select its parent container, and turn it into a Grid.
From there, the Grid Editor lets you control the number of columns and rows, spacing, and the size and position of your Loop items.
Enable Loop → Select Parent → Set Layout to Grid → Open Grid Editor → Create Your Layout
This makes it easy to create dynamic layouts for loops, galleries, projects, products, blog posts, and more, while keeping your content flexible and easy to manage.
What Can You Create With CSS Grid?
A traditional Loop layout might look like:
Card | Card | Card
But with CSS Grid, you can create much more flexible layouts.
For example:
- Make some items larger than others
- Span an item across multiple columns
- Span an item across multiple rows
- Create different layouts for different rows
- Control the spacing between items
- Build asymmetric or bento-style layouts
And you don’t have to manually create every item. Divi’s Loop Builder handles the repeated content, while CSS Grid controls the layout.
How to Create a Custom Grid Layout for a Loop
The process is very simple.
First, decide which element you want to Loop. You can enable Loop on a Group or Column, depending on how your content is structured.
Then, apply Grid to the parent container of that Loop.
Step 1: Enable Loop on Your Content
First, create the content you want to repeat.
You can enable Loop on a Group or Column.
For example, you could have:
Column → Loop
or:
Column → Group → Loop
The important thing is that the element containing your repeated content has a parent container where you can apply the Grid layout.
For our example, we created a project card with an image, title, description, and button.
Once Loop is enabled, Divi will automatically repeat the content based on your Loop query.
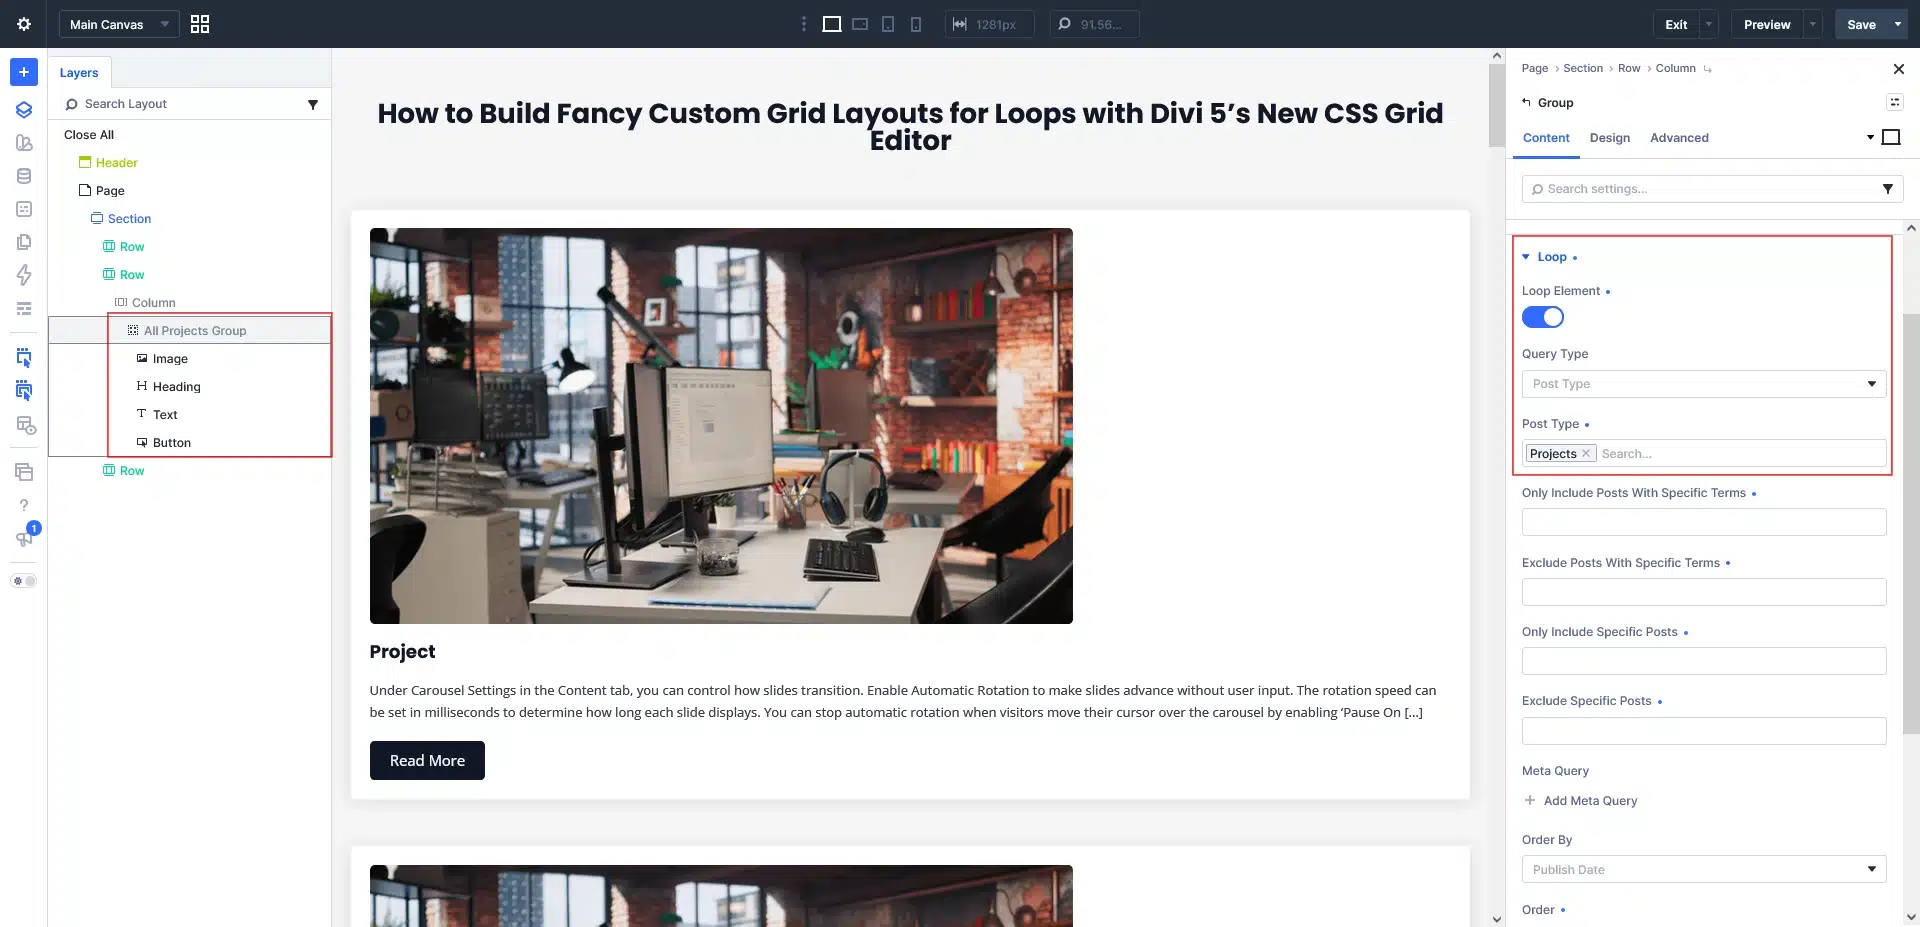
Step 2: Select the Parent Container & Change the Layout to Grid
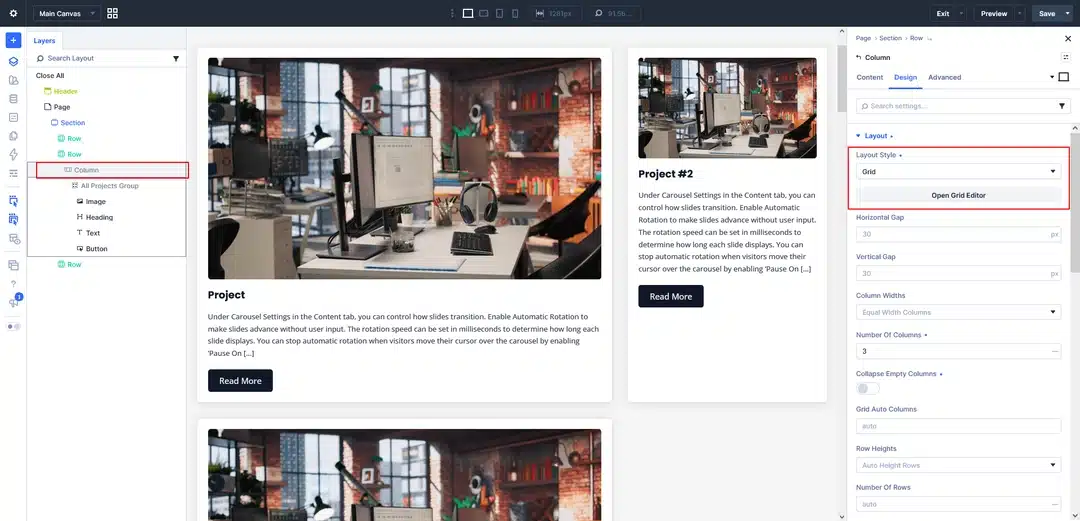
Now select the parent container of the element where you enabled Loop.
This is the important part.
If your Loop is enabled on a Group, select the parent Column.
For example:
Column
→ Group (Loop)
Here, you would select the Column and turn it into a Grid.
Change the Parent to Grid
After selecting the parent container, go to:
Design → Layout → Layout Style
Change the Layout Style to:
Grid
Divi will then provide the CSS Grid settings.
You can control settings such as:
- Number of Columns
- Number of Rows
- Column Widths
- Row Heights
- Horizontal Gap
- Vertical Gap
Choose the values based on the layout you want to create.
Step 3: Open the Grid Editor & Build Your Custom Grid
Now click: Open Grid Editor
Divi will open the visual Grid Editor.
This is where you can create your custom layout.
Instead of writing CSS manually, you can visually define your rows, columns, and Grid item positions.
Build Your Custom Grid
Now arrange your Loop items according to your design.
You can make an item take up more space by allowing it to span multiple columns or rows.
For example, you can create:
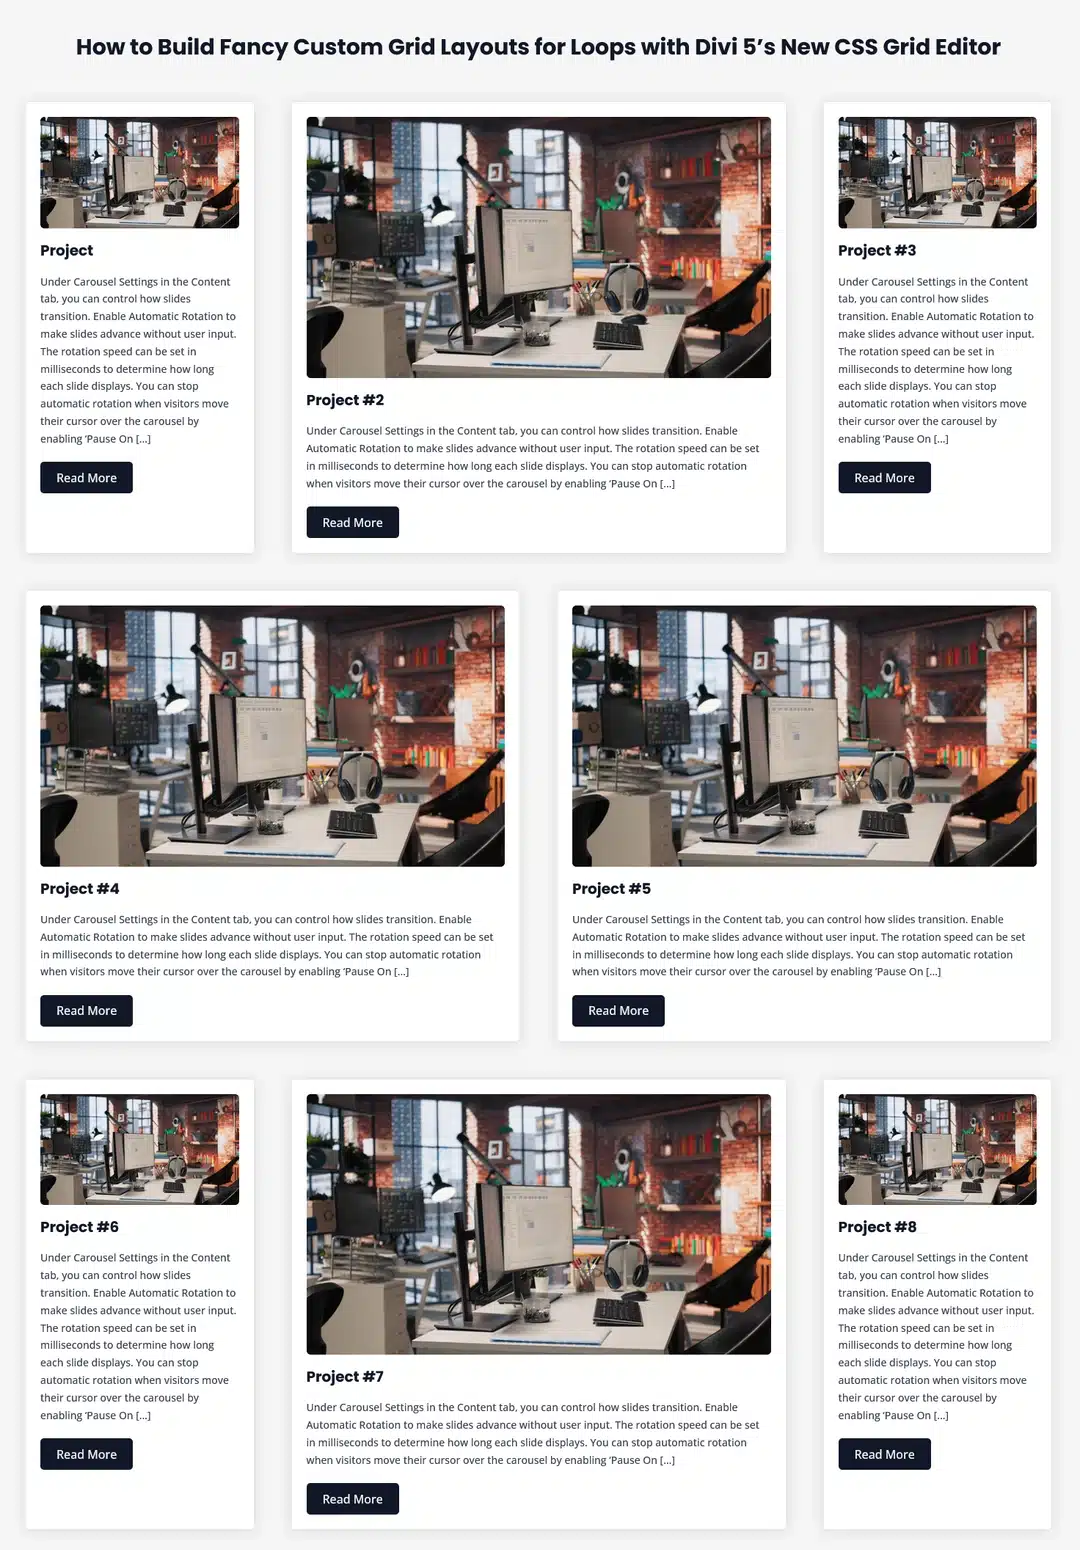
Small | Large | Small
and then:
Large | Large
You can also create your own completely different arrangement.
For our example, we created a custom project grid where some items are smaller and others take up more space.
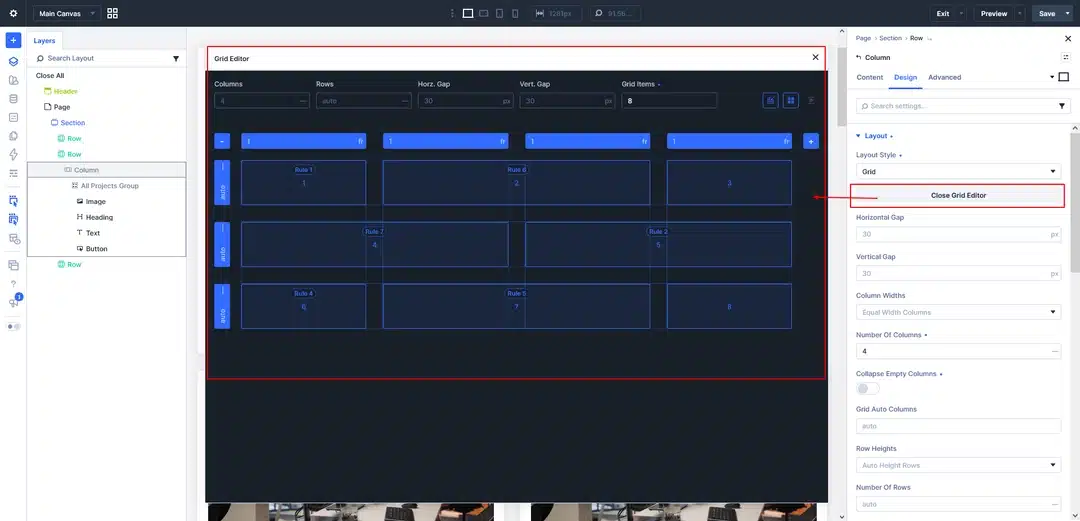
The Loop continues to handle the content automatically. The Grid Editor only controls how that content is positioned and displayed.
Step 4: Adjust the Grid Spacing
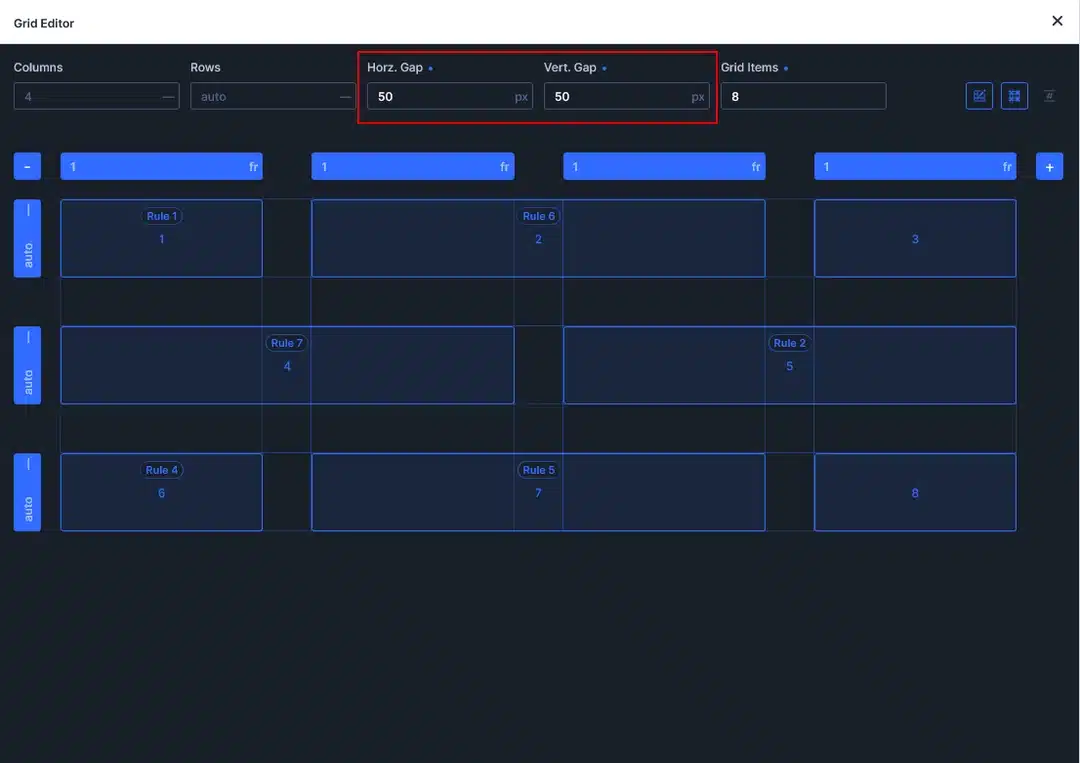
You can also adjust the space between your items using:
- Horizontal Gap
- Vertical Gap
For our example, we used 50px for both.
You can use smaller or larger values depending on your design.
Once you’re happy with the layout, save your changes and preview the page.
Your Loop content will now appear in the custom Grid layout you created.
Step 5: Use a Grid Offset Rule to Repeat the Layout
If you want the same custom layout pattern to repeat throughout your Loop, you can use a Grid Offset Rule.
For example, in our layout, we want every third project to become a larger card.
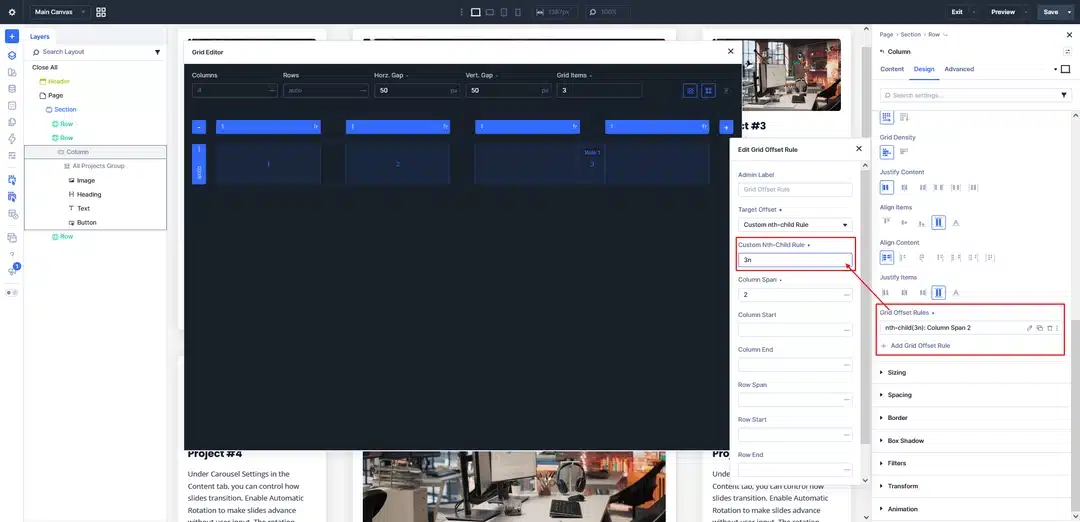
In the Grid Editor, click Add Grid Offset Rule and set the Target Offset to Custom nth-Child Rule.
Then enter: 3n
This tells Divi to apply the rule to every third Loop item—such as the 3rd, 6th, 9th, 12th, and so on.
You can then set the Column Span or other grid properties for those items. In our example, we set the Column Span to 2, making every third project wider than the others.
This is especially useful when working with dynamic Loop content because you don’t have to manually style each item.
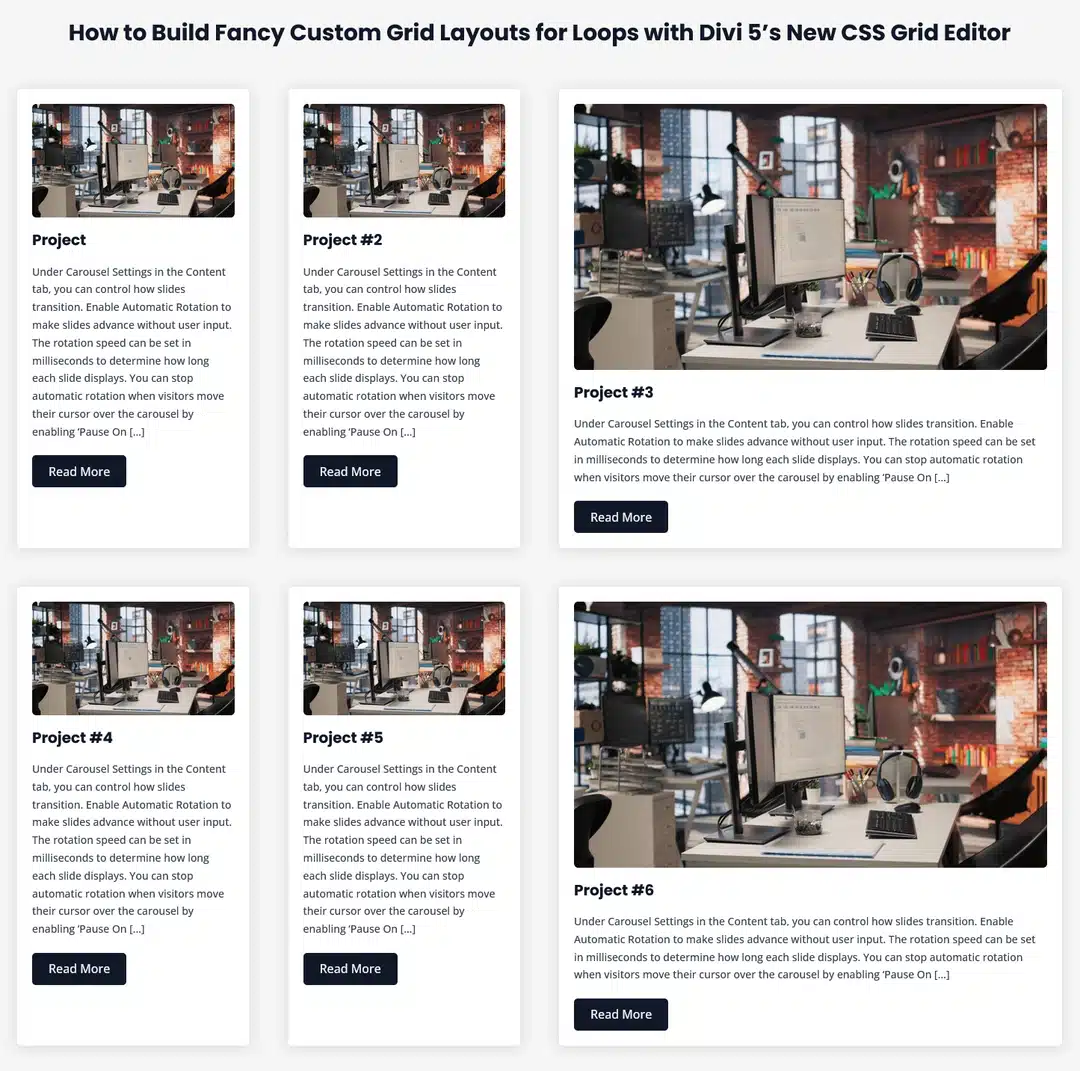
For example:
Project 1 → Normal
Project 2 → Normal
Project 3 → Wide
Project 4 → Normal
Project 5 → Normal
Project 6 → Wide
And the same pattern continues automatically as more Loop items are added.
Tip: You can use different nth-child patterns to create different repeating layouts. This gives you a simple way to create unique designs while keeping your Loop completely dynamic.
Use the Grid Editor With More Than Loops
The CSS Grid Editor isn’t limited to one specific type of content.
You can use the same approach for:
- Blog posts
- Projects
- Image galleries
- Products
- Team members
- Other dynamic content
The idea remains the same:
Create your content → Enable Loop → Select its parent → Enable Grid → Design your layout
This gives you much more freedom than a traditional equal-column layout.