Table of Contents
- Introduction
- What We’ll Build
- WooCommerce Modules Available in Divi 5
- Step 1: Create a Checkout Template
- Step 2: Build the Basic Layout
- Step 3: Create the Two-Column Checkout Layout
- Step 4: Add the Billing Module
- Step 5: Add the Shipping Module
- Step 6: Add Additional Information
- Step 7: Add the Order Summary
- Step 8: Add the Payment Module
- Step 9: Customize the Design Using Divi 5
- Step 10: Test Your Checkout Page
- Why Use Divi 5 WooCommerce Modules?
- Final Thoughts
- Want a Faster, Conversion-Focused WooCommerce Store?
Introduction
A well-designed checkout page can significantly improve your WooCommerce store’s conversion rate. While the default WooCommerce checkout works out of the box, it doesn’t always match your brand or provide the best shopping experience.
With the new WooCommerce Modules in Divi 5, you can visually build a fully customized checkout page without relying on shortcodes or custom PHP.
In this tutorial, we’ll show you how to build a clean two-column checkout page using Divi 5’s dedicated WooCommerce modules.
What We’ll Build
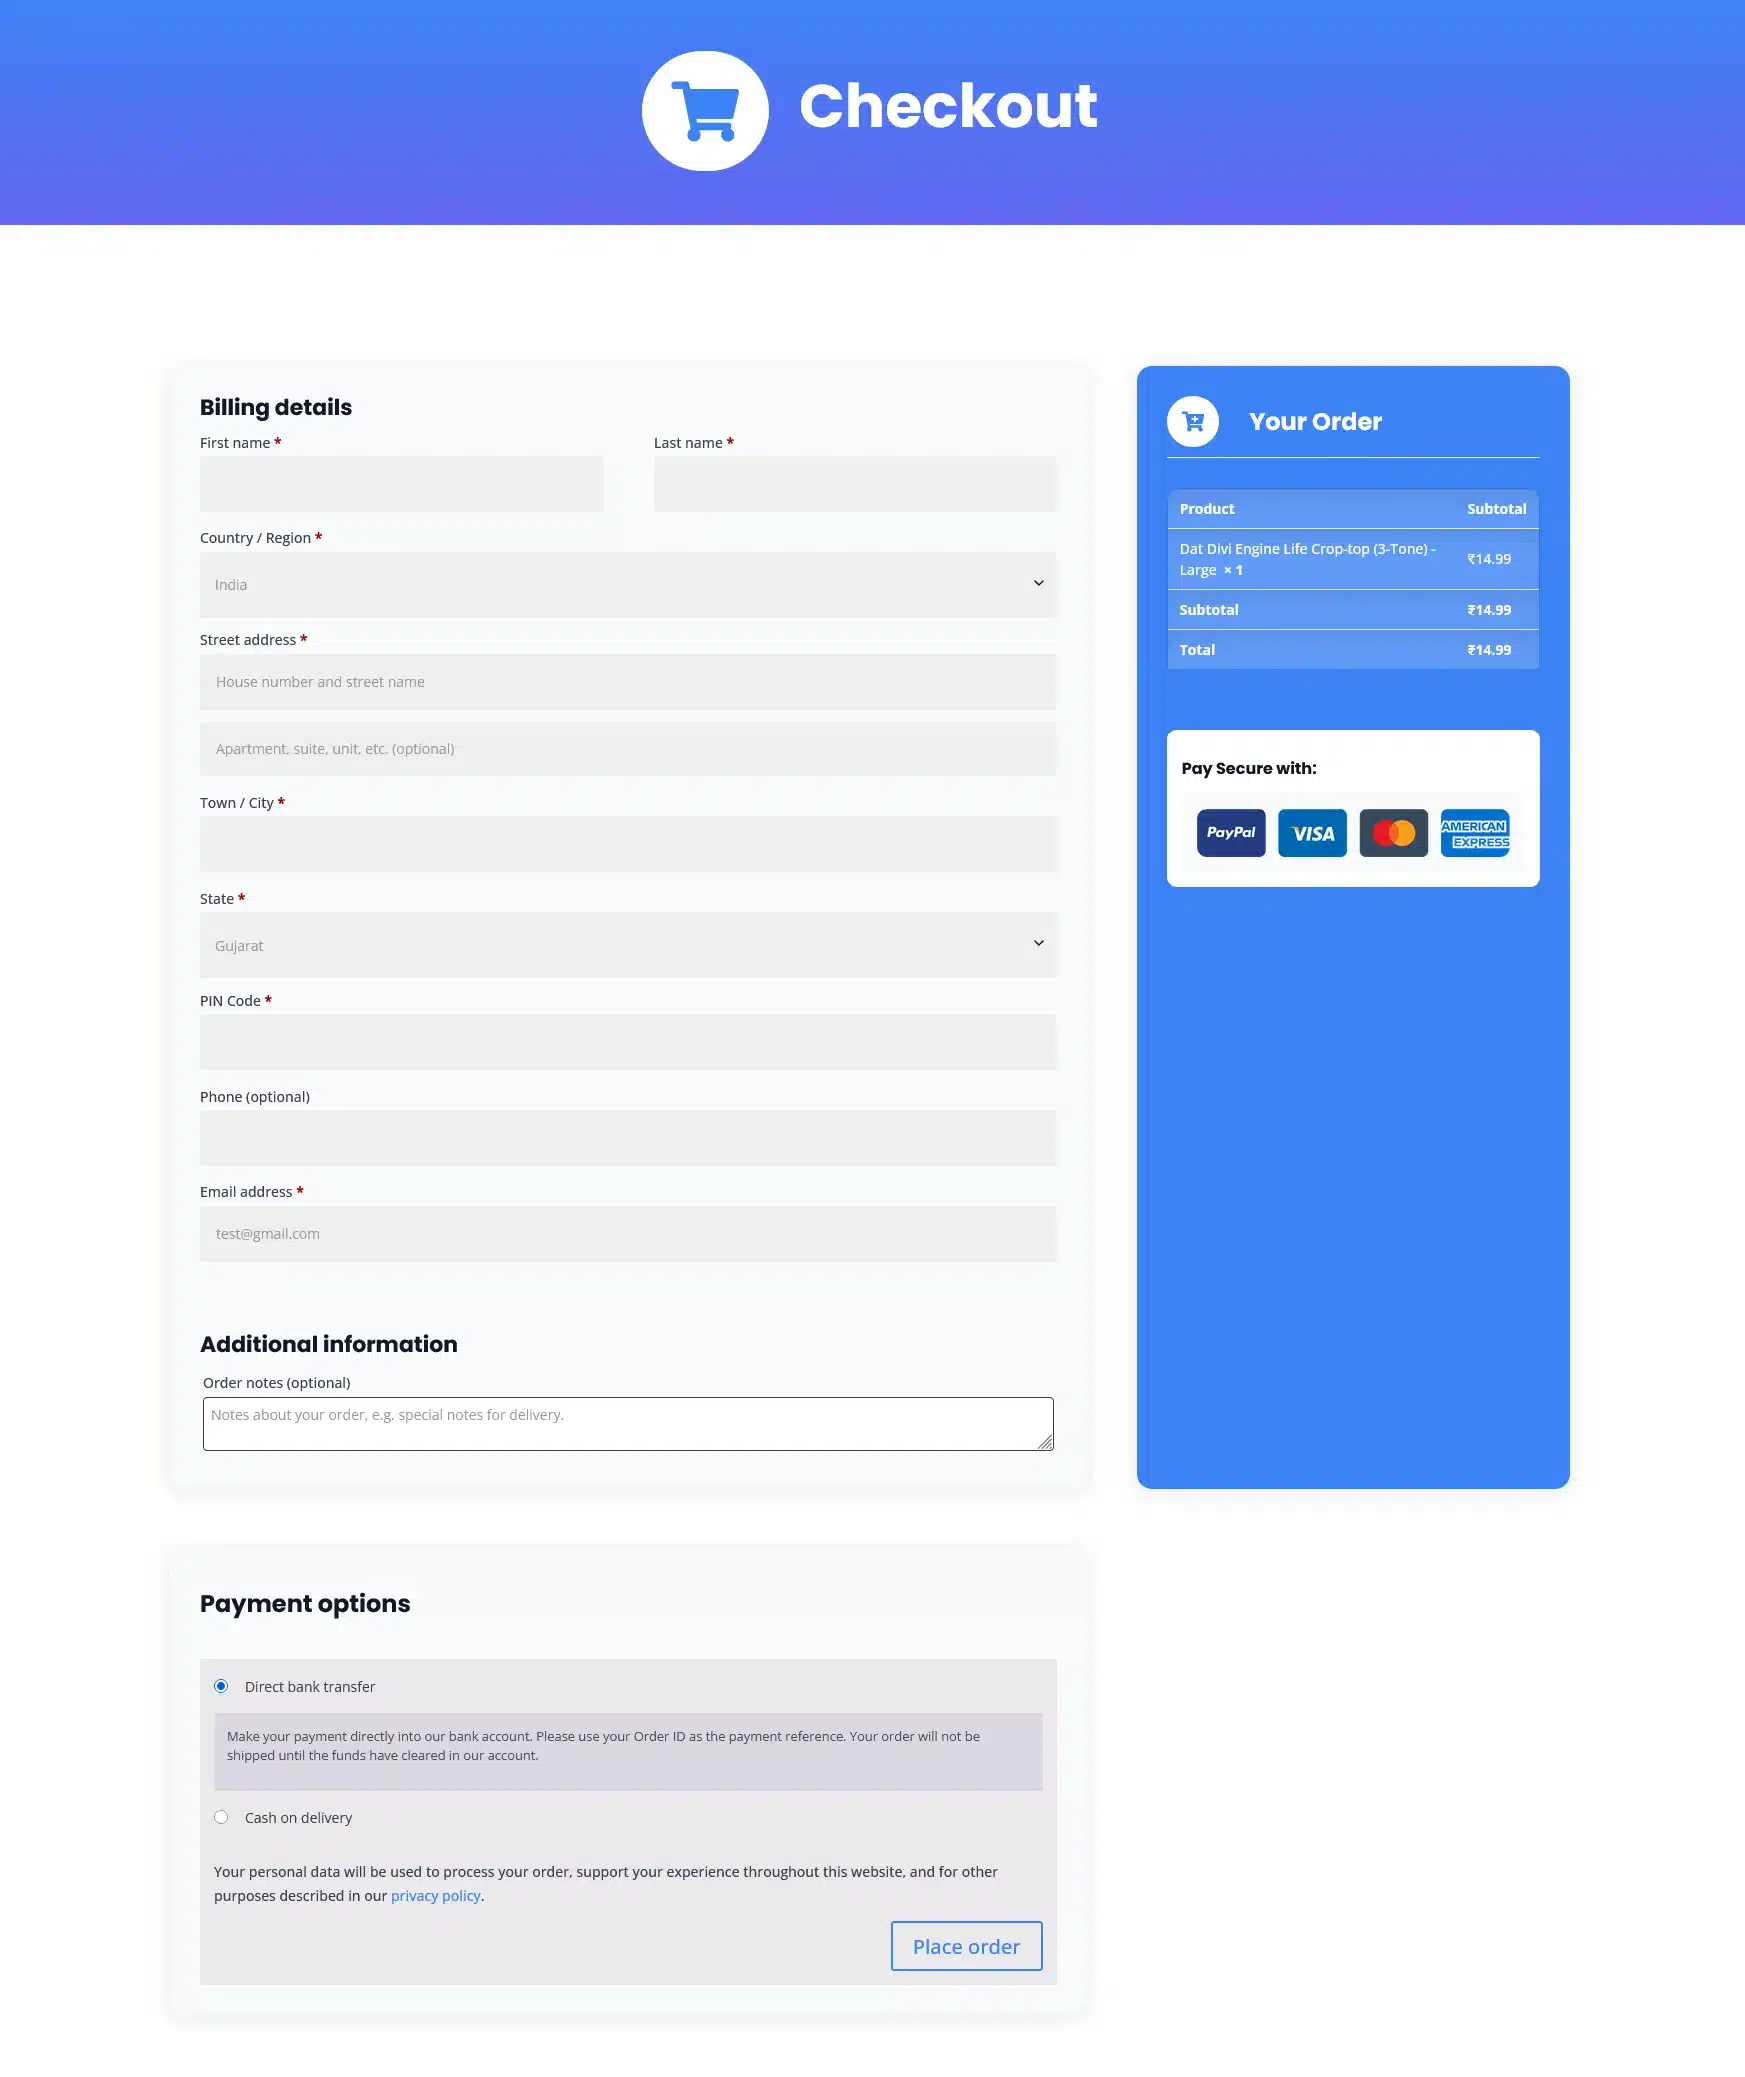
(Use your checkout layout image here.)
The checkout page we’ll create includes:
- Dynamic Page Title
- Woo Notice
- Billing Details
- Shipping Details
- Additional Information
- Order Summary
- Payment Section
Everything is built using Divi 5’s WooCommerce modules and can be customized visually.
WooCommerce Modules Available in Divi 5
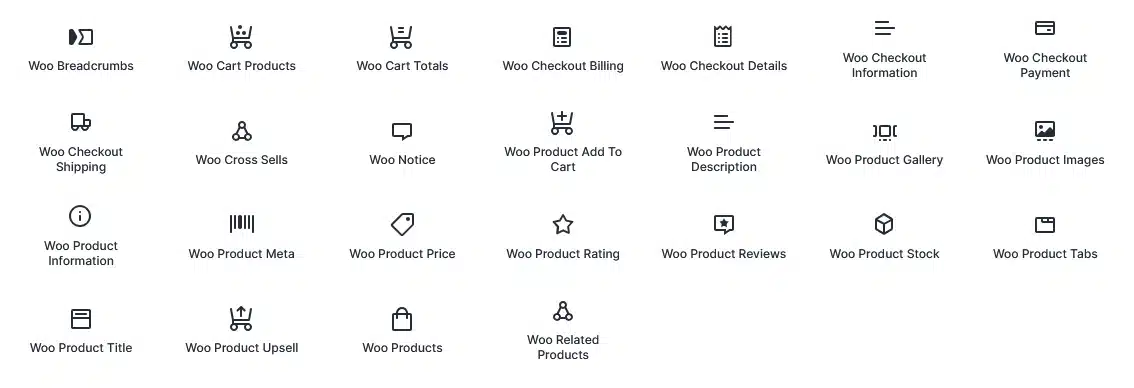
Divi 5 includes 25 WooCommerce modules, but only a handful are required for building a custom checkout page.
For this tutorial, we’ll use these checkout-specific modules:
- Woo Notice Displays coupon notices, login prompts, and checkout validation messages.
- Woo Checkout Billing Shows all billing information fields.
- Woo Checkout Shipping Displays shipping address fields.
- Woo Checkout Information Adds the Additional Information (Order Notes) section.
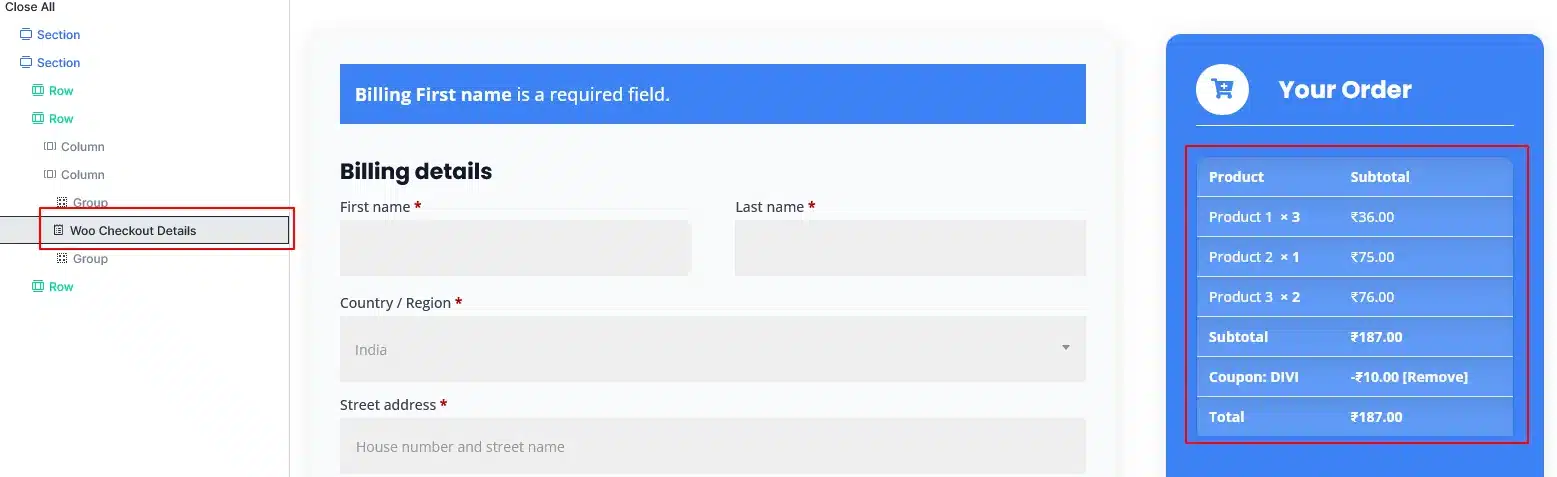
- Woo Checkout Details Displays the order summary including products, subtotal, shipping, taxes, and total.
- Woo Checkout Payment Displays payment gateways and the Place Order button.
These modules can be placed anywhere within your layout, giving you complete control over the checkout experience.
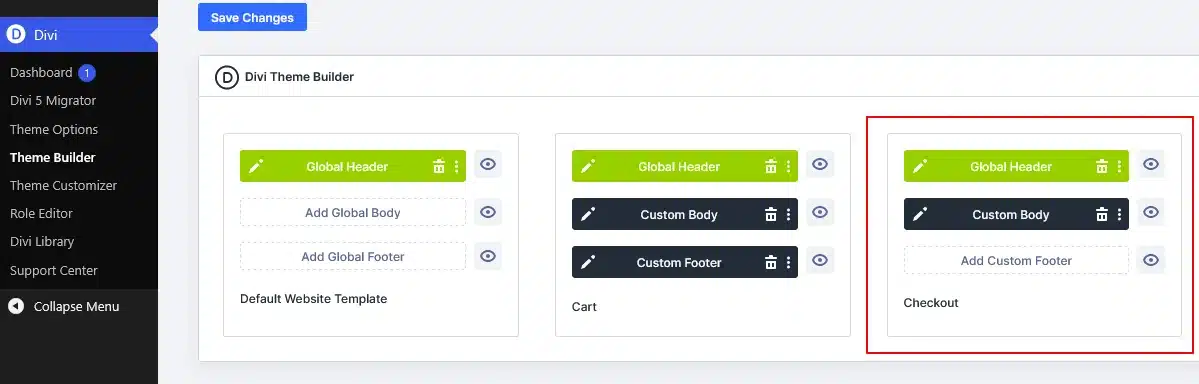
Step 1: Create a Checkout Template
Go to:
Divi → Theme Builder
Click
Add New Template
Choose
WooCommerce Pages
Select
Checkout
Click
Create Template
Now click
Add Custom Body
and launch the Visual Builder.
Step 2: Build the Basic Layout
Create:
- One Section
- One Fullwidth Row
Add a Heading Module.
Instead of typing a title manually, use Dynamic Content and select Post Title. This automatically displays the checkout page title.
Below the heading, add the Woo Notice module so customers can immediately see login messages, coupon notices, and checkout errors.
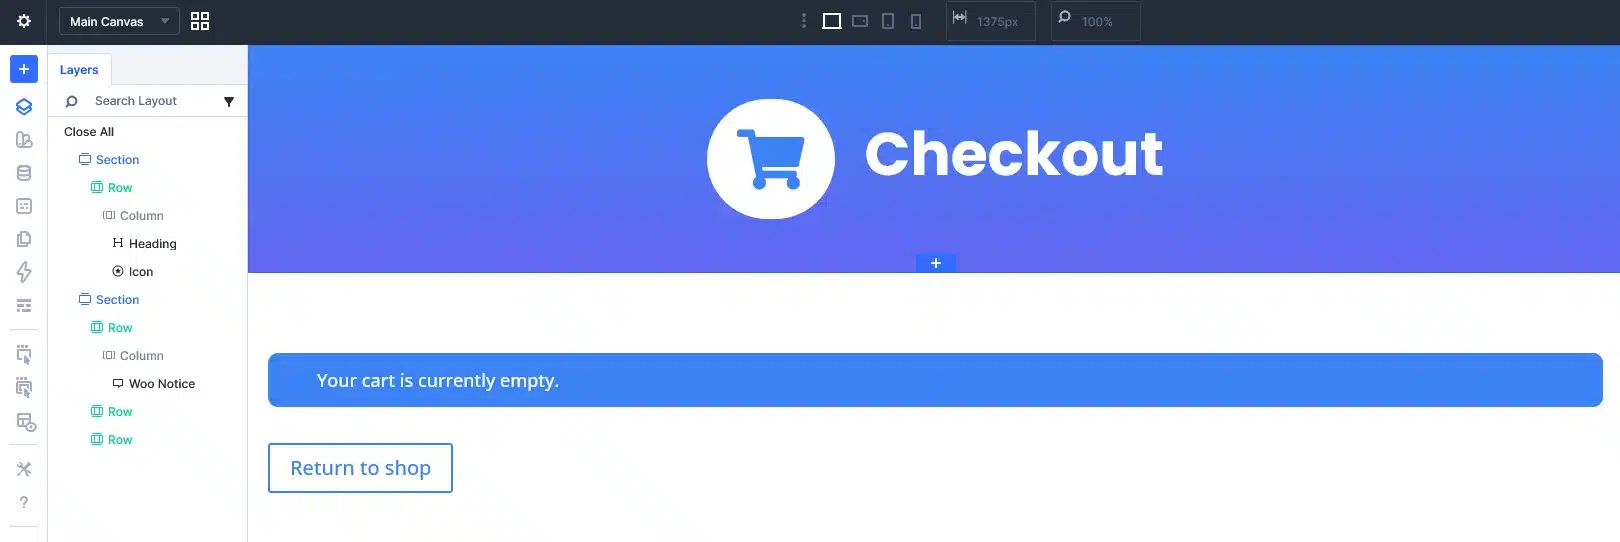
Step 3: Create the Two-Column Checkout Layout
Add a new row with two columns.
We recommend using:
Left Column: 60%
Right Column: 40%
The left side will contain customer information, while the right side will display the order summary and payment section.
This layout keeps the checkout organized and easy to scan.

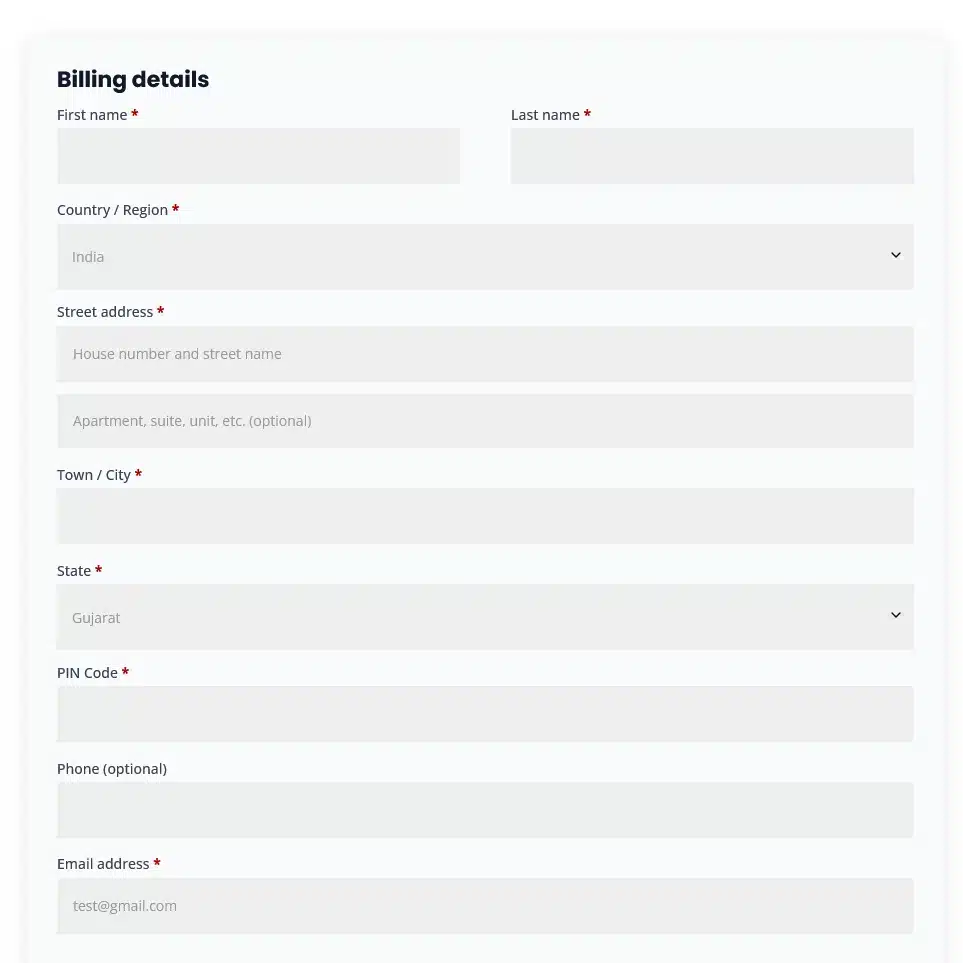
Step 4: Add the Billing Module
Inside the left column, insert the Woo Checkout Billing module.
This module automatically displays:
- First Name
- Last Name
- Company
- Country
- Street Address
- City
- State
- ZIP Code
- Phone
You can customize typography, colors, spacing, borders, and backgrounds using Divi’s design controls.
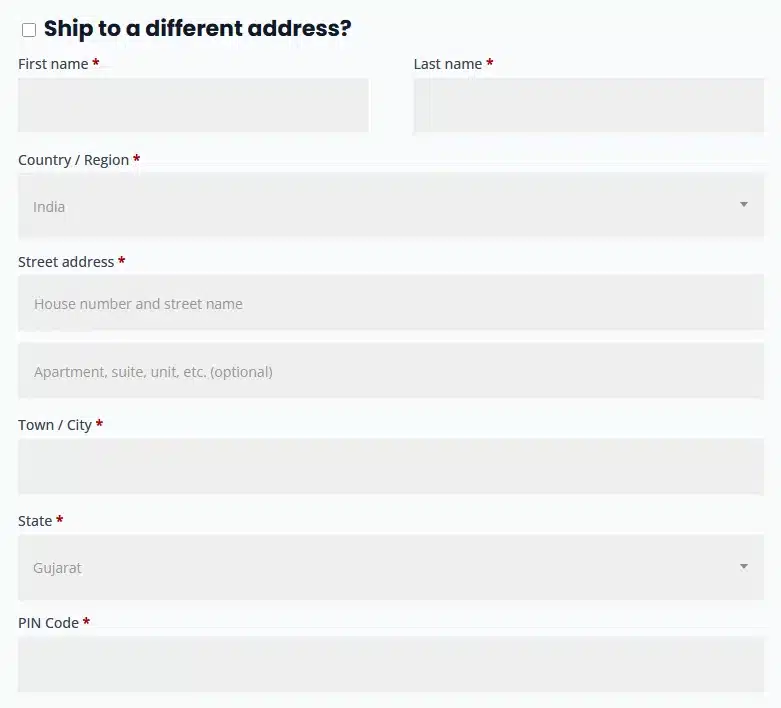
Step 5: Add the Shipping Module
Below the Billing module, add the Woo Checkout Shipping module.
If your store only sells digital products, you can simply omit this module.
For physical products, it allows customers to enter an alternative shipping address.
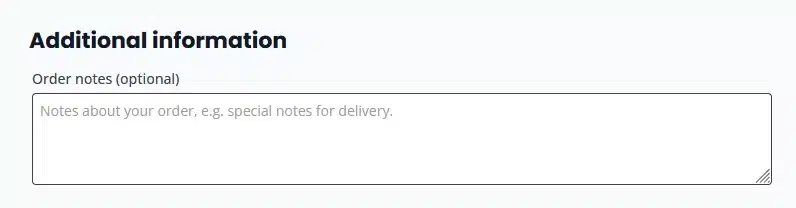
Step 6: Add Additional Information
Insert the Woo Checkout Information module.
This module contains the Order Notes field where customers can leave delivery instructions or additional comments.
Step 7: Add the Order Summary
Move to the right column.
Add the Woo Checkout Details module.
This module automatically displays:
- Products
- Quantity
- Coupon Discounts
- Shipping Charges
- Taxes
- Order Total
Because it’s dynamic, customers always see the latest cart information.
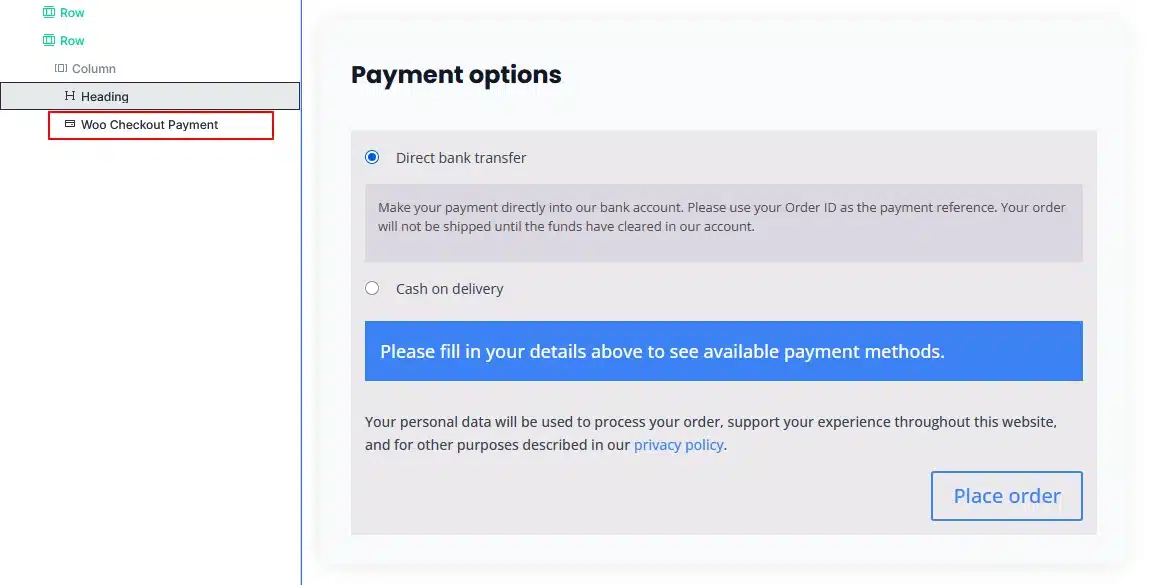
Step 8: Add the Payment Module
Below the order summary, insert the Woo Checkout Payment module.
This module displays:
- Available payment gateways
- Terms and Conditions
- Privacy Notice
- Place Order button
All active WooCommerce payment gateways are displayed automatically.
Step 9: Customize the Design Using Divi 5
This is where Divi 5 shines.
Every checkout module includes extensive design options, allowing you to customize:
Typography
- Headings
- Labels
- Input Text
Colors
- Buttons
- Backgrounds
- Borders
- Notices
Spacing
- Margins
- Padding
- Column Gaps
Borders & Effects
- Border Radius
- Box Shadow
- Hover Effects
Responsive Controls
Optimize your checkout separately for:
- Desktop
- Tablet
- Mobile
Since every module is independent, you have complete creative freedom without touching any code.
Step 10: Test Your Checkout Page
Before publishing, place a test order and verify:
- Login functionality
- Coupon application
- Shipping calculations
- Taxes
- Payment gateways
- Order confirmation emails
- Mobile responsiveness
A fully tested checkout ensures a smooth shopping experience for your customers.
Why Use Divi 5 WooCommerce Modules?
Instead of relying on WooCommerce’s default checkout template, Divi 5 lets you create a checkout page that perfectly matches your website’s branding.
Benefits include:
- No coding required
- Fully visual builder
- Responsive editing
- Flexible layouts
- Individual module styling
- Better user experience
- Improved conversion potential
Final Thoughts
Divi 5’s dedicated WooCommerce checkout modules make it easier than ever to design a professional, branded checkout page. By combining modules like Woo Notice, Billing, Shipping, Checkout Details, and Payment, you can create a streamlined checkout experience that looks great on every device and helps customers complete their purchases with confidence.
Want a Faster, Conversion-Focused WooCommerce Store?
A well-designed checkout page can significantly improve the shopping experience and help reduce cart abandonment. If you’re looking to build a custom WooCommerce website, optimize your checkout flow, or develop advanced functionality tailored to your business, our team is here to help.
From custom WordPress development to scalable eCommerce solutions, we create websites that are built for performance, security, and long-term growth.
Explore our WordPress Development Services