Table of Contents
- What We Will Build
- Step 1: Create an Events Custom Post Type
- Step 2: Add Your Events
- Step 3: Create the Upcoming Events Query
- Step 4: Add the Upcoming Events Meta Query
- Step 5: Create the Past Events Query
- Step 6: Add the Past Events Meta Query
- Step 7: Create an Elementor Loop
- Step 8: Create the Events Archive Template
- Step 9: Add the Upcoming Events Section & Connect Query
- Step 10: Add the Past Events Section & Connect Query
- How the Automatic Sorting Works
- The Complete Setup
- Why This Setup Is Useful
- Important Note About the Date Logic
- Final Result
Managing events manually can be time-consuming. Instead of moving events between Upcoming Events and Past Events manually, you can create a dynamic events page that does it automatically based on the event date.
In this tutorial, we will create an Events archive using JetEngine, Crocoblock, and Elementor.
Once the setup is complete:
Future events → Upcoming Events
Finished events → Past Events
Let’s see how to build it.
What We Will Build
Our final events page will have two sections:
Upcoming Events
This section will show events that are still upcoming.
Past Events
This section will show events whose date has already passed.
The important part is that we don’t need to move events manually. JetEngine Query Builder will check the event dates and display them in the correct section automatically.
Step 1: Create an Events Custom Post Type
First, we need a separate post type for our events.
Go to:
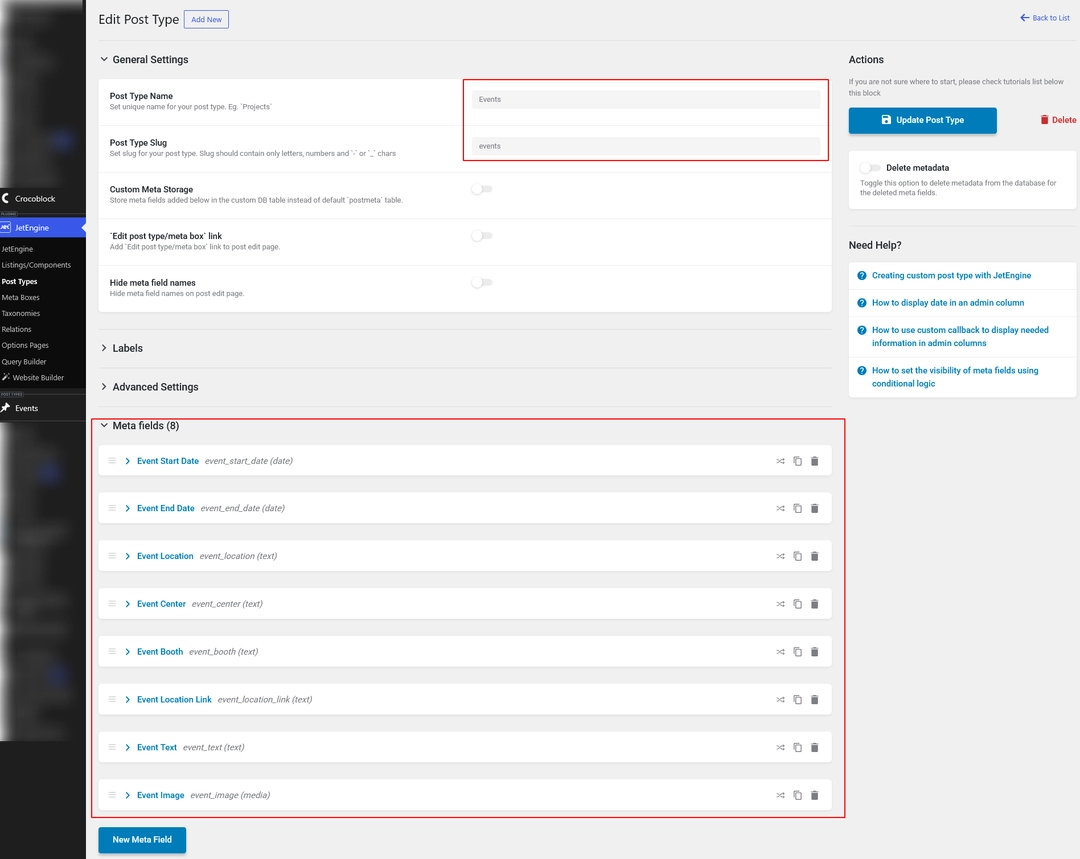
WordPress Dashboard → JetEngine → Post Types → Add New
Create a new Custom Post Type with:
Post Type Name: Events
Post Type Slug: events
You can keep the other settings as needed for your website.
After creating the post type, you will see Events in the WordPress dashboard.
Add Event Meta Fields
Now we need fields to store the event information.
For this setup, we created these meta fields:
| Meta Field | Field Key | Type |
|---|---|---|
| Event Start Date | event_start_date | Date |
| Event End Date | event_end_date | Date |
| Event Location | event_location | Text |
| Event Center | event_center | Text |
| Event Booth | event_booth | Text |
| Event Location Link | event_location_link | Text |
| Event Text | event_text | Text |
| Event Image | event_image | Media |
The two most important fields for the automatic event sorting are:
- event_start_date
- event_end_date
These dates will be used by our queries.
Tip: Use clear and unique field keys because we will need these keys later when creating the queries.
Step 2: Add Your Events
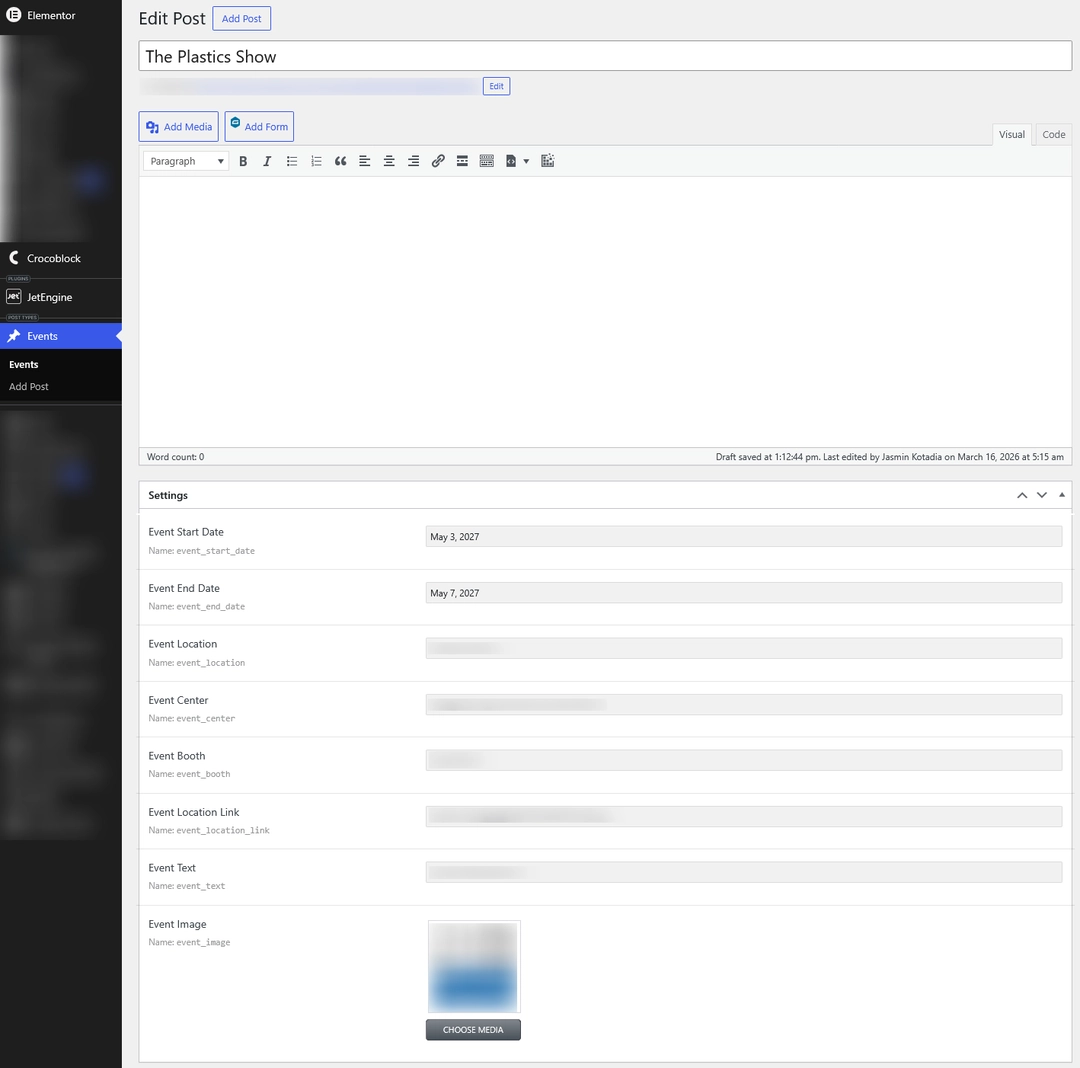
After creating the Events post type, go to:
WordPress Dashboard → Events → Add New
Add your event information.
For example:
Title: The Plastics Show
Event Start Date: May 3, 2027
Event End Date: May 7, 2027
Then add:
- Event Location
- Event Center
- Booth
- Location Link
- Event Text
- Event Image
Publish the event.
You can create as many events as you need.
The important thing is to enter the correct start and end dates.
Step 3: Create the Upcoming Events Query
Now we need to tell JetEngine which events should appear in the Upcoming Events section.
Go to:
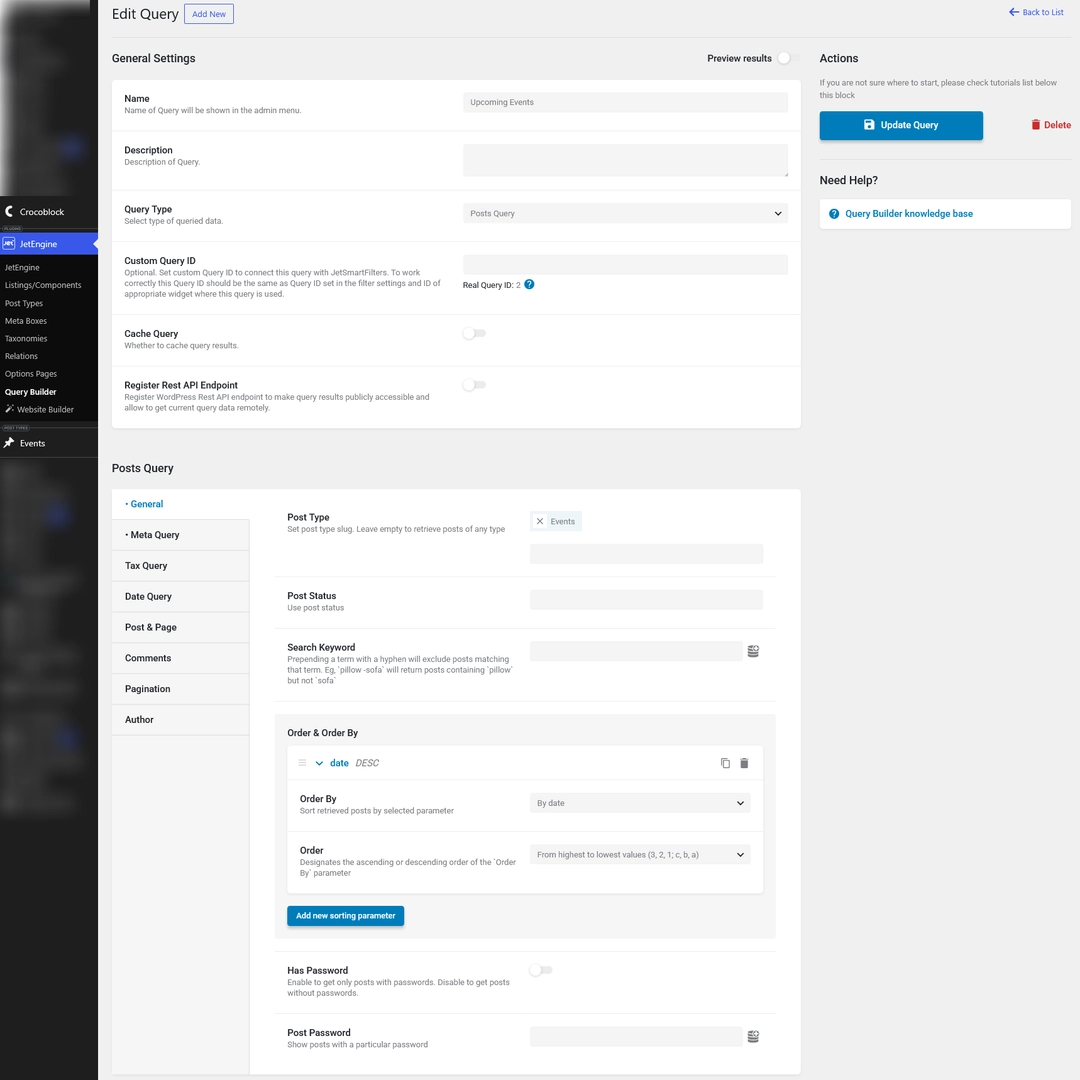
JetEngine → Query Builder → Add New
Set:
Query Name: Upcoming Events
Query Type: Posts Query
Select:
Post Type → Events
Your query will be used to find events whose date is still in the future.
Step 4: Add the Upcoming Events Meta Query
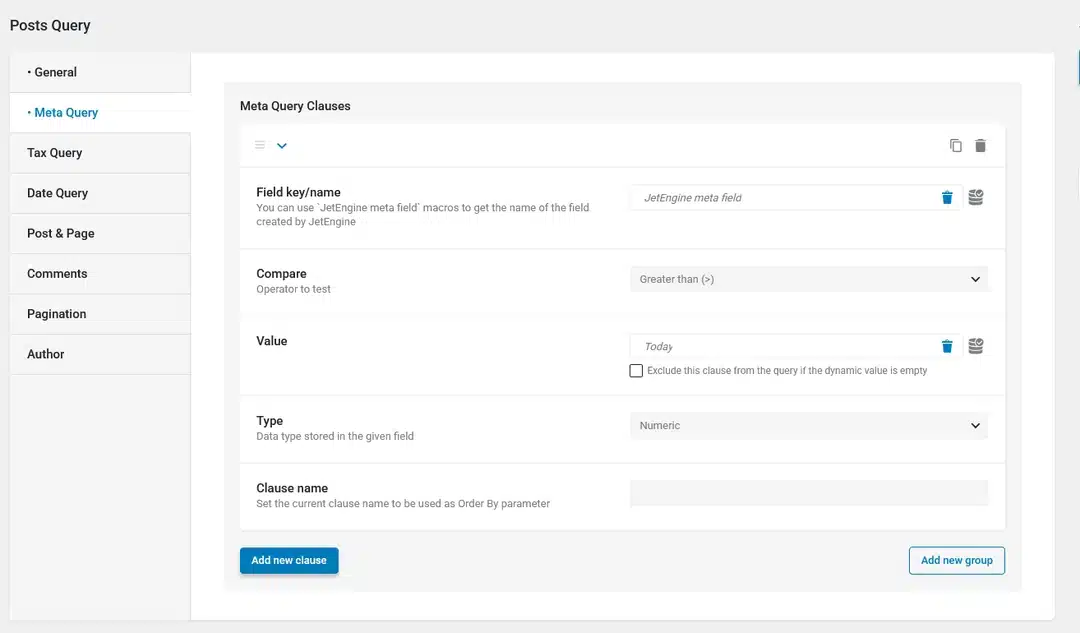
Inside the Posts Query settings, open:
Meta Query
Click Add Clause.
Set the meta query like this:
| Setting | Value |
|---|---|
| Field key/name | event_start_date |
| Compare | Greater than (>) |
| Value | Today |
| Type | Numeric |
So the logic is:
Event Start Date > Today
This tells JetEngine:
Show events whose start date is after today.
Sort the Upcoming Events
Now go back to the General section.
Under Order & Order By, use:
Order By: Date
Order: Descending
This controls the order in which the events are displayed.
Click:
Update Query
Your Upcoming Events query is now ready.
Step 5: Create the Past Events Query
Now we need another query for events that have already finished.
Go to:
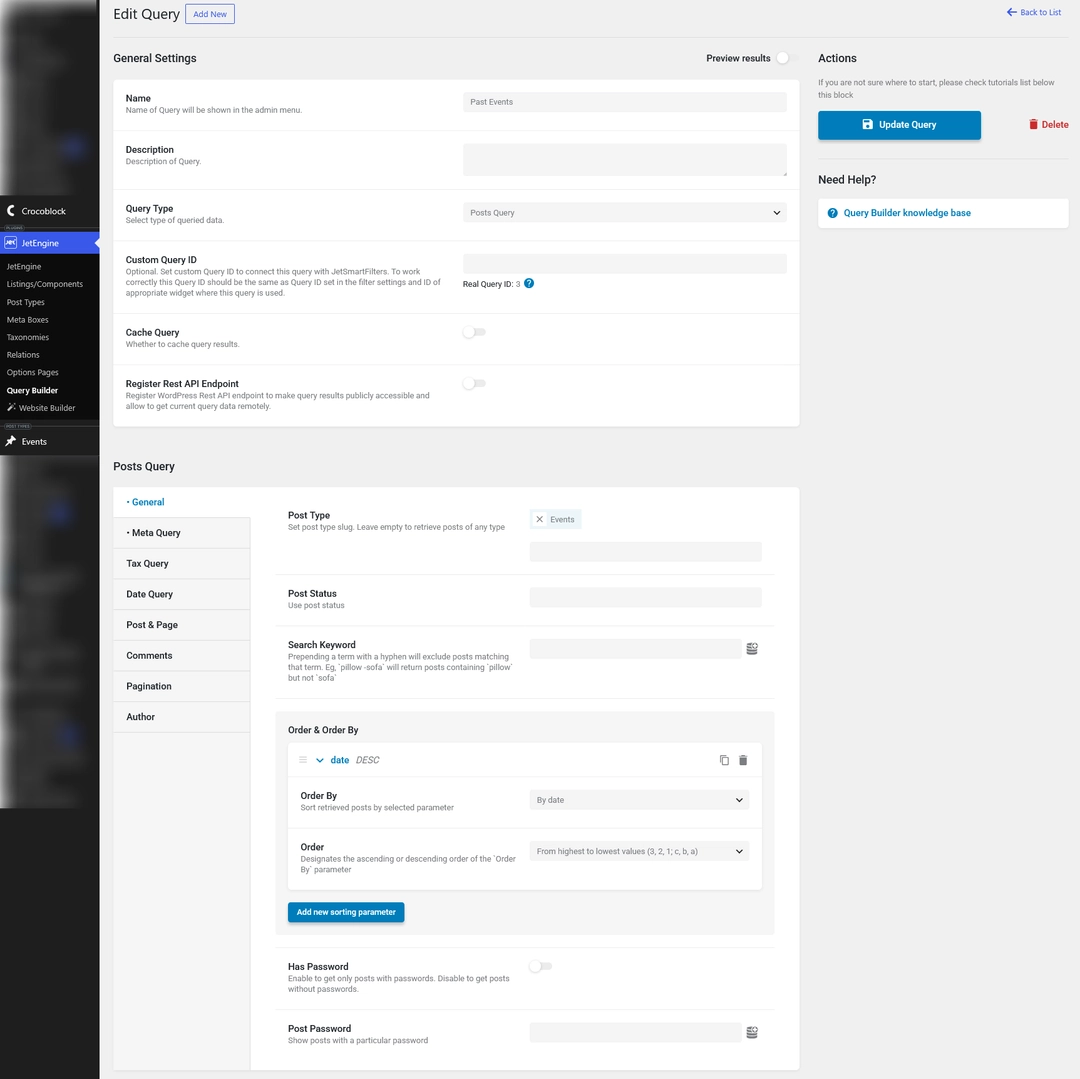
JetEngine → Query Builder → Add New
Set:
Query Name: Past Events
Query Type: Posts Query
Select:
Post Type → Events
Step 6: Add the Past Events Meta Query
Open:
Posts Query → Meta Query
Click Add Clause.
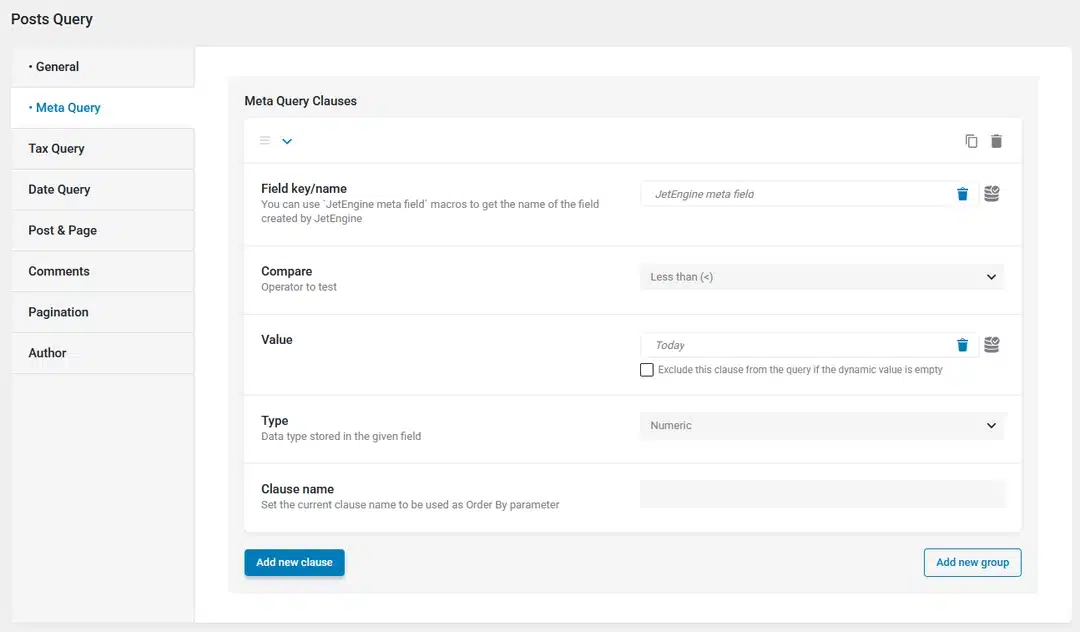
For the Past Events query, use the event’s End Date.
Set:
| Setting | Value |
|---|---|
| Field key/name | event_end_date |
| Compare | Less than (<) |
| Value | Today |
| Type | Numeric |
The logic is:
Event End Date < Today
This tells JetEngine:
Show events whose end date has already passed.
This is what makes the event automatically move into the Past Events section.
Sort the Past Events
Under Order & Order By, use:
Order By: Date
Order: Descending
Then click:
Update Query
Now you have two queries:
- Upcoming Events
- Past Events
You can see both queries in:
JetEngine → Query Builder
Step 7: Create an Elementor Loop
Now we need to design how each event will look.
Go to:
Elementor → Loop Grid / Loop Item
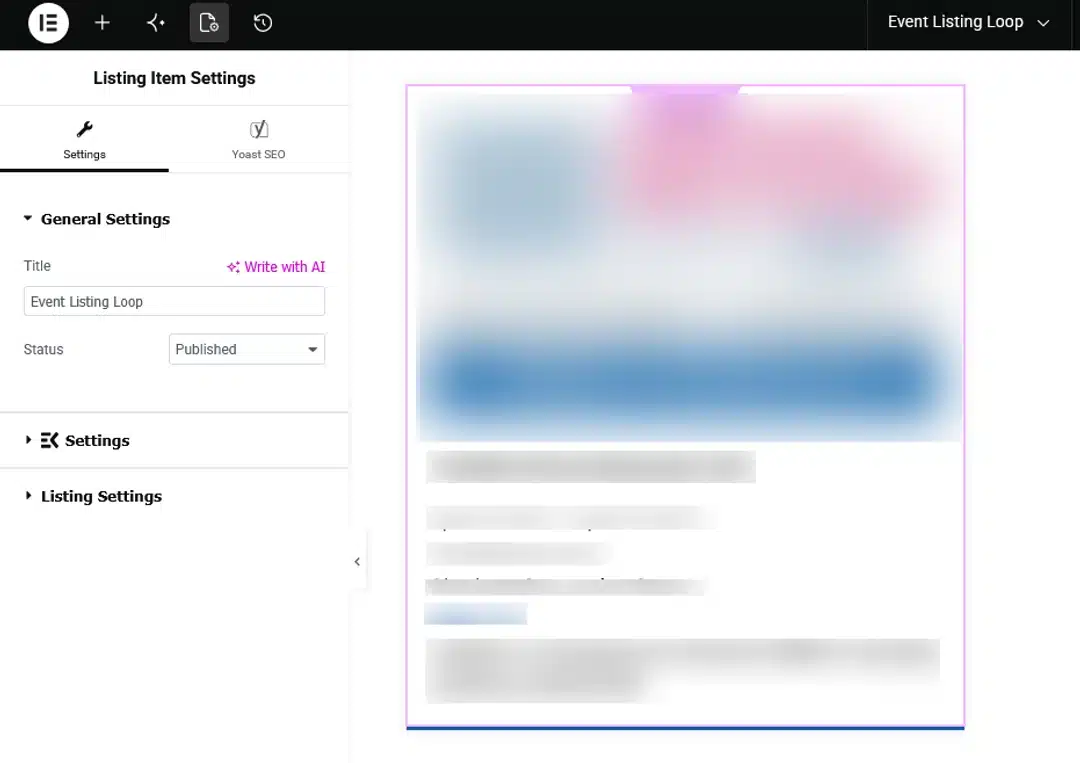
Create a new Loop Item for your Events post type.
Inside the loop, add the information you want to display.
For example:
Event Image
Use the Event Image meta field as the dynamic image.
Event Title
Use the post title dynamically.
Event Date
Display:
- Event Start Date
- Event End Date
Event Location
Display the Event Location meta field.
Event Center
Display the Event Center meta field.
Booth
Display the Event Booth meta field.
Event Text
Display the Event Text meta field.
You can style the loop card according to your website design.
The main benefit of using a Loop is that you only design the event card once.
Every event will automatically use the same layout.
Step 8: Create the Events Archive Template
Now we need to create the actual Events page.
Go to:
Elementor → Theme Builder → Archive
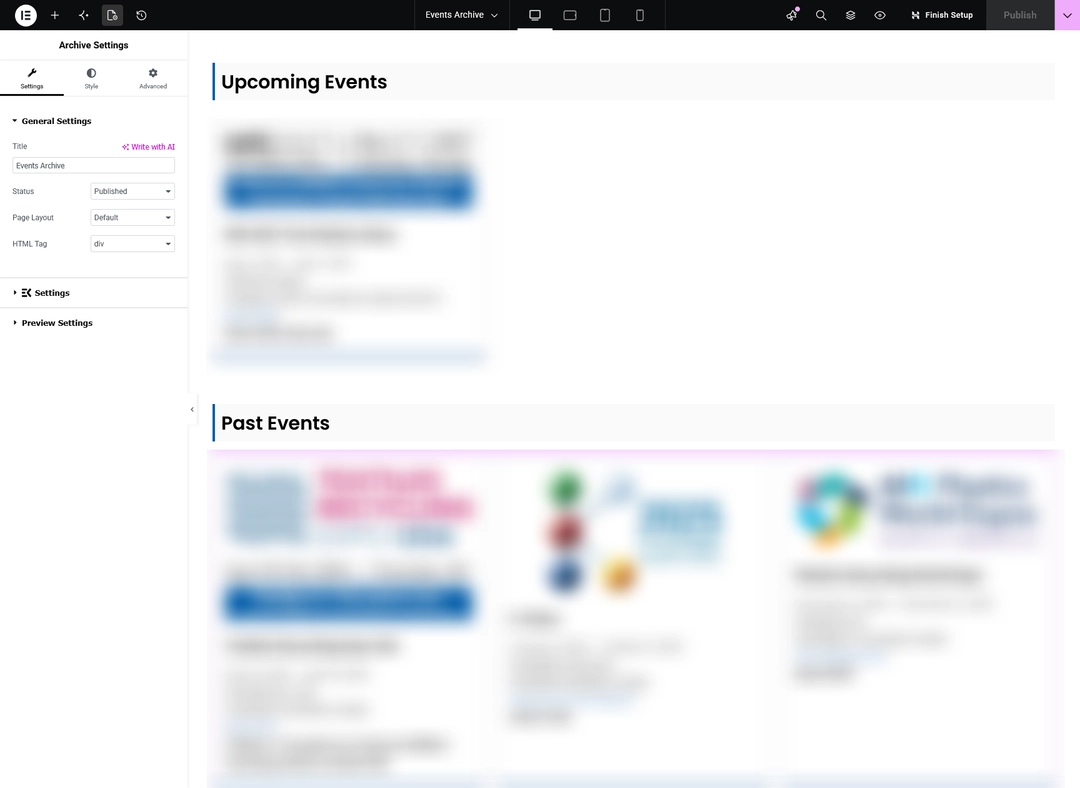
Create a new Events Archive template.
You can add your normal page elements such as:
- Page heading
- Intro text
- Upcoming Events section
- Past Events section
For example:
Upcoming Events
Add a Listing Grid widget below the heading.
Then select your Event Loop Item.
Step 9: Add the Upcoming Events Section & Connect Query
This is an important step.
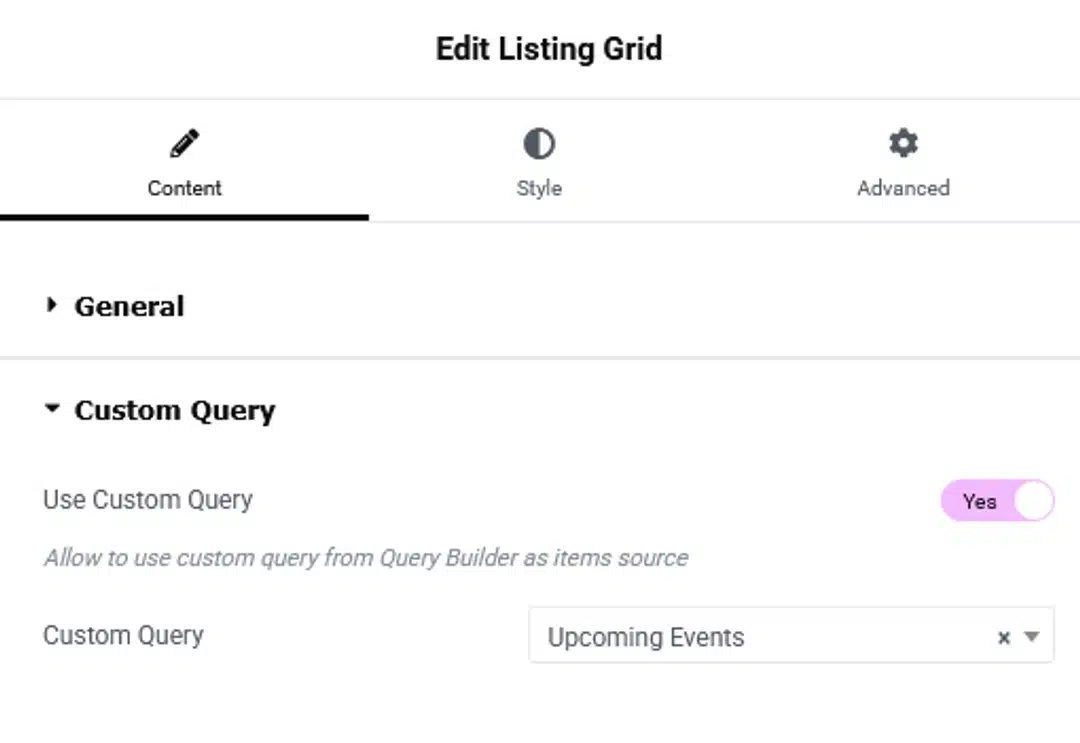
Select the Listing Grid used for Upcoming Events.
Go to:
Content → Custom Query
Enable:
Use Custom Query → Yes
Then select:
Custom Query → Upcoming Events
Now this Listing Grid will use the query we created earlier.
It will only display events that match the Upcoming Events query.
Step 10: Add the Past Events Section & Connect Query
Below the Upcoming Events section, create another heading:
Past Events
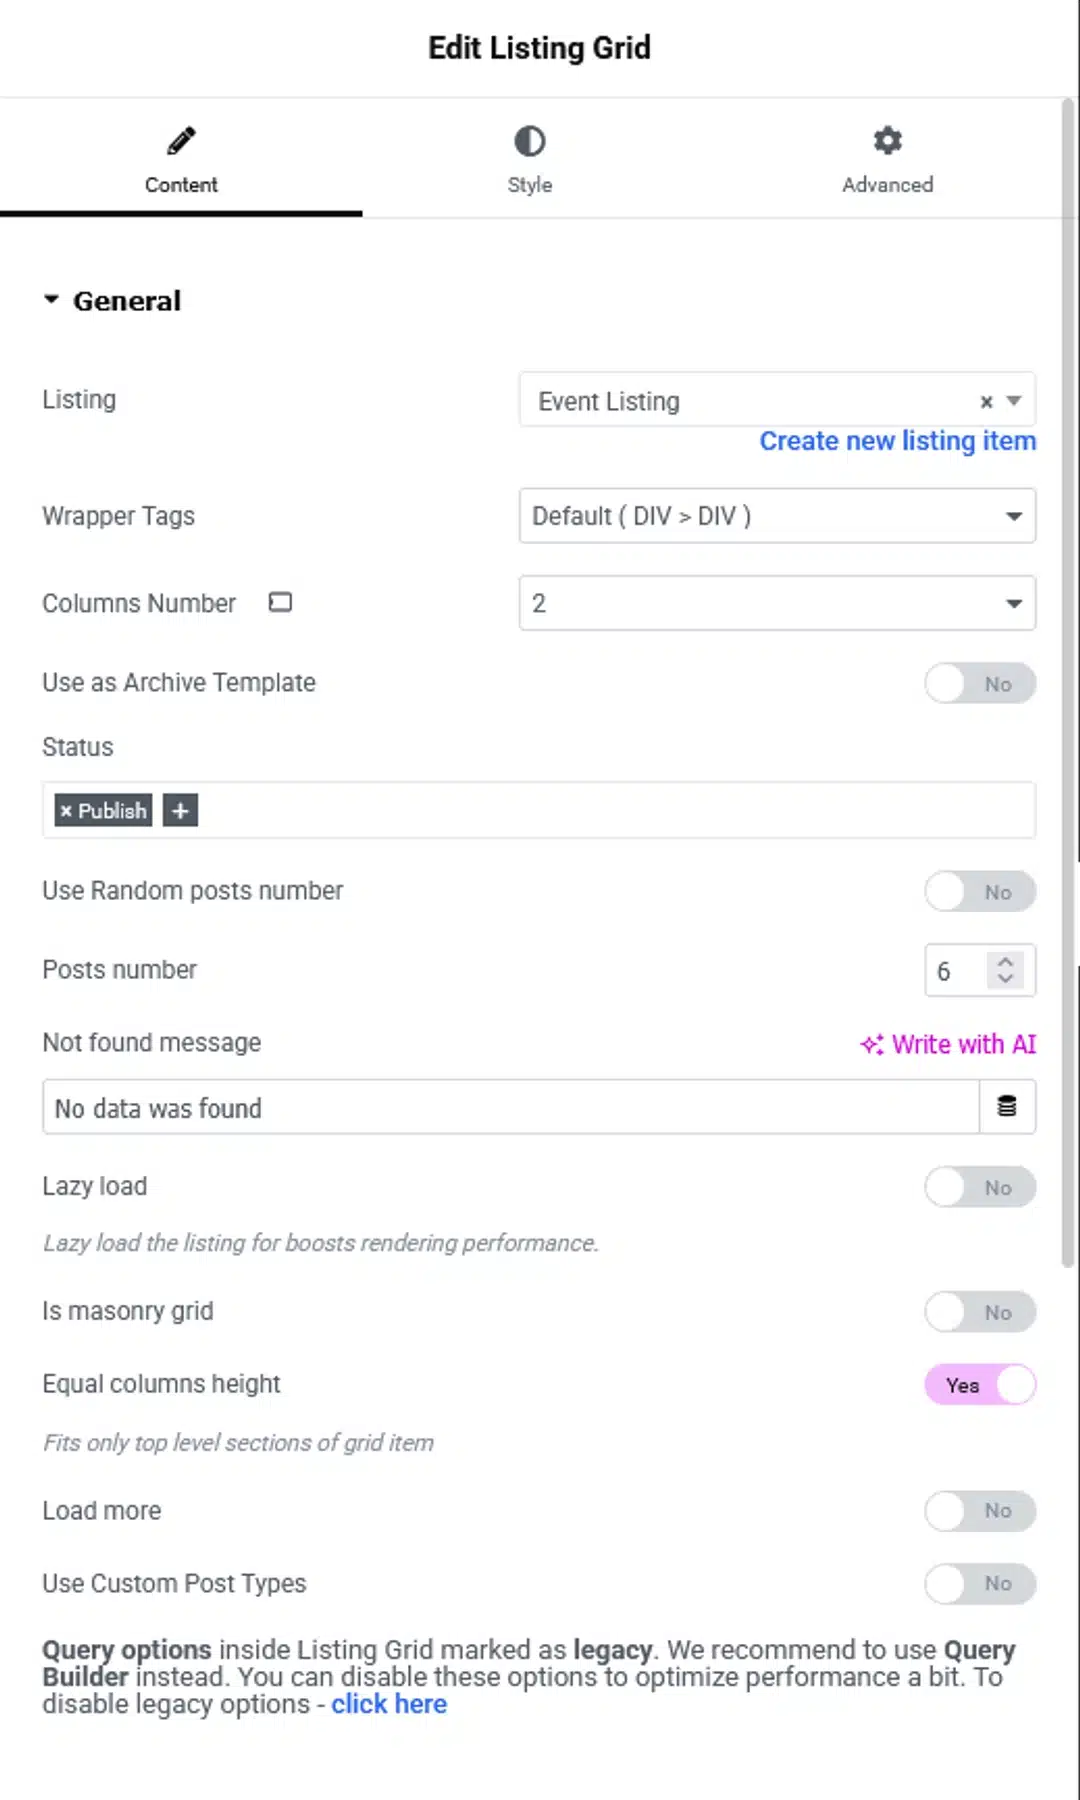
Add another Listing Grid.
Select the same Event Loop Item.
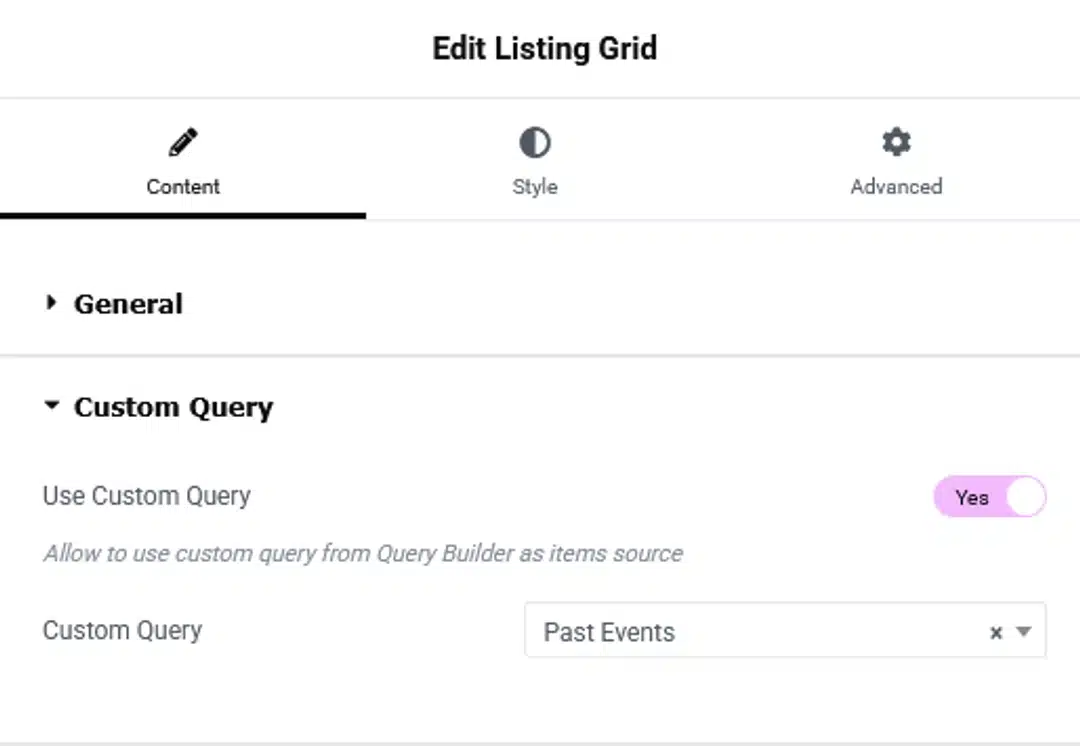
Then go to:
Content → Custom Query
Enable:
Use Custom Query → Yes
This time select:
Custom Query → Past Events
Now this Listing Grid will display only events that match the Past Events query.
This means we can use the same loop design for both sections.
How the Automatic Sorting Works
Now the complete system works like this:
Example
Suppose today is:
September 7, 2026
And you have an event:
Event Start Date: September 20, 2026
Event End Date: September 22, 2026
Because the event is still in the future:
Upcoming Events → Event is displayed
After September 22 passes:
Event End Date < Today
The Past Events query now matches the event.
So the event automatically appears under:
Past Events
You don’t need to edit the event or move it manually.
The Complete Setup
Your final setup looks like this:
JetEngine

│

├── Events Post Type

│   ├── Event Start Date

│   ├── Event End Date

│   ├── Event Location

│   ├── Event Text

│   └── Event Image

│

└── Query Builder

│

├── Upcoming Events

│   └── Event Start Date > Today

│

└── Past Events

└── Event End Date < Today

Then in Elementor:

Events Archive

│

├── Upcoming Events

│   └── Listing Grid

│       └── Custom Query → Upcoming Events

│

└── Past Events

└── Listing Grid

└── Custom Query → Past Events

________________________________________
Why This Setup Is Useful
With this dynamic setup, you don’t have to manually manage your events page.
When you add a new event:
Add Event → Enter Dates → Publish
JetEngine handles the rest.
When the event date passes, it automatically moves from:
Upcoming Events → Past Events
This keeps your Events page organized and saves time when managing a large number of events.
Important Note About the Date Logic
In this setup, we are using:
Upcoming: event_start_date > Today
Past: event_end_date < Today
This works well for events that have clearly defined start and end dates.
If you want an event that is currently happening to remain in Upcoming Events until its end date, the Upcoming query should instead be based on the Event End Date. For example:
Event End Date >= Today
That is slightly better for multi-day events.
Final Result
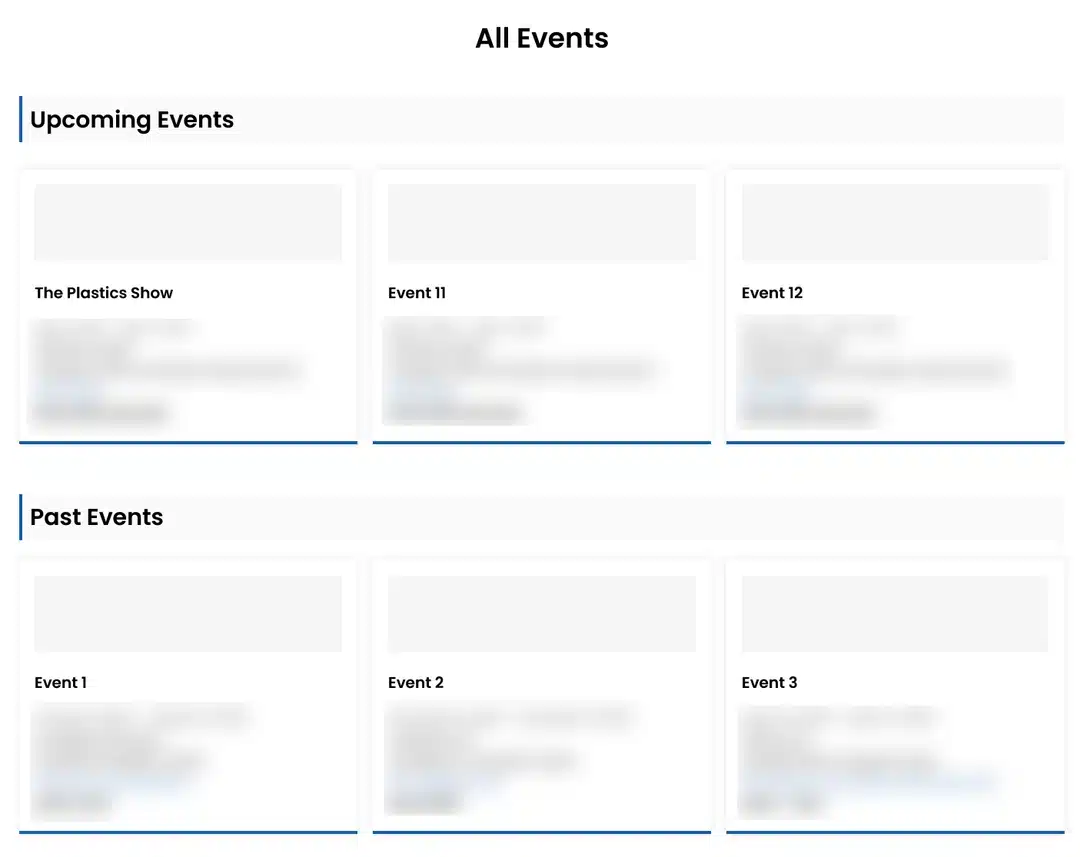
Once everything is configured, your Events page will automatically organize events into two sections:
Upcoming Events
Future events are displayed here automatically.
Past Events
Once an event’s end date has passed, it automatically appears here.
No manual sorting. No duplicate event entries. Just add the event and its dates.