
Table of Contents
- What Is a Clickable Image Map?
- Important: Upload the Image to WordPress
- How the Image Map Works
- SVG vs JPG, PNG & WebP Image Maps
- Make Your Image Map Responsive
- Tips for Creating Clickable Image Maps
- Final Thoughts
- Frequently Asked Questions
Want to make different parts of a single image clickable?
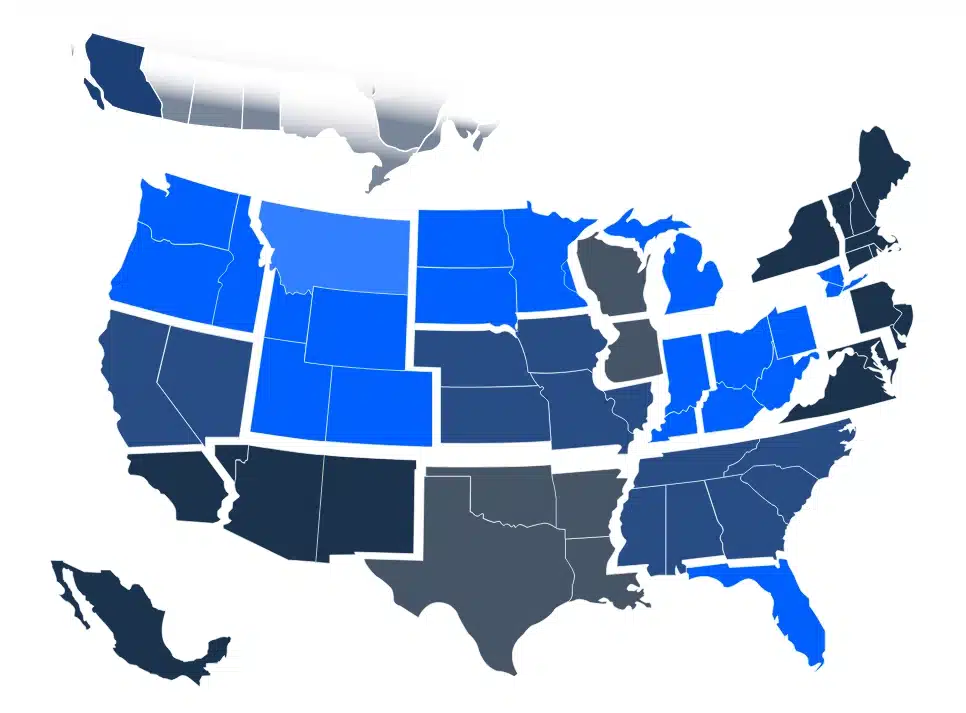
For example, you may have a USA map where each state should link to a different page, a product diagram with clickable sections, or a floor plan where each room links to its own page.
Instead of using multiple images or placing separate buttons over the image, you can create an image map.
An image map allows you to make specific areas of one image clickable and assign a different link to each area.
In this guide, we’ll show you two easy ways to create clickable image maps in WordPress:
- SVG images: Add links directly to the SVG code.
- JPG, PNG, or WebP images: Use an online image map generator to create the clickable areas automatically.
What Is a Clickable Image Map?
A clickable image map is an image where different areas can have different links.
For example, imagine a map of the United States:
- California → California page
- Texas → Texas page
- Florida → Florida page
- New York → New York page
All of these links can be placed on one image.
HTML image maps use <map> and <area> elements to define the clickable areas.
This can be useful for:
- Interactive maps
- Location finders
- Product diagrams
- Floor plans
- Infographics
- Service area maps
- Interactive illustrations
- Product images
Method 1: Create a Clickable SVG Image
If you already have an SVG map or illustration, you can make individual parts clickable by adding <a> tags directly inside the SVG code.
This is especially useful when your SVG contains separate paths for different areas.
For example, if your SVG contains a path for a particular state, you can wrap that path inside an anchor tag:
<a href="/locations/texas/">
    <path d="..."></path>
</a>
Now that specific SVG area becomes clickable.
You can repeat the same process for other areas:
<a href="/locations/texas/">
    <path d="..."></path>
</a>

<a href="/locations/florida/">
    <path d="..."></path>
</a>

<a href="/locations/california/">
    <path d="..."></path>
</a>
Add the SVG to Your WordPress Page
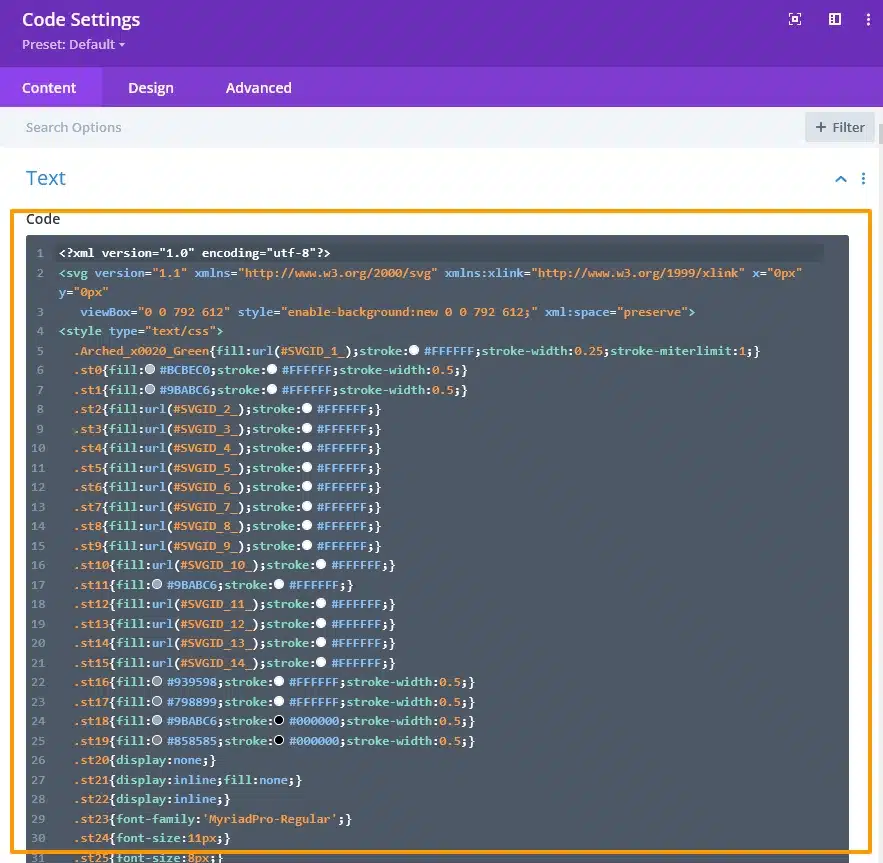
Once you’ve added your links to the SVG code, you can place the SVG directly into a Divi Code Module.
In Divi:
Visual Builder → Add Code Module → Paste SVG Code
Then save the module and check the page.
Each linked SVG area can now take visitors to a different page.
Add Hover Effects to Your SVG
One of the advantages of using SVG is that you can also add hover effects with CSS.
For example:
.map-area {
    transition: 0.3s ease;
}
.map-area:hover {
    opacity: 0.7;
}
You can also change the fill color:
.map-area:hover {
    fill: #333333;
}
This allows you to create effects such as:
- Color changes
- Opacity changes
- Smooth transitions
- Highlighted states
- Interactive map effects
For example, your SVG could use a class:
<a href="/locations/texas/" class="map-area">
    <path d="..."></path>
</a>
Then your CSS can target .map-area.
Tip: SVG is a great option when you want more control over the appearance and hover effects of individual areas.
Method 2: Create an Image Map for JPG, PNG or WebP
If your image is a JPG, PNG, or WebP, you don’t need to manually create the coordinates yourself.
Instead, use an online image map generator.
For this example, we’ll use Image-Map.net, a free online image map generator that lets you upload an image, draw clickable areas, add links, and generate the required HTML code.
For this example, you can use either of these tools:
Map My Img: https://map-my-img.com/ — Recommended for responsive image maps.
Image-Map.net: https://www.image-map.net/ — Another free image map generator for creating clickable image areas.
Step 1: Open the Image Map Generator
Open a free online image map generator such as Image-Map.net.
You don’t need to manually calculate or write image-map coordinates. The tool lets you visually select the clickable areas directly on your image.
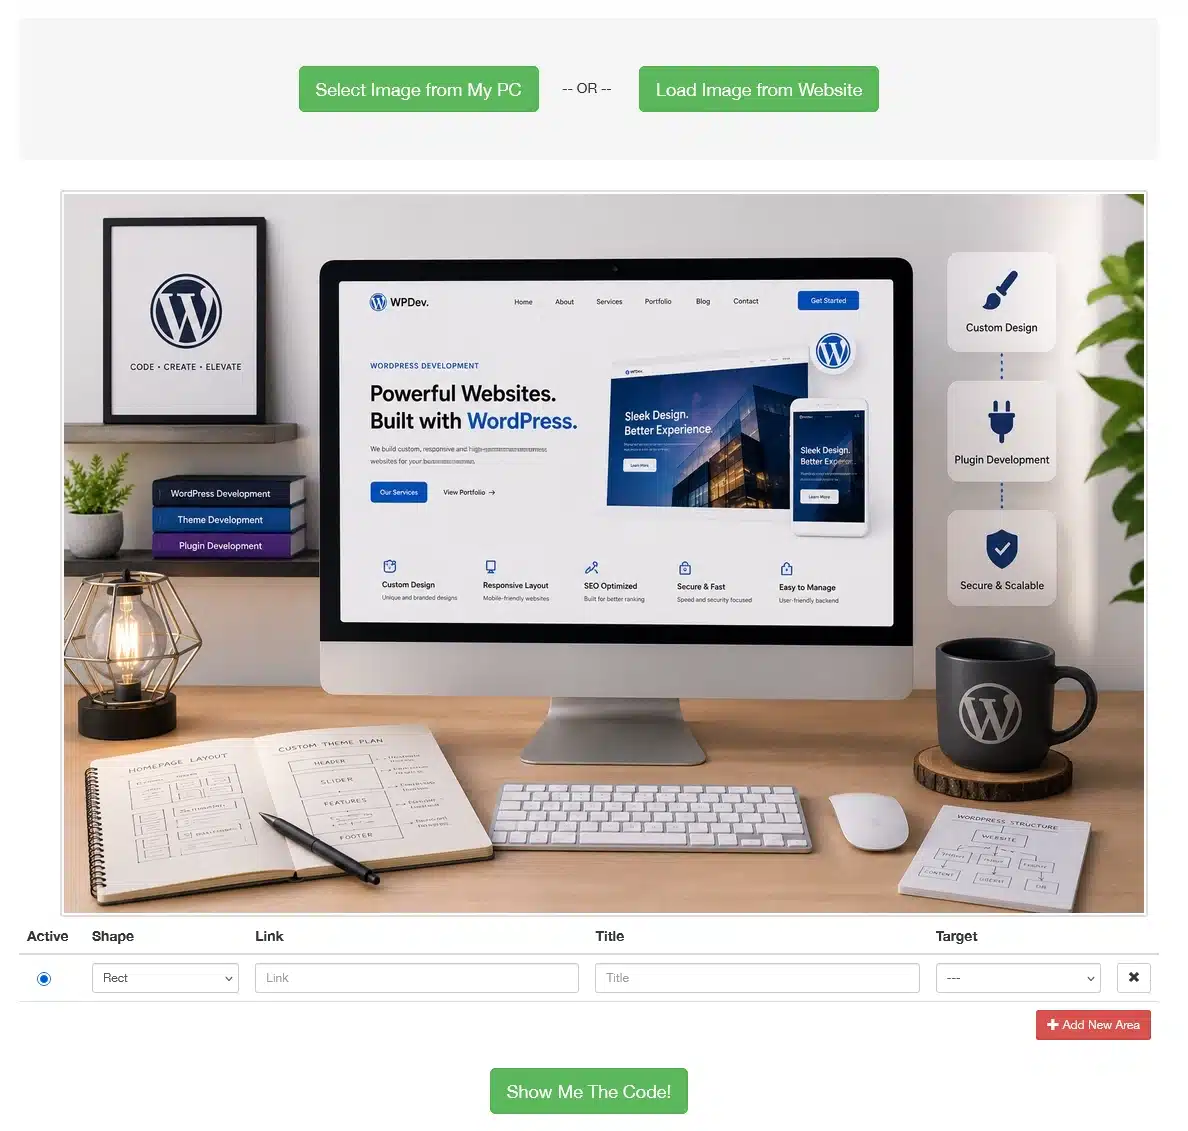
Choose one of these options:
- Select Image from My PC – Upload an image from your computer.
- Load Image from Website – Enter the URL of an image that is already live on your website.
Tip: For this tutorial, we recommend using an image that is already uploaded to your website. For example:
Using a live image URL makes it easier when you copy the generated code into your WordPress site because the image already has a valid URL. If you upload an image only from your computer, the generated code may contain a local file path that will not work on your live website.

Step 2: Upload Your Image
Click Select Image from My PC and upload your JPG, PNG, or WebP image.
For example, you can upload:
- USA map
- Product image
- Floor plan
- Infographic
- Location map
Once the image is loaded, you’ll be able to select different areas of the image.
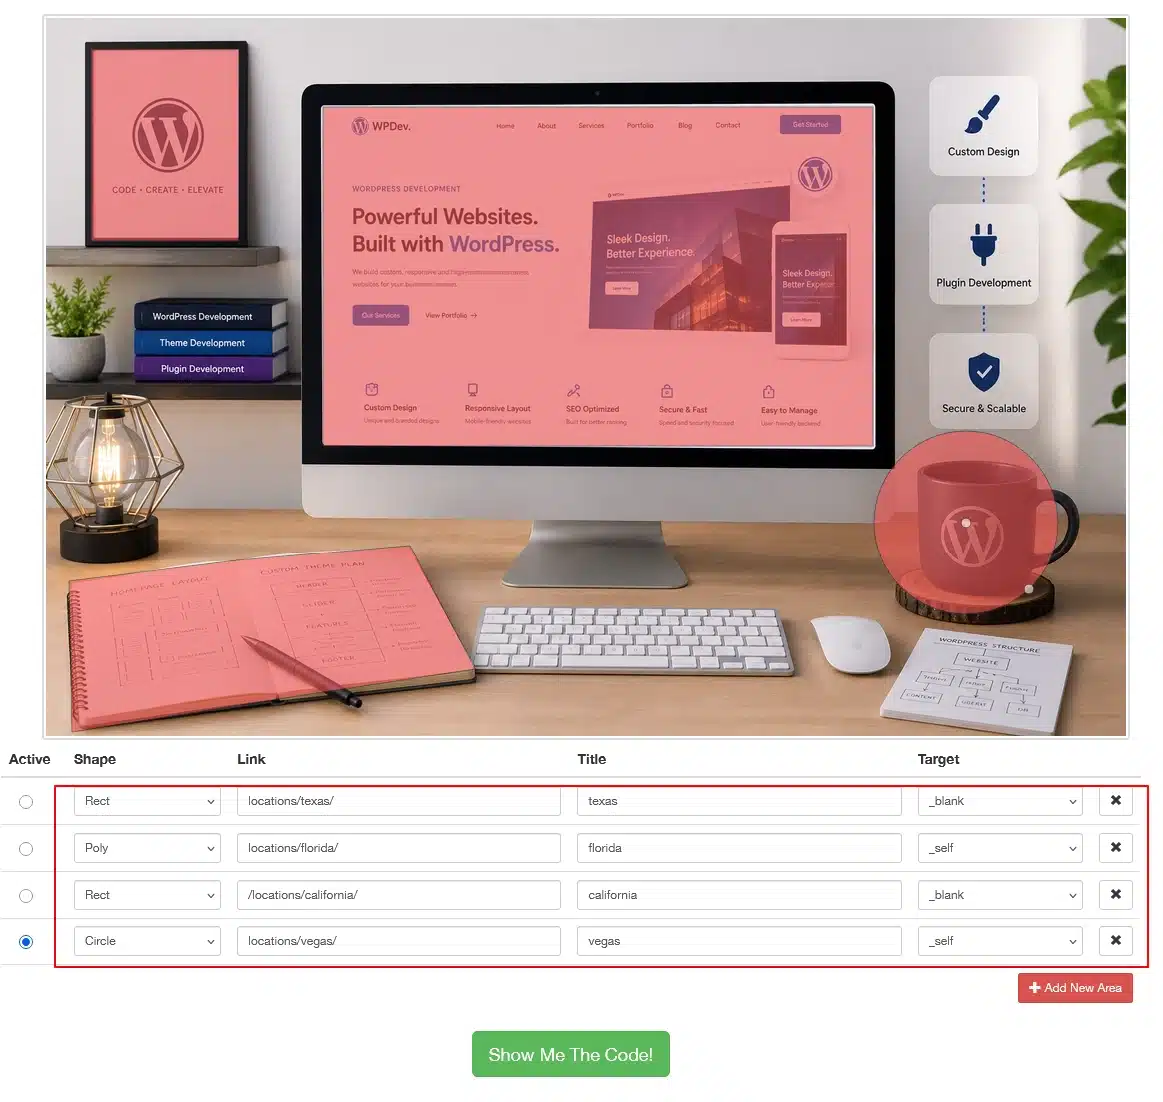
Step 3: Select the Clickable Area
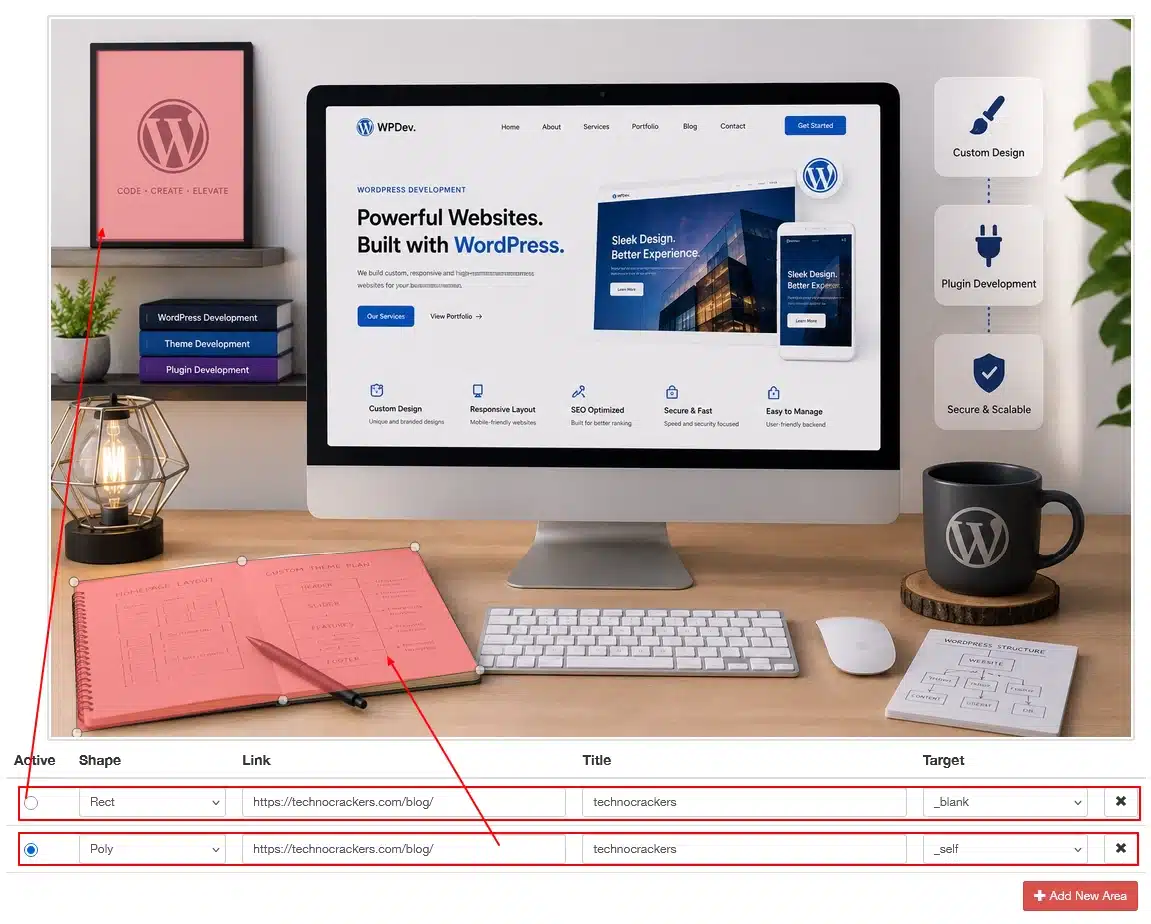
Now select the part of the image you want to make clickable.
The tool provides different shapes such as:
- Rectangle
- Circle
- Polygon
For simple areas, a rectangle or circle may be enough.
For maps and irregular shapes, use Polygon.
With a polygon, you can click around the exact shape of the area you want to make clickable.

Step 4: Add the Link
After selecting the area, add the URL where you want that part of the image to go.
For example: https://example.com/texas/
You can also add:
- Alt text
- Title
- Target
For example:
URL: /locations/texas/
Alt: Texas
Title: View Texas Location
Then save the area.
Add your screenshot here
Step 5: Add More Clickable Areas
Repeat the same process for the other parts of your image.
For example:
| Image Area | Link |
|---|---|
| California | /locations/california/ |
| Texas | /locations/texas/ |
| Florida | /locations/florida/ |
| New York | /locations/new-york/ |
You can create as many clickable areas as your image requires.
Step 6: Generate the HTML Code
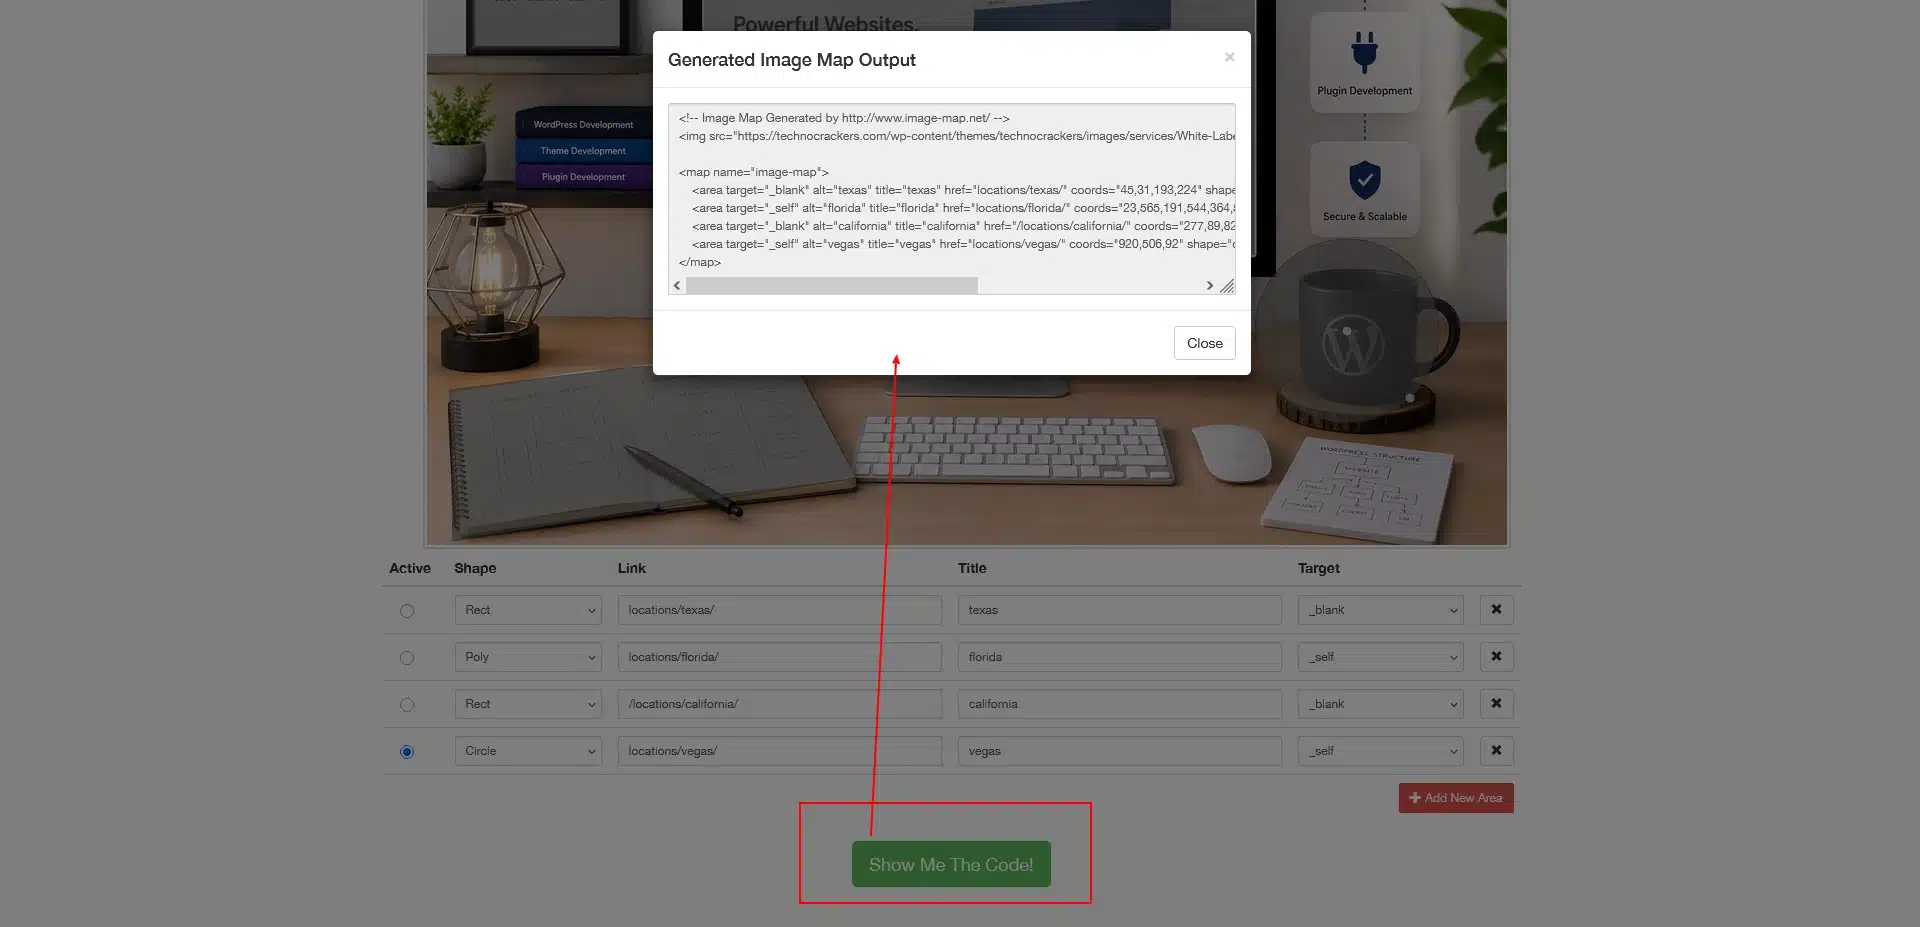
Once you’ve finished creating all your clickable areas, click:
Show Me The Code!
The tool will generate the HTML code for your image map. (Image Map Generator)
You’ll get code similar to:
<!-- Image Map Generated by http://www.image-map.net/ -->
<img src="https://technocrackers.com/wp-content/themes/technocrackers/images/services/White-Label-WordPress-Development-img.webp" usemap="#image-map">

<map name="image-map">
    <area target="_blank" alt="texas" title="texas" href="locations/texas/" coords="45,31,193,224" shape="rect">
    <area target="_self" alt="florida" title="florida" href="locations/florida/" coords="23,565,191,544,364,529,429,653,232,683,26,716" shape="poly">
    <area target="_blank" alt="california" title="california" href="/locations/california/" coords="277,89,827,429" shape="rect">
    <area target="_self" alt="vegas" title="vegas" href="locations/vegas/" coords="920,506,92" shape="circle">
</map>
You don’t need to manually create this code.
The online generator creates it for you.
Step 7: Add the Code to Your WordPress Website
Now copy the generated code.
If you’re using Divi, open the page in the Visual Builder and add a:
Code Module
Then paste the generated image-map code into the Code Module.
For example:
<img src="your-image.jpg" usemap="#image-map">

<map name="image-map">
    ...
</map>
Save the module and check the page on the frontend.
Your image should now contain multiple clickable areas.

Important: Upload the Image to WordPress
When using the generated code, make sure the image source points to the actual image on your WordPress website.
For example:
<img src="https://example.com/wp-content/uploads/2026/09/usa-map.webp" usemap="#image-map">
You can upload the image to:
WordPress Dashboard → Media → Add New
Then copy the image URL and replace the image URL in the generated code.
How the Image Map Works
You don’t need to understand the code to create an image map, but it’s helpful to know what the generated code is doing.
The image contains:
usemap=”#image-map”
This connects the image to: <map name=”image-map”>
Inside the map, each <area> defines one clickable section.
For example:
<area href="/texas/" alt="Texas" coords="..." shape="poly">
The href defines the destination, while coords defines the clickable position on the image.
The important part is that you don’t need to calculate these coordinates manually. The online generator does that for you.
SVG vs JPG, PNG & WebP Image Maps
Both approaches can create clickable images, but the workflow is different.
| Image Type | Recommended Method |
|---|---|
| SVG | Add <a> tags to SVG elements |
| JPG | Use an online image-map generator |
| PNG | Use an online image-map generator |
| WebP | Use an online image-map generator |
For SVG, you have more control over individual vector elements and CSS hover effects.
For JPG, PNG, and WebP, an online image-map generator is usually much easier because it automatically creates the clickable coordinates.
Make Your Image Map Responsive
One important thing to remember with traditional HTML image maps is that the clickable coordinates are based on the image dimensions.
If the image is resized significantly on smaller screens, the clickable areas can become misaligned.
So always test your image map on:
- Desktop
- Tablet
- Mobile
Some newer image-map tools provide responsive output specifically for this reason. For example, Map My Img offers a responsive HTML export designed to scale with the image. (Map My Img)
Map My Image: https://map-my-img.com/
If your image map is an important part of your website, make sure you test it carefully on different screen sizes before publishing.
Tips for Creating Clickable Image Maps
Use the correct image
Start with the final version of your image. If you replace it with a differently sized or cropped image later, your clickable areas may need to be recreated.
Use descriptive links
Instead of linking every area to a generic page, use the appropriate page for each section.
Add useful alt text
Give each clickable area a meaningful description where possible.
Test every clickable area
Click every section after publishing to make sure the correct page opens.
Test on mobile
Don’t only test on desktop. Make sure the clickable areas still work correctly on smaller screens.
Add hover effects to SVG
If you are using SVG, CSS can be used to highlight individual areas when the user moves the mouse over them.
Final Thoughts
Creating a clickable image in WordPress doesn’t have to be complicated.
If you’re working with an SVG, you can add <a> tags directly around the SVG elements and then place the SVG code inside a Divi Code Module. You can also use CSS to create custom hover effects.
For JPG, PNG, and WebP images, an online image-map generator makes the process much easier. Simply upload your image, draw the clickable areas, add your URLs, generate the HTML, and paste the code into your WordPress or Divi Code Module.
This makes it possible to turn a normal static image into an interactive element without manually calculating coordinates or writing the entire image-map code yourself.
Frequently Asked Questions
Can I make different parts of one image clickable?
Yes. An image map allows you to create multiple clickable areas within a single image, with each area linking to a different URL.
Can I create an image map without coding?
Yes. For JPG, PNG, and WebP images, you can use an online image-map generator to draw the clickable areas and generate the HTML code for you.
Can I use image maps in Divi?
Yes. You can paste the generated HTML into a Divi Code Module.
Can I add hover effects?
Yes. SVG image maps can be styled with CSS to create hover effects such as color changes, opacity changes, and transitions.
Do I need a separate image for every link?
No. Multiple clickable areas can be created on a single image.
Can I use WebP for an image map?
Yes. WebP can be used as the image in an HTML image map. The clickable areas are defined separately using HTML.