Table of Contents
- Where to Find the New Heading Fill Options
- Option 1. None – Use a Normal Text Color
- Option 2. Gradient – Create Gradient Text
- Gradient Stops
- Gradient Type
- Gradient Direction
- Repeat Gradient
- Gradient Length
- Place Gradient Above Background Image
- Option 3. Image – Fill Your Heading With an Image
- Heading Image File
- Heading Image Fill Size
- Heading Image Fill Position
- Heading Image Fill Repeat
- Heading Image Fill Blend
- Option 4. Transparent – Create an Outline Text Effect
- Combine Fill and Stroke for Creative Effects
- Create an Image-Masked Heading in Divi 5
- Create Gradient Text in Divi 5
- Which Fill Type Should You Use?
- Final Thoughts
Divi 5 introduces more powerful controls for styling heading text without relying on custom CSS or additional plugins. One of the most useful additions is the ability to apply different fill effects directly to heading text.
You can fill your headings with a solid color, gradient, image, or even make the text transparent to create an outlined text effect.
In this guide, we’ll explore the new Heading Fill Type, gradient controls, image fills, transparent text, and text strokes in Divi 5.
Where to Find the New Heading Fill Options
Open any Heading module in Divi 5 and go to:
Heading → Design
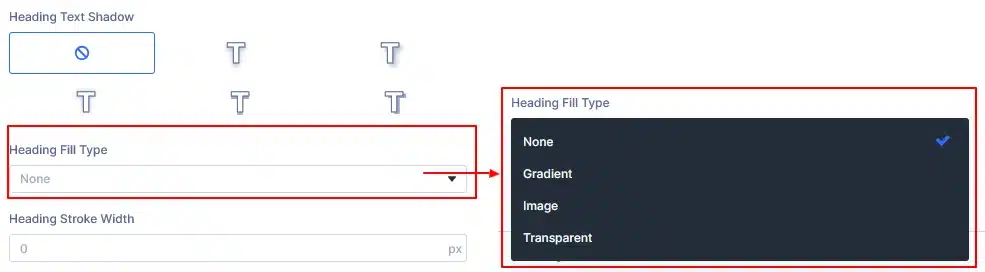
Inside the heading design settings, you’ll find options for:
- Heading Text Shadow
- Heading Fill Type
- Heading Stroke Width
- Heading Stroke Color
The Heading Fill Type controls how the inside of your heading text is displayed.
Divi 5 provides four fill options:
- None
- Gradient
- Image
- Transparent
Let’s look at each option.
Option 1. None – Use a Normal Text Color
The None option keeps your heading text in its normal solid color.
This is the default and simplest option.
When Heading Fill Type is set to None, the heading uses the regular text color you’ve configured for the heading.
This is ideal when you simply want a standard heading without any special fill effect.
Option 2. Gradient – Create Gradient Text
The Gradient option allows you to fill your heading text with a custom gradient.
Select:
Heading Fill Type → Gradient
Divi 5 then provides a Heading Gradient Fill option where you can create or select a gradient.
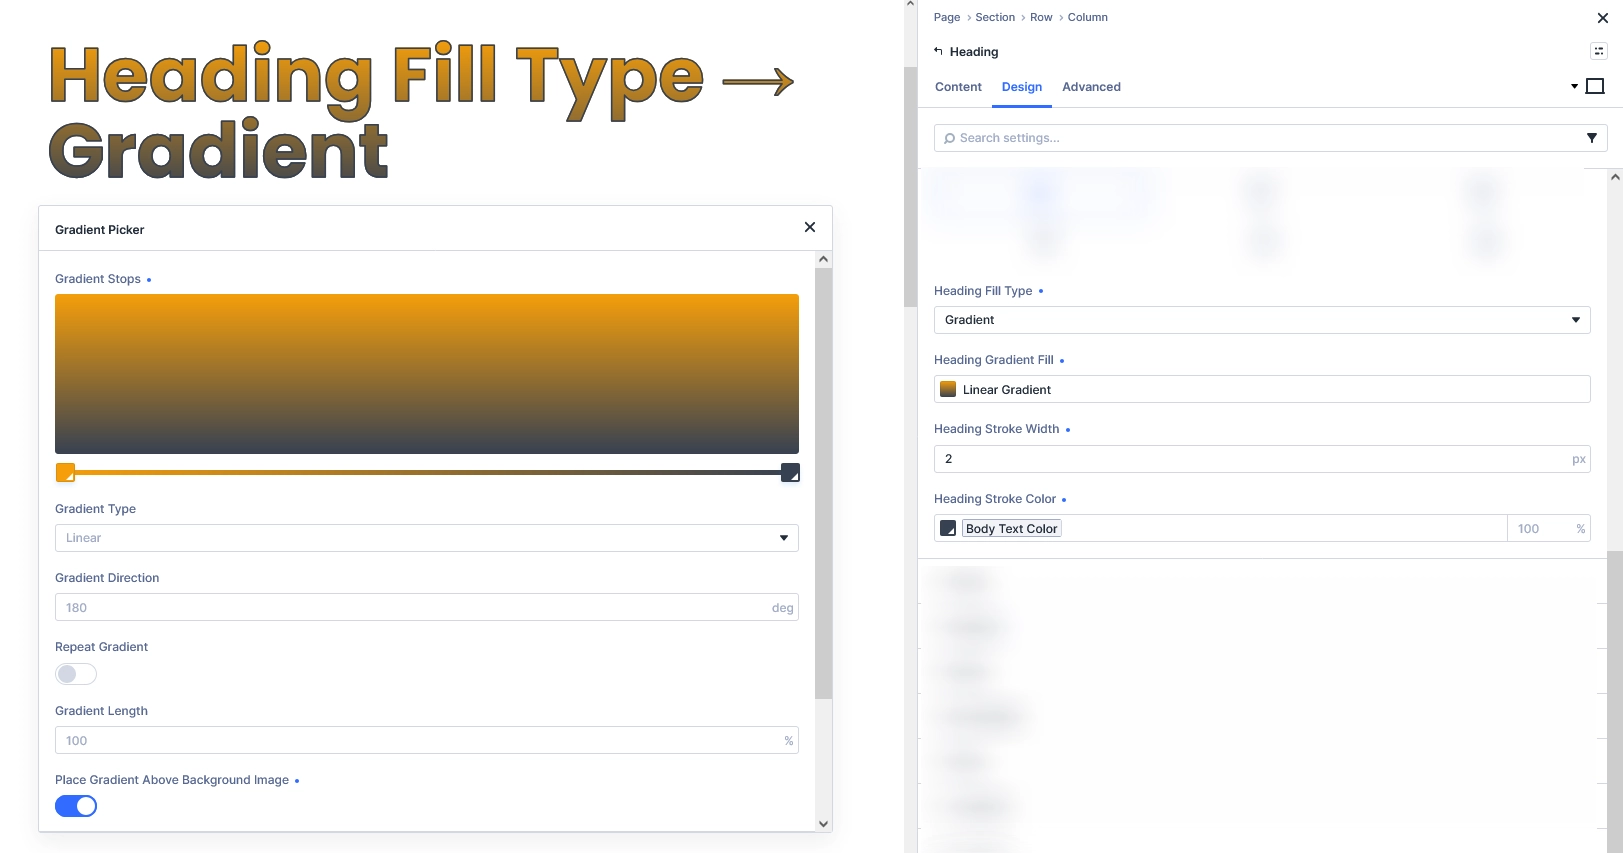
The Gradient Picker gives you several controls for customizing the effect.
Gradient Stops
Gradient stops determine the colors used in your gradient.
You can add multiple color stops and adjust their positions to create different effects.
For example:
Blue → Purple → Pink
or:
Orange → Dark Gray
This gives you complete control over how the gradient transitions across the heading.
Gradient Type
Divi provides different gradient types, such as:
- Linear
- Radial
- Conic
A Linear Gradient transitions from one side of the text to another.
A Radial Gradient creates a gradient that expands from a central point.
A Conic Gradient creates a circular or rotating color transition.
Gradient Direction
For linear gradients, you can control the direction of the color transition.
For example:
0° → 90° → 180° → 270°
Changing the direction lets you control whether the gradient moves horizontally, vertically, or diagonally across your text.
Repeat Gradient
Enable Repeat Gradient when you want the gradient pattern to repeat across the heading.
This can be useful for creating more decorative or patterned text effects.
Gradient Length
The Gradient Length controls how much of the heading area the gradient covers.
Adjusting this value can make the color transition tighter or spread it across a larger area.
Place Gradient Above Background Image
This option allows the gradient to appear above the heading’s background image when both are being used.
This gives you additional control when combining multiple visual effects.
Option 3. Image – Fill Your Heading With an Image
One of the most creative new options is Image.
Select:
Heading Fill Type → Image
Instead of using a solid color or gradient, Divi uses an image to fill the actual letters of your heading.
This creates an image-filled text or image mask effect.
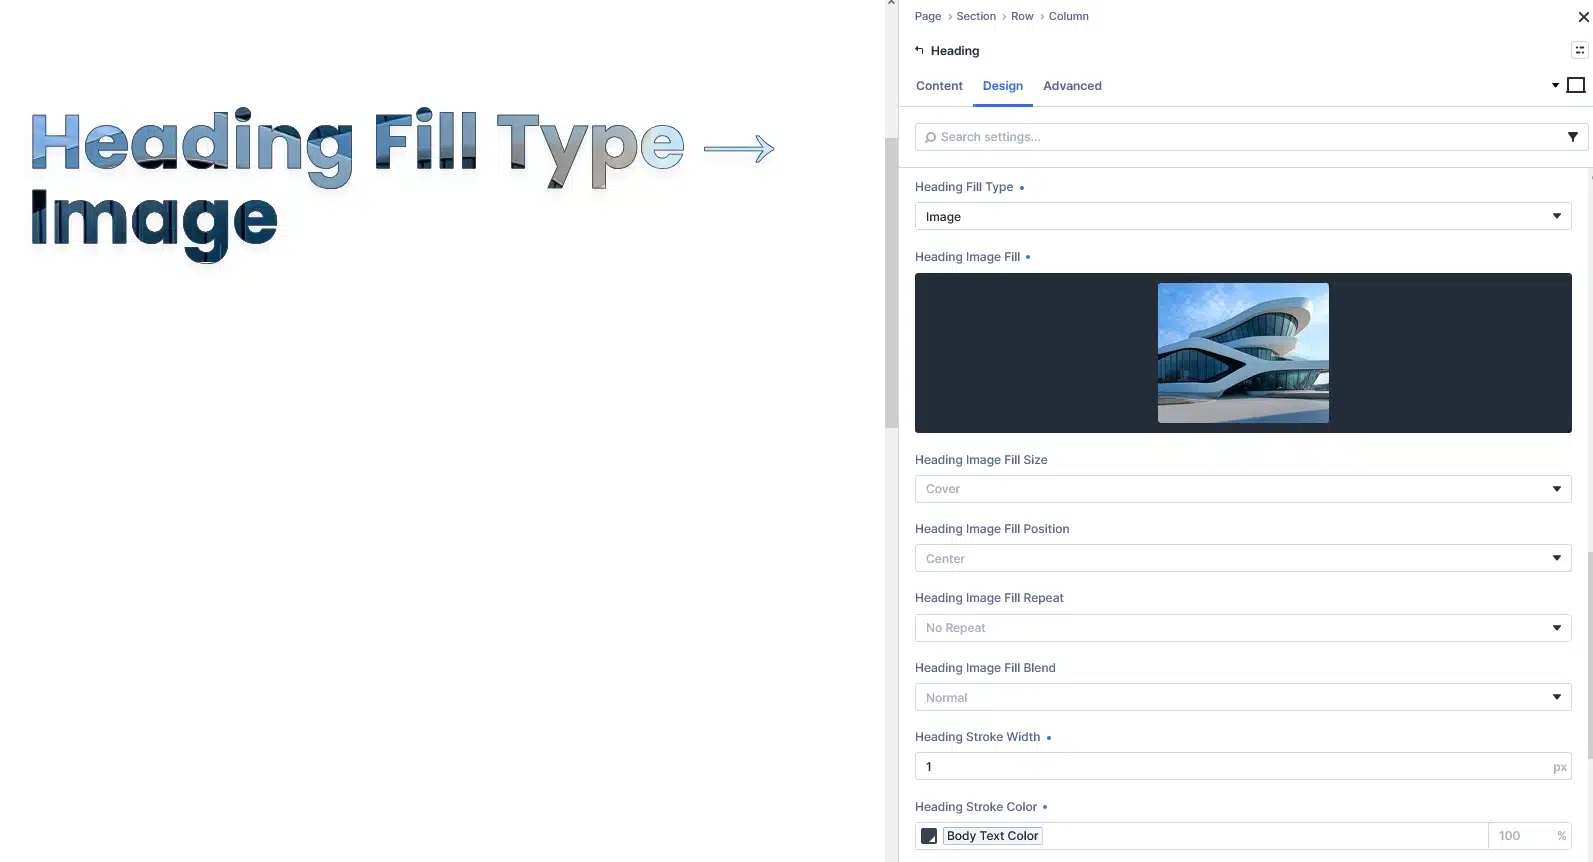
Heading Image File
Upload or select the image you want to use inside the text.
For example, you could use:
- A landscape photo
- A city image
- A texture
- A product image
- An abstract background
- A nature photograph
The image will appear inside the heading letters.
Heading Image Fill Size
This controls how the image fits inside the heading.
For example, Cover makes the image fill the available text area while maintaining its proportions.
Heading Image Fill Position
Use this option to control which part of the image is visible inside the text.
Common positions include:
- Center
- Top
- Bottom
- Left
- Right
This is especially useful when the most important part of your image needs to appear inside the letters.
Heading Image Fill Repeat
You can control whether the image repeats.
No Repeat keeps the image displayed as one continuous image.
Repeating the image can create a tiled effect.
Heading Image Fill Blend
The Blend option controls how the image interacts with the heading.
For a standard image-filled heading, Normal keeps the image displayed naturally.
Different blend modes can be used to create more creative effects.
Option 4. Transparent – Create an Outline Text Effect
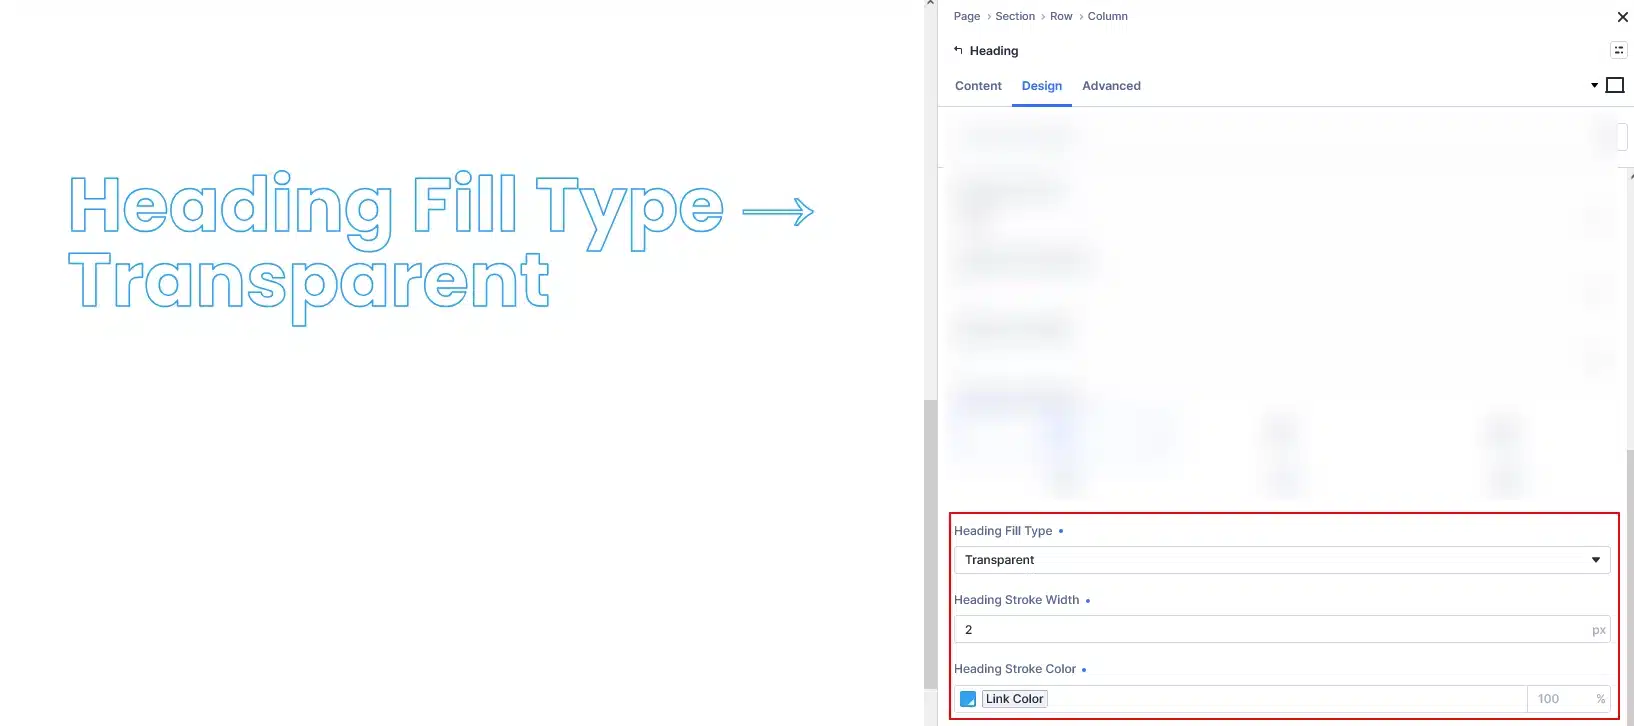
The Transparent option is useful when you want to create an outlined heading.
Select:
Heading Fill Type → Transparent
The inside of the text becomes transparent, allowing the background behind the heading to show through.
To make the outline visible, increase the Heading Stroke Width.
For example:
Heading Fill Type: Transparent
Heading Stroke Width: 2px
Then select your desired Heading Stroke Color.
This is especially useful for:
- Hero sections
- Large promotional headings
- Modern landing pages
- Image backgrounds
- Dark backgrounds
- Creative typography
For example, you can place transparent outlined text over a large background image to create a modern visual effect.
Combine Fill and Stroke for Creative Effects
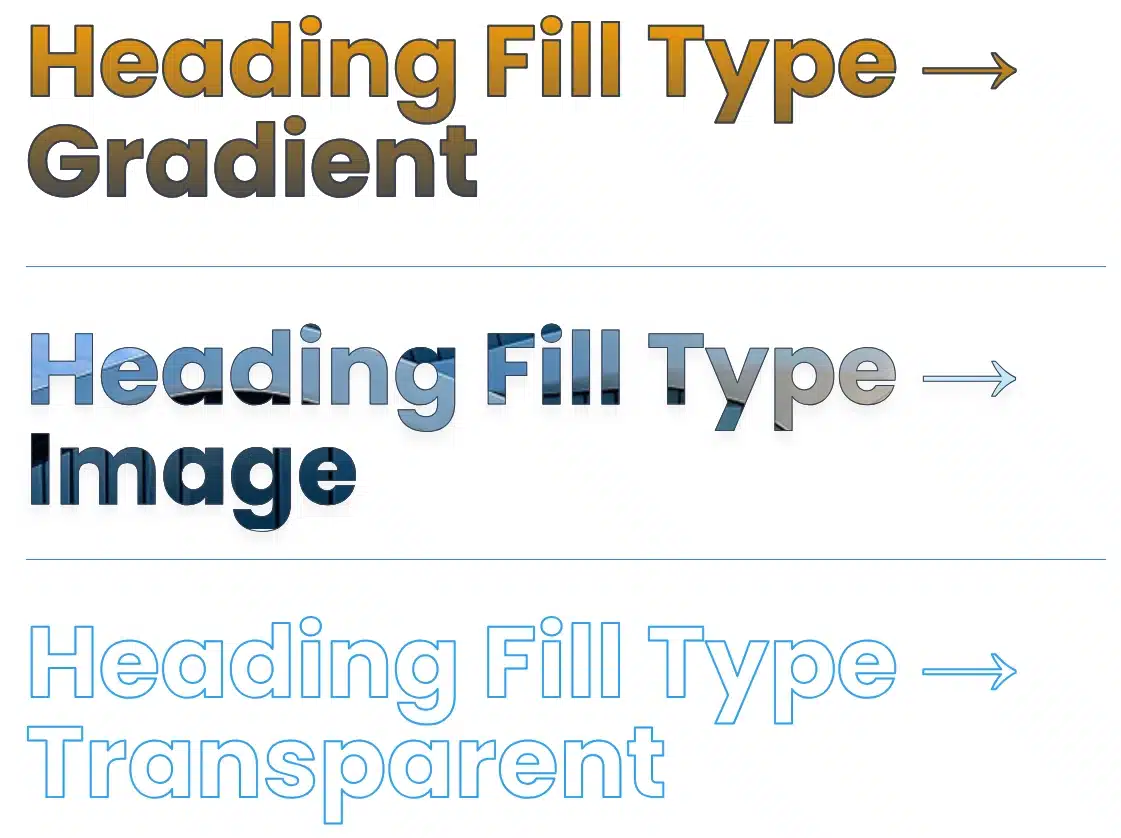
The real power of these options comes from combining them.
For example, you can use:
Gradient + Stroke
Use a gradient inside the letters and a contrasting stroke around them.
Fill: Gradient
Stroke Width: 2px
This works well for bold promotional headings.
Image + Stroke
Use an image inside the text and add a subtle outline.
Fill: Image
Stroke Width: 1px
This can make the image-filled text easier to read.
Transparent + Stroke
Create a completely outlined heading.
Fill: Transparent
Stroke Width: 2px
This is one of the easiest ways to create an outlined text effect without custom CSS.
Create an Image-Masked Heading in Divi 5
Now let’s put everything together.
To create an image-filled heading:
- Add a Heading
- Go to Design → Heading.
- Find Heading Fill Type.
- Select Image.
- Choose your image under Heading Image File.
- Adjust the image size and position.
- Set the Heading Stroke Width if you want an outline.
- Choose a Heading Stroke Color.
- Add a text shadow if needed.
The result is a heading where the image appears inside the actual letters.
This gives you the appearance of an image mask without needing custom CSS or an external design tool.
Create Gradient Text in Divi 5
Creating gradient text is just as simple.
- Add or select your Heading module.
- Go to Design → Heading.
- Set Heading Fill Type to Gradient.
- Open Heading Gradient Fill.
- Select your gradient colors.
- Adjust the gradient type.
- Change the gradient direction.
- Adjust the gradient length if necessary.
- Add a stroke or text shadow if required.
You can experiment with different color combinations until you get the desired result.
Which Fill Type Should You Use?
The right option depends on the design you’re trying to create.
| Fill Type | Best For |
|---|---|
| None | Standard headings and simple designs |
| Gradient | Modern, colorful, attention-grabbing headings |
| Image | Creative headings and image-mask effects |
| Transparent | Outline and typography effects |
Final Thoughts
The new heading styling options in Divi 5 make it much easier to create eye-catching typography without relying on custom CSS.
With Heading Fill Type, you can quickly switch between a standard text color, gradient text, image-filled text, and transparent outlined text.
You can then take the design even further by combining these effects with:
- Gradient controls
- Image positioning
- Text strokes
- Stroke colors
- Text shadows
Whether you’re creating a hero section, landing page, promotional banner, or creative heading, these new Divi 5 controls give you much more flexibility over how your typography looks.
The best approach is to experiment with different combinations and keep the effect consistent with the overall design of your website.