Table of Contents
Elementor’s new Atomic Form feature makes it easier to build and customize forms directly inside the Elementor Editor. Instead of using a separate form widget for every field, you can create a form and add different Atomic Form elements based on your requirements.
In this guide, we’ll show you how to use the Atomic Form element and add fields such as File Upload, Radio Button, Date Picker, Select, and more.
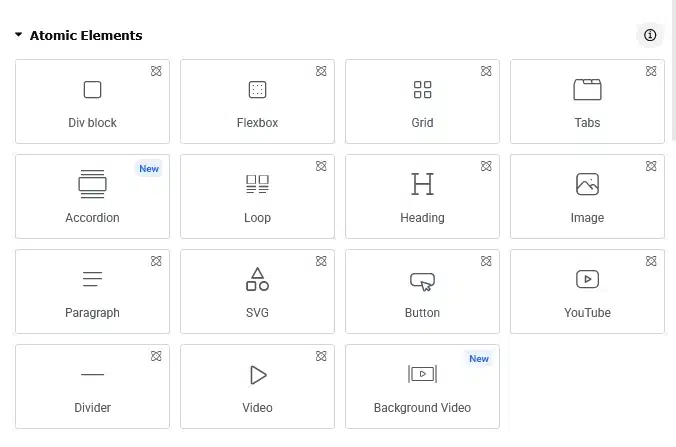
Note: Make sure the Elementor Atomic Editor/Atomic Elements feature is enabled before following this tutorial.
What Is Elementor Atomic Form?
The Atomic Form is a new Elementor element that lets you create and customize forms using individual form elements.
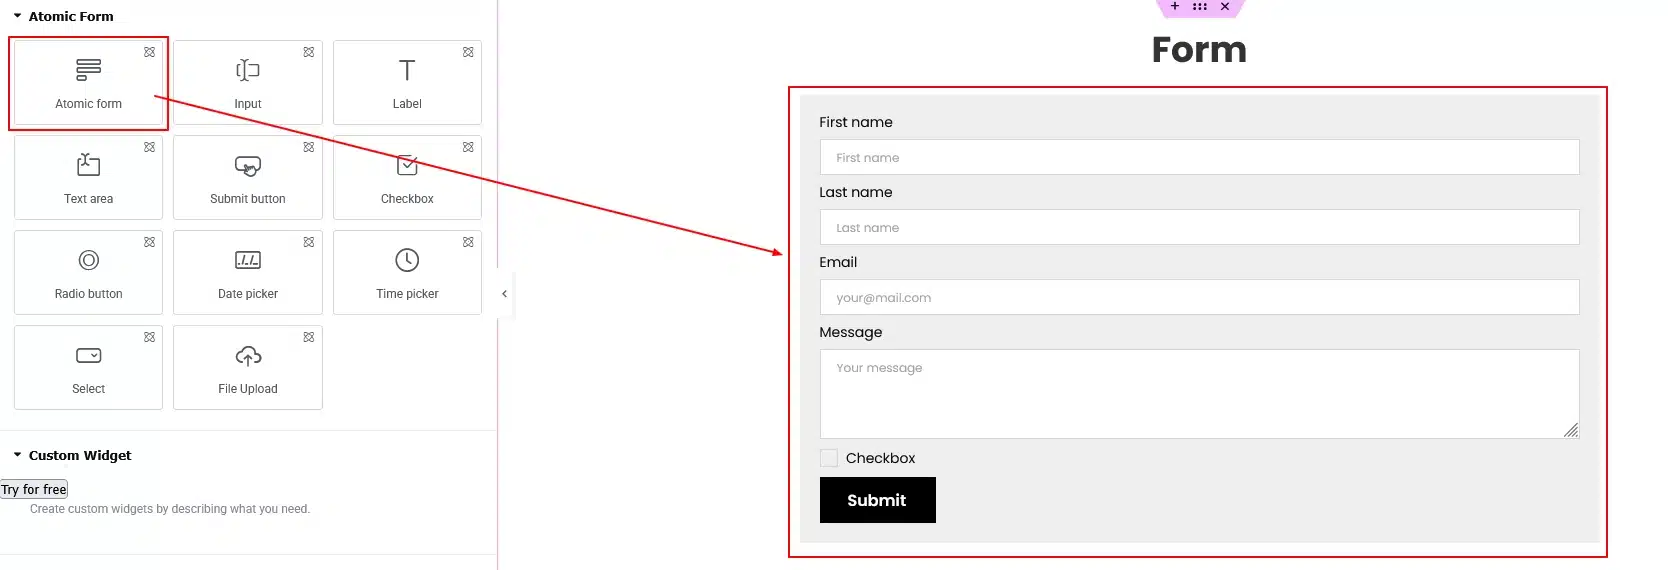
It provides several elements that you can add to your form, including:
- Atomic Form
- Input
- Label
- Text Area
- Submit Button
- Checkbox
- Radio Button
- Date Picker
- Time Picker
- Select
- File Upload
These elements can be added to your form according to your requirements.
How to Create a Form with Atomic Form
Before adding individual fields, you first need to add the Atomic Form element to your page.
Step 1: Open a Page with Elementor
First, open any page and click Edit with Elementor.
Once the Elementor Editor opens, you will find the Atomic Form elements in the Elements panel.
Step 2: Add the Atomic Form
Search for Atomic Form in the Elements panel and drag it onto your page.
Once added, the form comes with some fields by default, such as:
- First Name
- Last Name
- Message
- Checkbox
- Submit Button
This gives you a basic form that you can customize further.
How to Add More Fields to Your Form
Now you may want to add additional fields to your form, such as:
- File Upload
- Radio Button
- Date Picker
- Time Picker
- Select
- Additional Input fields
- Text Area
Adding these fields is simple.
Example: Add a File Upload Field
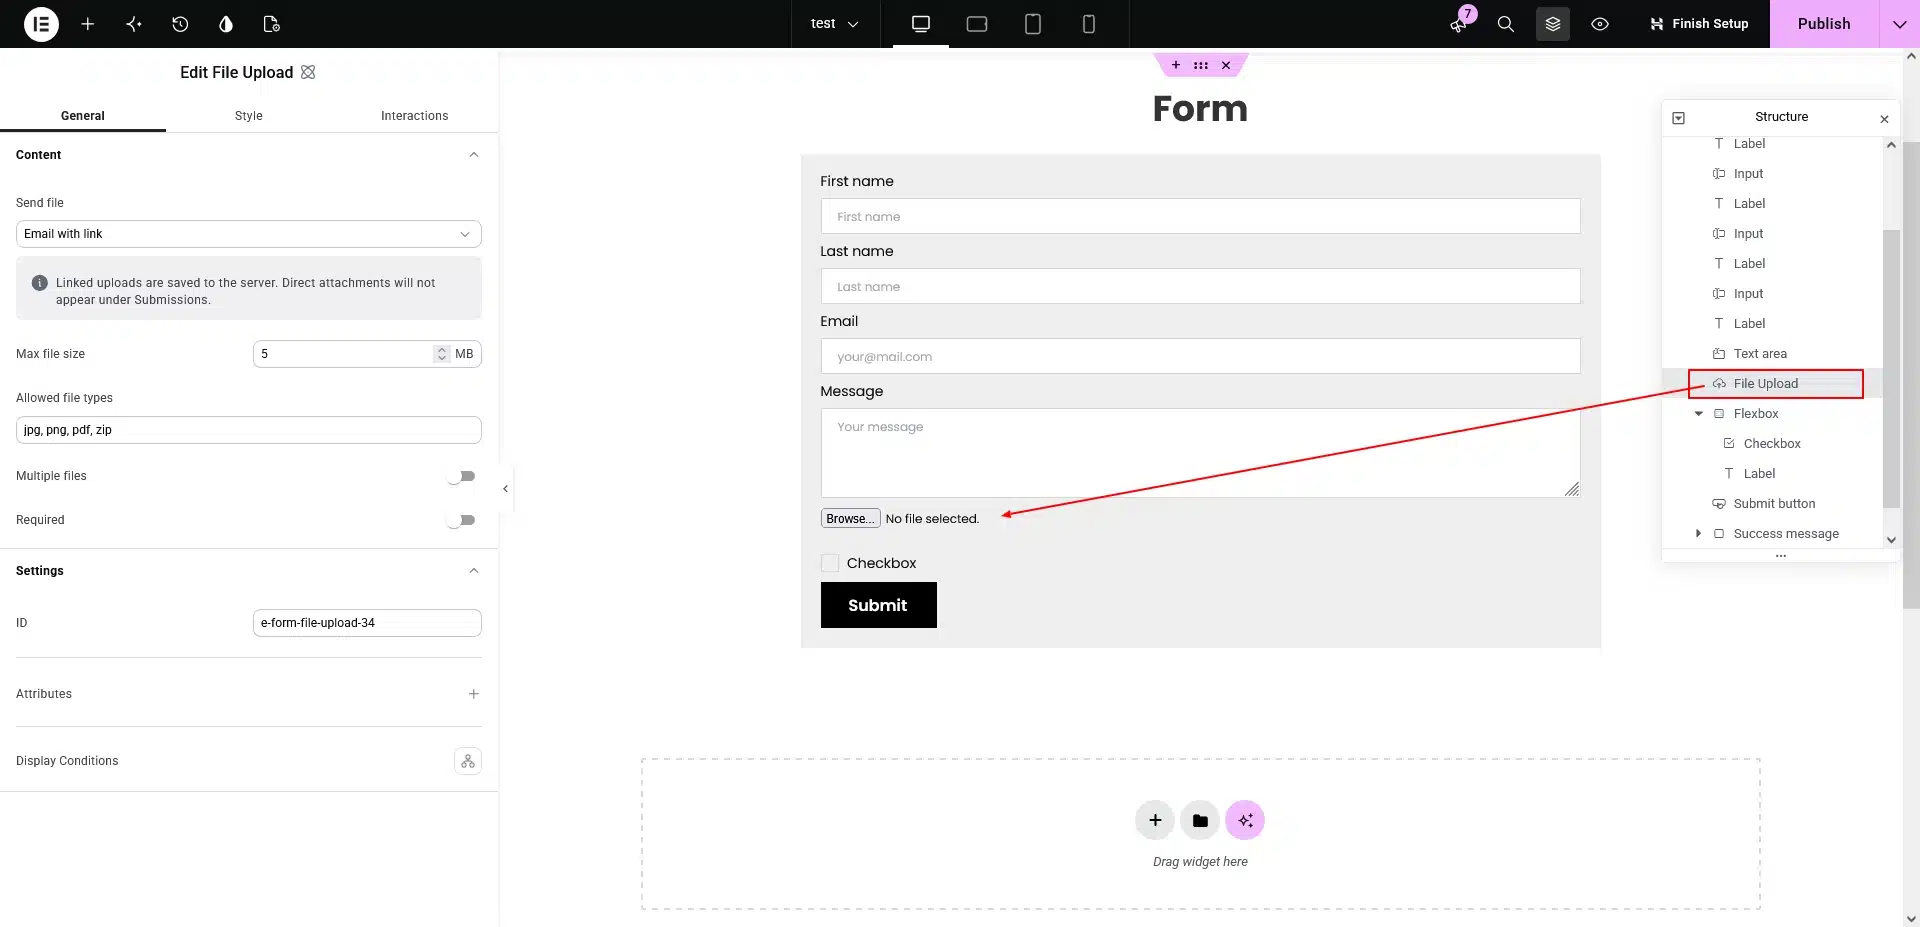
Suppose you want to allow visitors to upload a file after the Message field.
Follow these steps:
Step 1: Select the Message Field
Click the Message field inside your Atomic Form.
Step 2: Add File Upload
From the Atomic Form elements panel, select or drag the File Upload element into the form.
The File Upload field will be added directly after the Message field.
You can use the same process to add other Atomic Form elements.
Add Other Form Elements
The same method can be used to add different fields to your form.
For example, you can add:
Radio Button
Use the Radio Button element when visitors need to select one option from a list.
Checkbox
Use a Checkbox when visitors need to select or confirm an option.
Date Picker
Use the Date Picker when you want visitors to select a date.
Time Picker
Use the Time Picker when visitors need to select a specific time.
Select
Use the Select element when you want to provide multiple options in a dropdown.
Input
Use the Input element to add additional text-based fields to your form.
Text Area
Use the Text Area element when you need a larger field for longer messages or information.
This gives you flexibility to build different types of forms based on your requirements.
Customize File Upload Settings
The File Upload element also provides several settings.
After selecting the File Upload field, you can configure options such as:
- Send File
- Maximum File Size
- Allowed File Types
- Multiple Files
- Required
- ID
For example, you can allow visitors to upload JPG, PNG, PDF, or ZIP files and set a maximum upload size.
Configure Form Email Settings
After creating your form fields, you can configure what happens when someone submits the form.
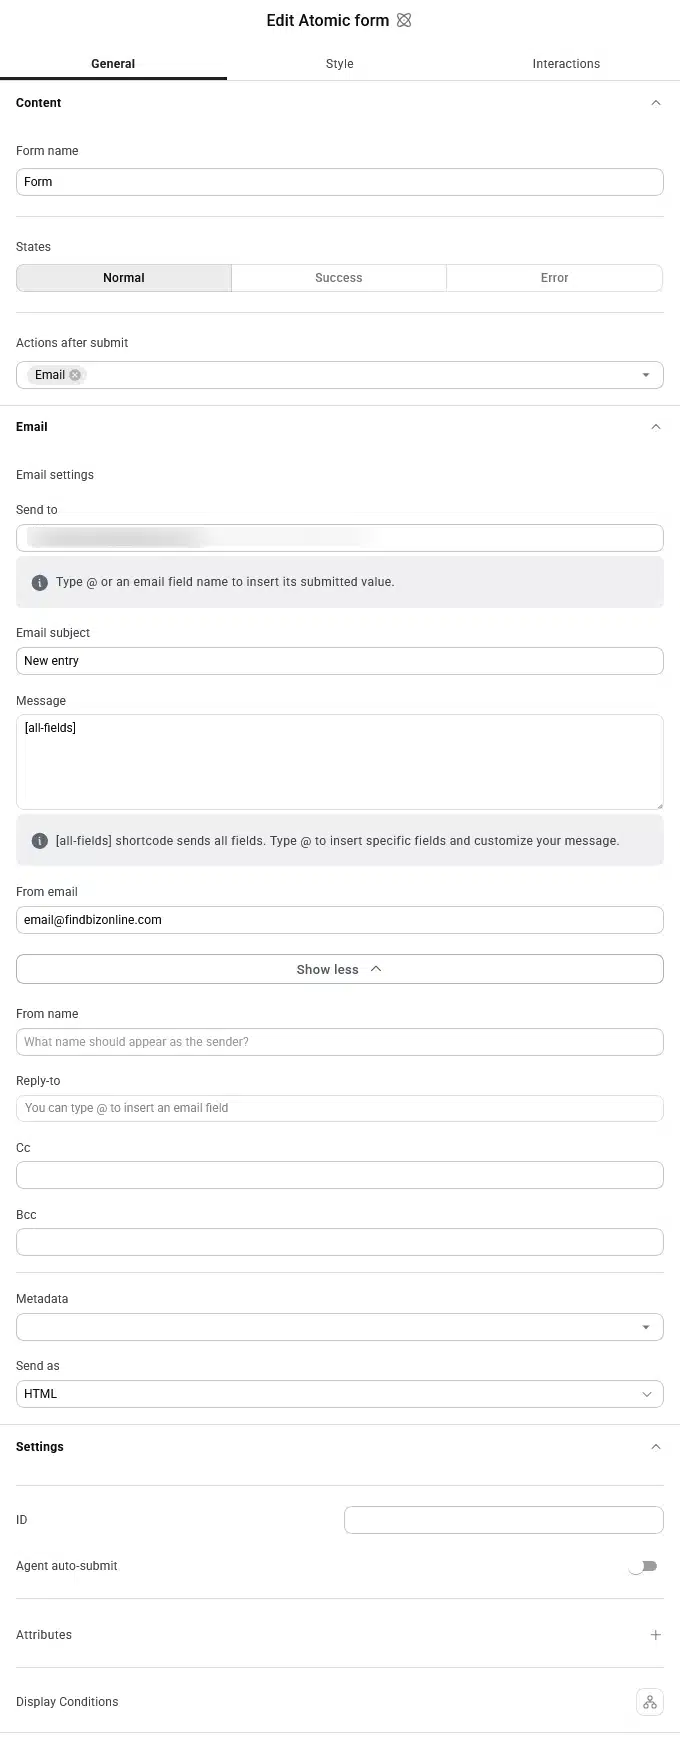
Select the Atomic Form element and open its settings.
Under the form settings, you can configure the Actions After Submit option.
You can also customize the email settings, including:
- Send To
- Email Subject
- Message
- From Email
- From Name
- Reply-To
- CC
- BCC
- Metadata
- Send As
This allows you to control how submitted form information is sent to your email address.
Customize the Email Message
You can also customize the email message that you receive after a form submission.
By default, you can use: [all-fields]
This sends all submitted form fields in the email.
You can also insert individual form fields into the message and create a more customized email notification.
For example, you could create an email containing the visitor’s name, email address, message, and other submitted information.
Final Thoughts
Elementor’s Atomic Form provides a simple way to create and customize forms using individual form elements.
You can start with the default form and then add fields such as Radio Button, Select, Date Picker, Time Picker, File Upload, Text Area, and more whenever you need them.
The process is straightforward: add the Atomic Form, select the appropriate field, configure its settings, and customize the form submission options.
With these options, you can create everything from simple contact forms to more detailed forms based on your website’s needs.