Table of Contents
Adding a category filter to an Elementor page makes it easier for visitors to find the content they are looking for without browsing through an entire page. While Elementor provides basic filtering options, JetSmartFilters gives you more advanced control over WordPress queries and filtering.
With JetSmartFilters, you can create multiple taxonomy filters, display result counters, add active filter tags, combine multiple filtering criteria, and create SEO-friendly filter URLs. It works seamlessly with Elementor Pro Loop Grid, JetEngine Listing Grid, WooCommerce product grids, and other supported providers.
The best part is that you can set everything up directly through the Elementor interface without writing custom code. JetSmartFilters handles the filtering queries and AJAX updates in the background.
How to Add a Category Filter in Elementor Using JetSmartFilters
Follow these five steps to create and configure a category filter.
Step 1: Create a New Filter
First, create the filter you want to use on your Elementor page.
Go to Smart Filters > Add New in your WordPress dashboard. Give your filter a name and select the filter type based on how you want users to choose categories.
You can use filter types such as:
- Checkboxes
- Select
- Radio
- Visual
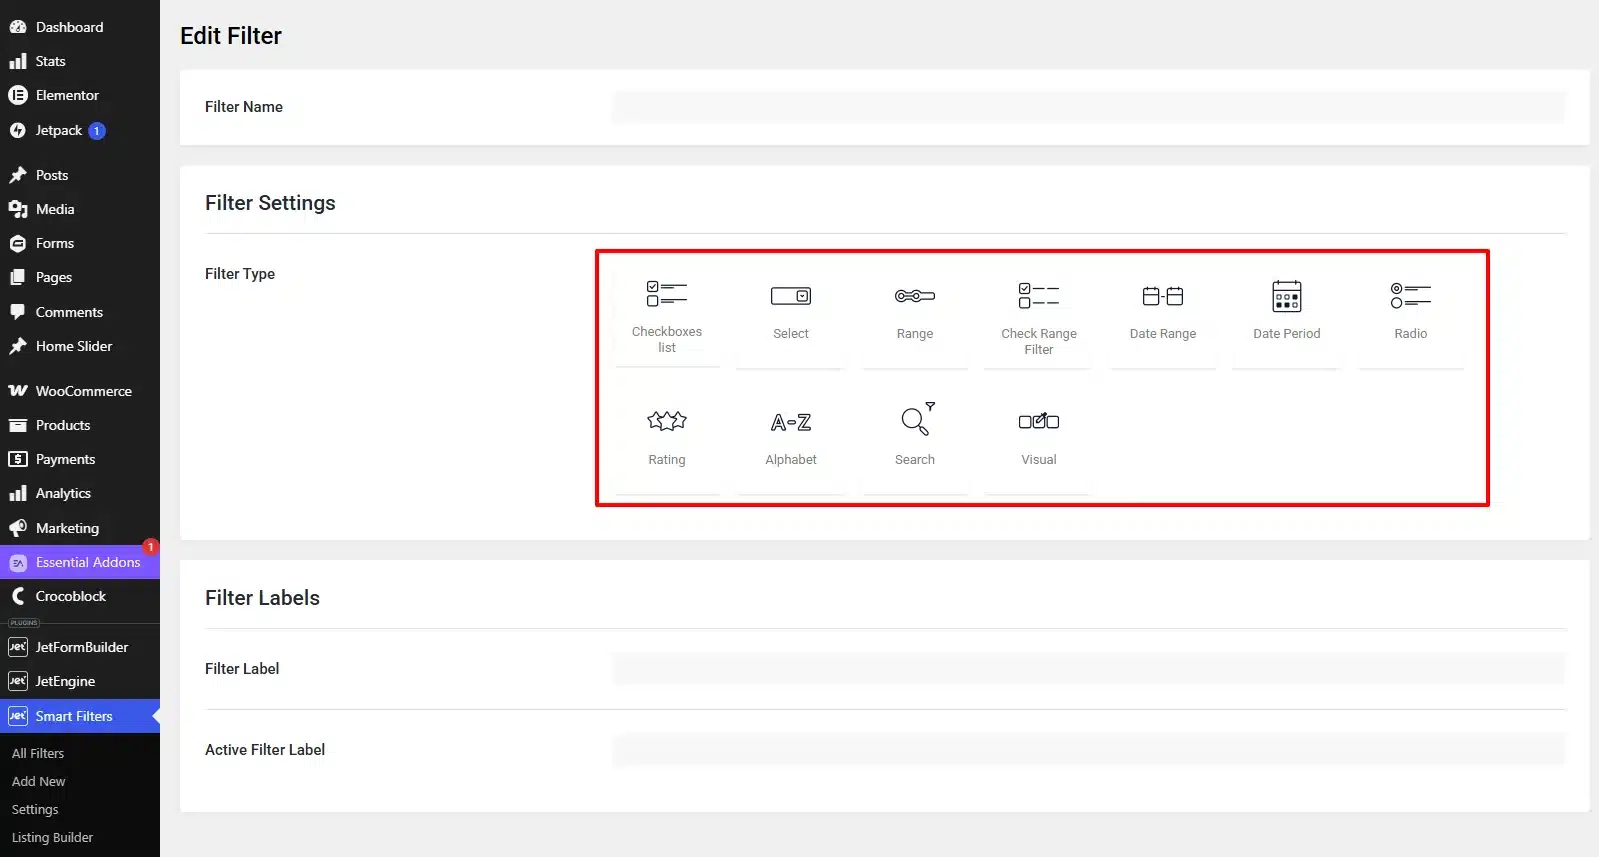
Next, set the Data Source to Taxonomies and select the taxonomy you want to filter by, such as Category or a custom taxonomy.
Depending on your requirements, you can also configure additional options, including:
- Displaying child categories
- Showing or hiding empty categories
- Setting the filter relation
- Filtering by custom meta fields when required
Once you have configured the filter, click Publish.
Step 2: Choose the Content Block to Filter
Next, determine which content block the category filter will control.
For a simple post listing, you can use the native Listing Builder available under JetSmartFilters > Listing Builder.
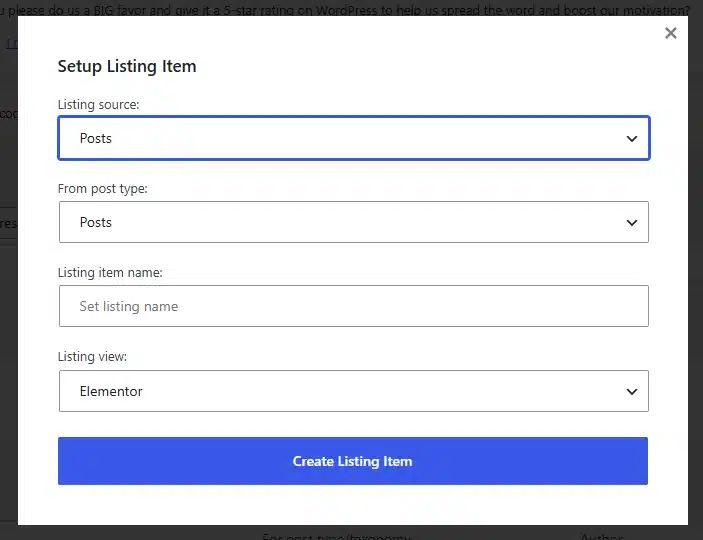
If you need to display posts based on a more advanced query, you can use JetEngine’s Query Builder together with a JetEngine Listing.
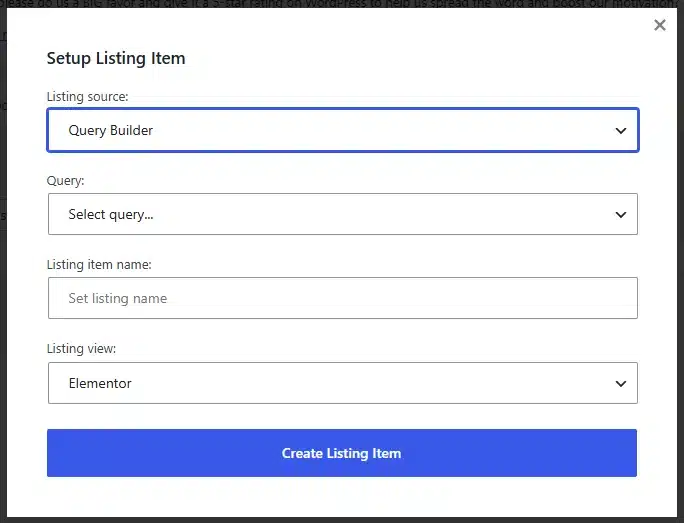
For WooCommerce websites, JetSmartFilters can also be used with product grids and product tables. It also supports Elementor Pro Posts, Portfolio widgets, and Elementor Loop Grid, so you can skip this step when using one of these supported providers.
You can also select multiple providers from the Additional Providers Enabled section if your page requires it.
Important: If you are using JetSmartFilters with an Elementor Loop Grid, make sure the Is Filterable option is enabled in the Loop settings. Otherwise, you may encounter an “Error. Incomplete request” message when applying the filter.
Step 3: Add the Filter Widget to Your Elementor Page
Now, open the page where you want to display the category filter and click Edit with Elementor.
Add the JetSmartFilters widget that corresponds to the filter type you created. Place it near the content grid or listing that you want to filter.
Inside the widget settings:
- Select the filter you created.
- Choose the appropriate Provider.
- Select the content grid or listing that should respond to the filter.
For example, your provider could be an Elementor Loop Grid or a JetEngine Listing Grid.
Once connected, the category filter will control the content displayed in your selected grid.
Step 4: Configure the Filter Behavior
After connecting the filter to your content grid, configure how the filtering should work.
JetSmartFilters provides different filtering modes depending on your requirements.
For a smoother user experience, select AJAX mode. This allows the content to update without requiring the entire page to reload.
If you want the selected filters to be reflected in the URL, you can use Mixed mode. This can be particularly useful when you want users to share filtered results or create URLs that open with specific filter selections.
You can also configure custom aliases for filter results from:
JetSmartFilters > Settings
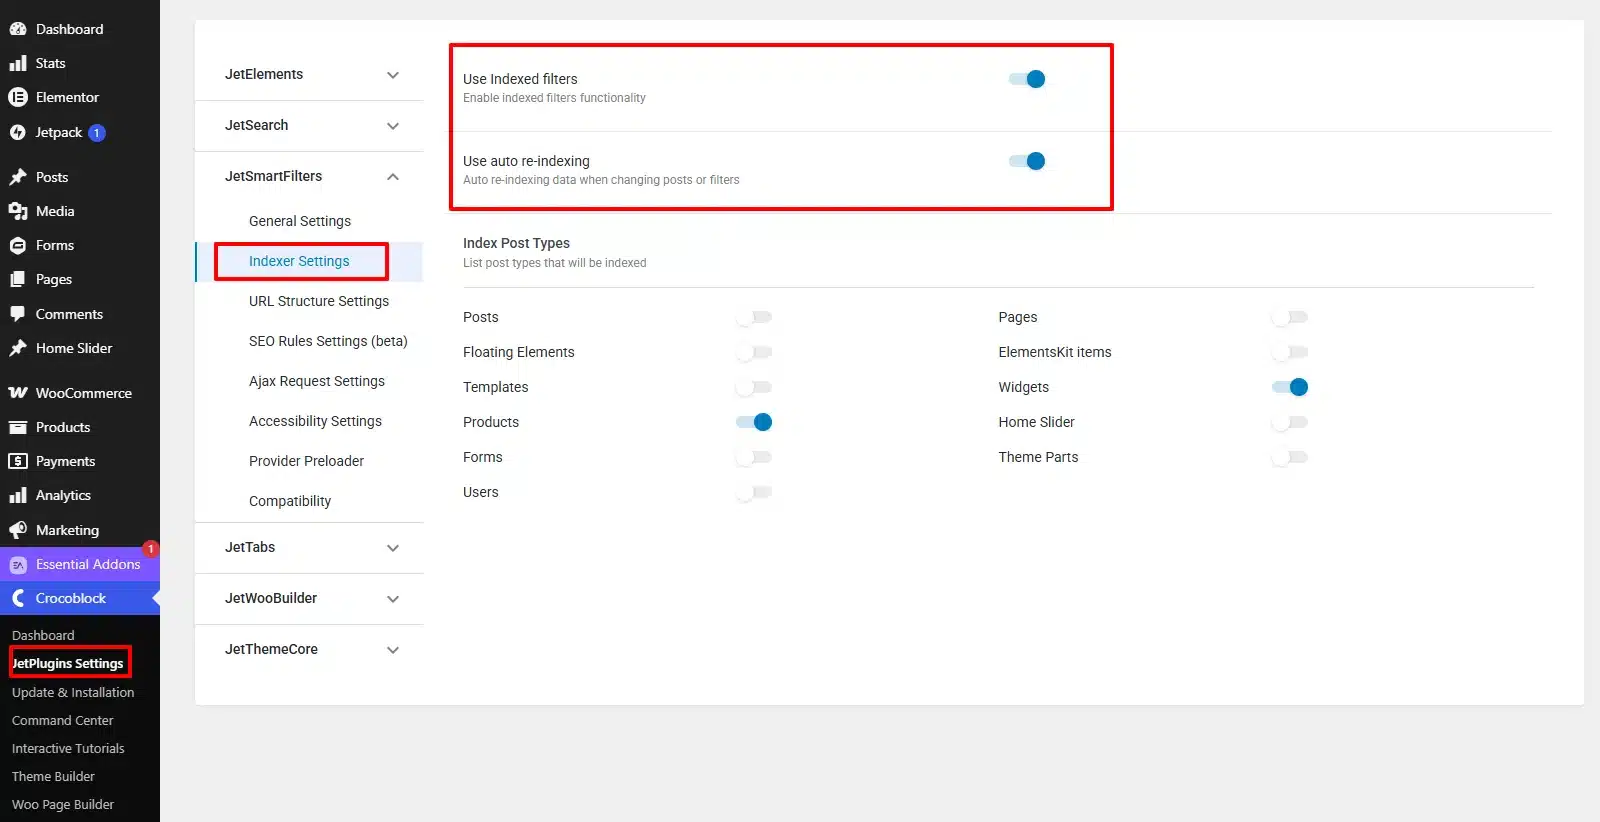
If you want to display the number of matching results for each filter option, enable the Indexer functionality from the JetSmartFilters settings.
Using a Query ID
If you want the filter to control a specific content block on a page, you can connect the filter using a unique Query ID.
To do this:
- Select the target container in Elementor.
- Open the Advanced tab.
- Add a unique value to the CSS ID field.
- Enter the same ID in the Query ID field of the JetSmartFilters widget.
This ensures that the filter is applied to the intended content block.
Step 5: Configure Additional Settings and Style the Filter
The final step is to customize the filter’s functionality and appearance.
From the Additional Settings section, you can enable useful options such as:
- Search
- Dropdown menus
- Scrollable filter areas
- Expandable filter panels
- Apply buttons
- Active filter tags
- Result counters
You can also style the filter using Elementor so that it matches your website’s design, colors, typography, and spacing.
Consider the type of website and user experience when choosing how the filter should behave. For an online store, an Apply button can be useful when visitors need to select multiple criteria before updating the product results. For a blog or content archive, AJAX filtering can provide a faster experience by updating the results immediately after a selection.
Don’t forget about pagination if your filtered content contains a large number of posts or products. JetSmartFilters provides a dedicated pagination widget that can work together with your filtering setup.
Final Thoughts
Adding a category filter to an Elementor page with JetSmartFilters is a flexible way to improve content navigation and user experience. You can connect taxonomy filters to Elementor Loop Grids, JetEngine listings, WooCommerce product grids, and other supported providers without writing custom code.
By configuring AJAX or Mixed filtering, result counters, active tags, Query IDs, and pagination, you can create a powerful and user-friendly filtering system that makes it easier for visitors to find relevant content.
Whether you are building a blog archive, directory, portfolio, or WooCommerce store, JetSmartFilters provides the tools you need to create advanced category filtering directly within your WordPress website.