Table of Contents
- What We’re Building
- Step 1: Create a Registration Form
- Step 2: Add the User Role Dropdown
- Step 3: Install the User Registration Add-On
- Step 4: Create the Dealer User Registration Feed
- Step 5: Add a Registration Condition for Dealer
- Step 6: Create the Customer User Registration Feed
- Step 7: Add a Registration Condition for Customer
- Step 8: Configure Email Notifications
- Step 9: Test the Registration Form
- Final Thoughts
If you want to create a custom WordPress registration form where users can select their account type during registration, Gravity Forms and the User Registration Add-On make this easy.
In this tutorial, we’ll create a registration form with two user role options:
- Dealer
- Customer
When a user selects Dealer, a Dealer WordPress user account will be created. When they select Customer, a Customer user account will be created.
What We’re Building
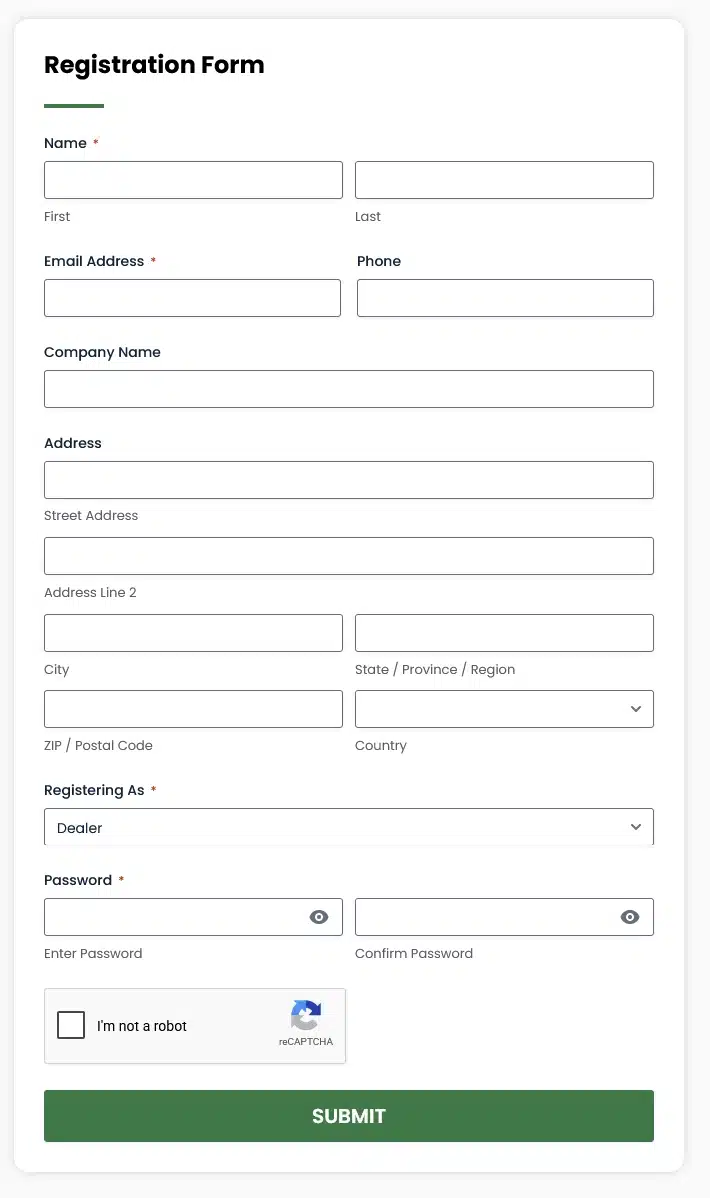
Our registration form includes standard fields such as:
- Name
- Email Address
- Phone
- Company Name
- Address
- Password
- Registering As
The Registering As dropdown contains two options:
- Dealer
- Customer
The selected option determines which WordPress user role is assigned to the new user.
Step 1: Create a Registration Form
First, create a new form in Gravity Forms.
Add the fields you need for your registration form.
For our example, we added:
- Name
- Email Address
- Phone
- Company Name
- Address
- Registering As
- Password
You can also add other fields depending on the information you want to collect from users.
Step 2: Add the User Role Dropdown
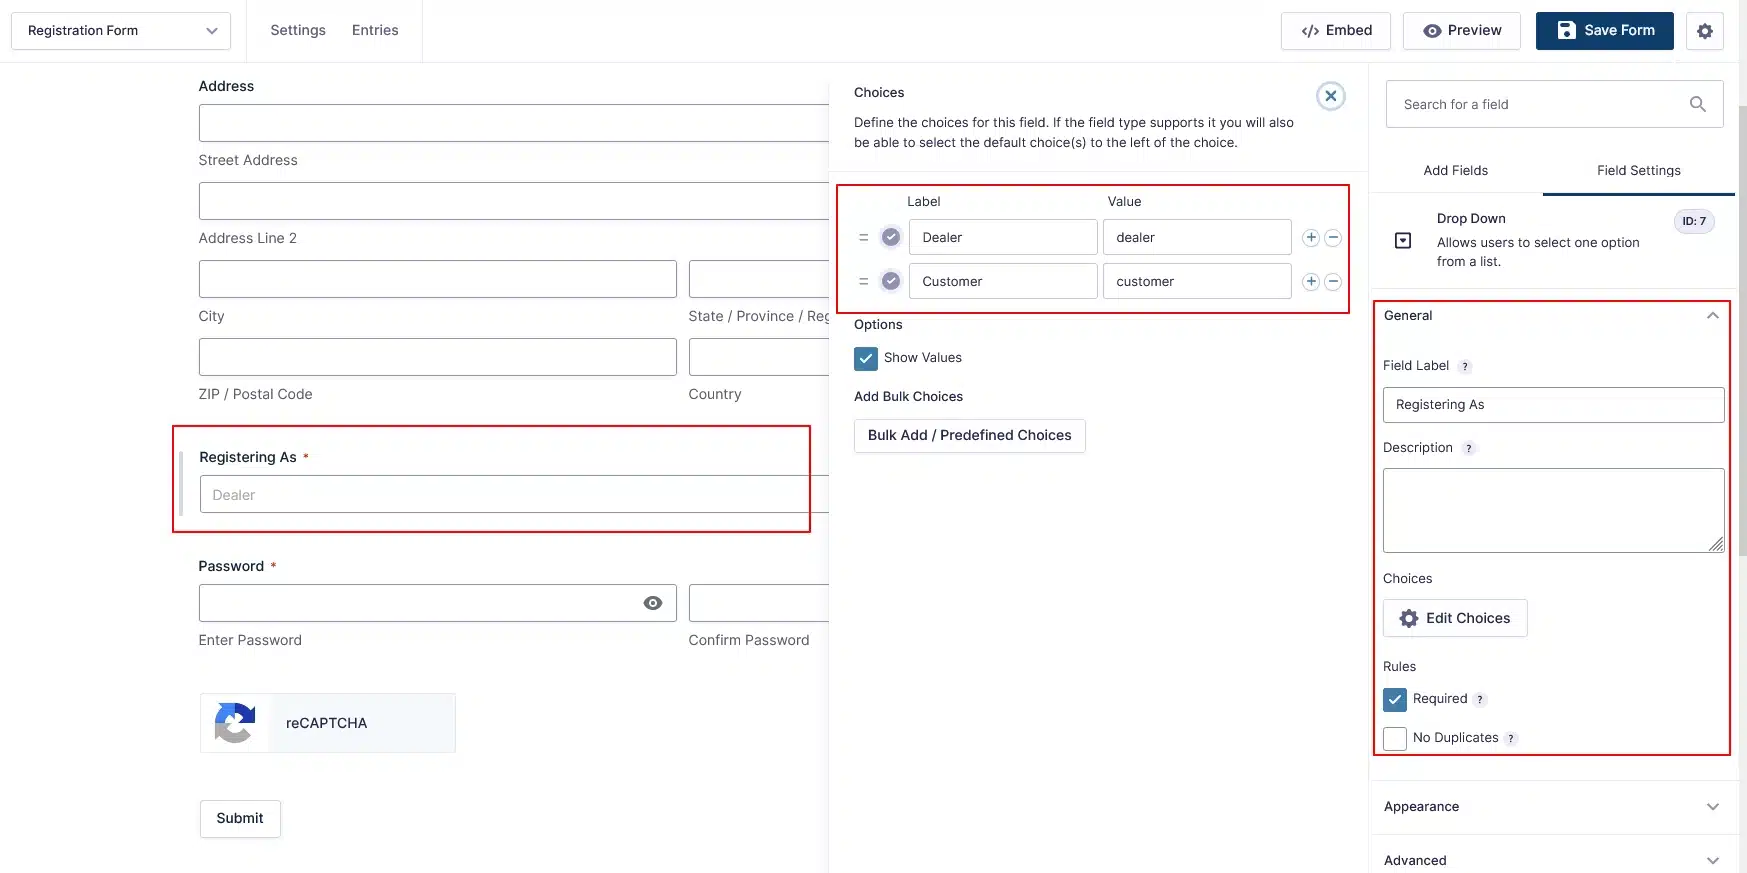
Next, add a Drop Down field to the form.
Set the field label to:
Registering As
Then add the two choices:
- Dealer
- Customer
For example:
| Label | Value |
|---|---|
| Dealer | dealer |
| Customer | customer |
Make this field Required so users must select an account type before submitting the form.
This field will later be used to determine which user registration feed should create the account.
Step 3: Install the User Registration Add-On
To automatically create WordPress user accounts when the form is submitted, install and activate the Gravity Forms User Registration Add-On.
After activating the add-on, you’ll see the User Registration option under your form’s settings.
This allows Gravity Forms to create a WordPress user from the information submitted through the registration form.
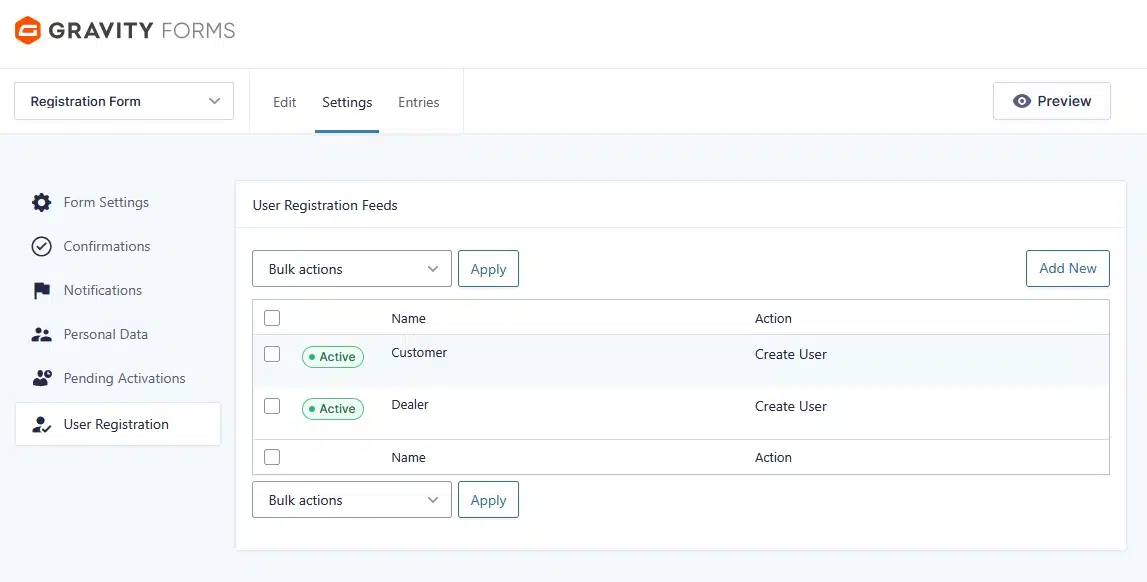
Step 4: Create the Dealer User Registration Feed
Go to:
Forms → Your Registration Form → Settings → User Registration
Create a new user registration feed for the Dealer role.
Set the feed name to something like:
Dealer
Then map the form fields to the corresponding WordPress user fields.
For example:
- Username → Name
- First Name → Name (First)
- Last Name → Name (Last)
- Email → Email Address
- Password → Password
- Role → Dealer
You can also map additional information such as:
- Company
- Billing Address
- City
- State
- ZIP/Postal Code
- Country
Step 5: Add a Registration Condition for Dealer
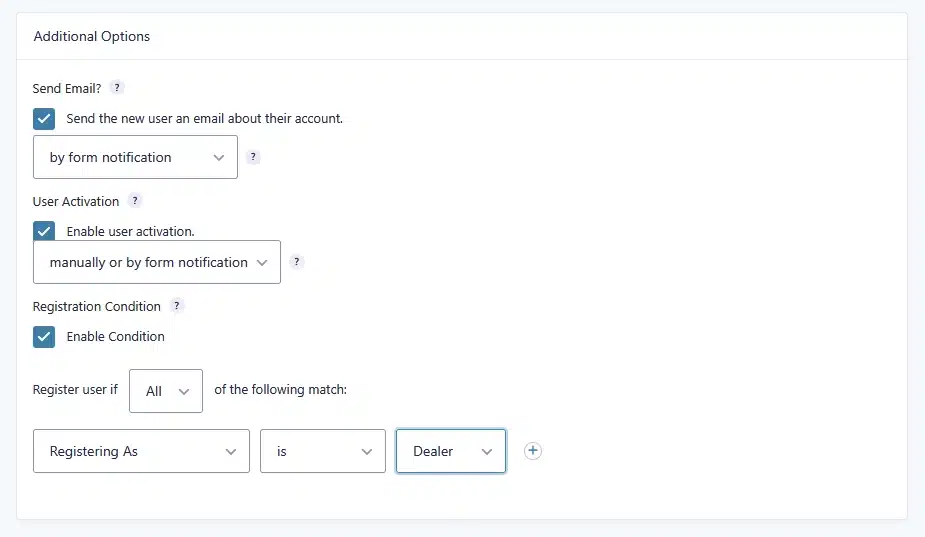
Now we need to make sure this registration feed only runs when the user selects Dealer.
Enable the Registration Condition option.
Set the condition to:
Registering As → is → Dealer
Now the Dealer registration feed will only create a user with the Dealer role when Dealer is selected in the form.
Step 6: Create the Customer User Registration Feed
Next, create another User Registration feed for the Customer role.
Set the feed name to:
Customer
Map the same form fields to the appropriate WordPress user fields.
For the user role, select:
Customer
Step 7: Add a Registration Condition for Customer
Just like the Dealer feed, add a registration condition to the Customer feed.
Set it to:
Registering As → is → Customer
Now the Customer registration feed will only run when the user selects Customer.
Your setup will look like this:
Registration Form
       │
       └── Registering As
              │
              ├── Dealer
              │     ↓
              │   Dealer Registration Feed
              │
              └── Customer
                    ↓
                  Customer Registration Feed
This allows one registration form to handle both user types.
Step 8: Configure Email Notifications
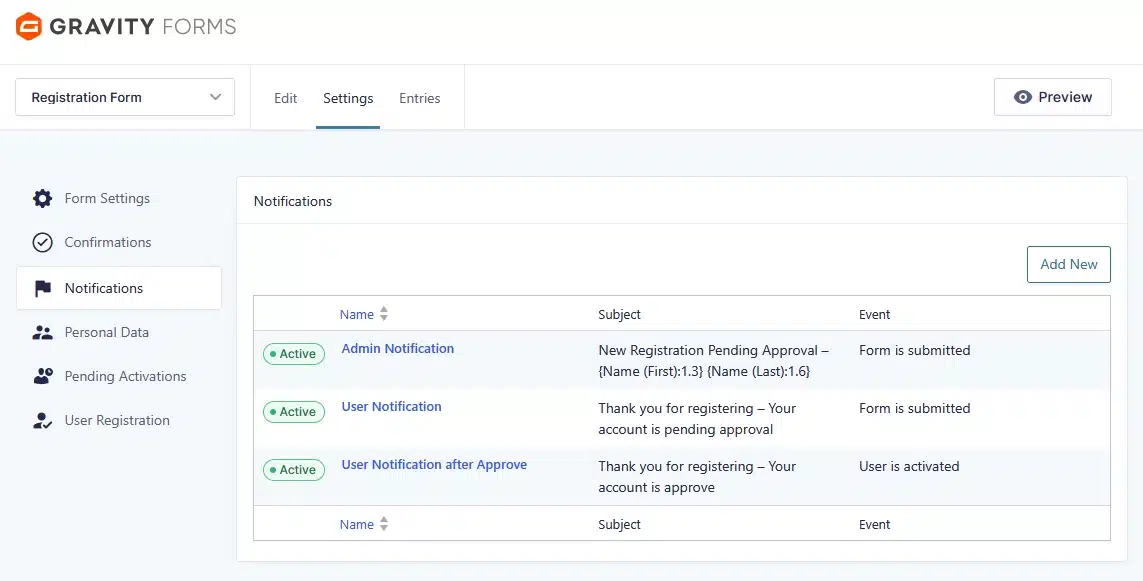
Finally, configure your Gravity Forms notifications.
You can create notifications for different registration events.
For example, you can send:
- An email notification to the website administrator when a new registration is submitted.
- A confirmation email to the user after registration.
- An additional email after the user’s account is approved or activated.
In our example, notifications were configured for:
New Registration Pending Approval
and
User Notification
You can customize the subject and message according to your website’s requirements.
Step 9: Test the Registration Form
Now test the form from the front end.
First, select:
Dealer
Submit the form and verify that the new WordPress account is created with the Dealer role.
Then test the form again with:
Customer
The new account should be created with the Customer role.
This lets you use a single registration form for multiple types of users.
Final Thoughts
With Gravity Forms and the User Registration Add-On, you can create a custom WordPress registration form that lets users select their account type during registration.
The setup is simple:
- Create your registration form.
- Add a Registering As dropdown.
- Add Dealer and Customer choices.
- Install the User Registration Add-On.
- Create a Dealer registration feed.
- Create a Customer registration feed.
- Add registration conditions for each role.
- Configure email notifications.
- Test both registration options.
This approach allows you to manage multiple user types from a single registration form while automatically assigning the correct WordPress role based on the user’s selection.