Table of Contents
- What Are WordPress User Roles?
- Why Create a Custom WordPress User Role?
- Understanding WordPress Capabilities
- Method 1: Create a Custom User Role Without Code
- Step 1: Install User Role Editor
- Step 2: Create a New Role
- Step 3: Select the Required Capabilities
- Step 4: Save the Role
- Step 5: Assign the Role to a User
- Method 2: Create a Custom User Role With Code
- Step 1: Create a Custom Plugin
- Step 2: Add the Plugin Header
- Step 3: Add the Custom Role
- Step 4: Run the Function When the Plugin Activates
- Step 5: Add Role Cleanup
- Step 6: Activate the Plugin
- Plugin or Code: Which Approach Should You Use?
- Use ACF to Control Field Visibility by User Role
- Best Practices for Custom WordPress Roles
- Conclusion
WordPress comes with several built-in user roles that control what different users can do on a website. These roles work well for many projects, but they may not always provide the exact permissions your team or clients need.
For example, you might want to create a user who can manage customer accounts but cannot edit website content, or a content manager who can edit posts without having access to plugins and themes.
In these situations, creating a custom WordPress user role gives you more control over user permissions.
You can create custom roles using a plugin such as User Role Editor, or you can create them with PHP using WordPress’s built-in add_role() function.
What Are WordPress User Roles?
A WordPress user role is a collection of permissions, known as capabilities, that determines what a user can do inside WordPress.
WordPress includes these built-in roles:
- Administrator – Has access to almost all website management features.
- Editor – Can manage and publish content created by themselves and other users.
- Author – Can create, edit, and publish their own posts.
- Contributor – Can create and edit their own posts but cannot publish them.
- Subscriber – Has limited access, mainly for managing their own profile.
- Super Admin – Available on WordPress Multisite and provides network-level control.
These roles combine multiple capabilities. A custom role allows you to create your own combination based on the requirements of your website.
Why Create a Custom WordPress User Role?
Custom roles are useful when the default WordPress roles don’t match your workflow.
For example, a business website might need separate access for:
- Content writers
- Content editors
- Customer support agents
- Store managers
- Marketing team members
- Clients
- Website administrators
Instead of giving everyone Administrator access, you can create a role with only the permissions that person needs.
This follows the principle of giving users the minimum required access and adding additional capabilities only when necessary.
Understanding WordPress Capabilities
Before creating a custom role, it helps to understand the difference between a role and a capability.
A role is a group of permissions.
A capability is an individual permission.
Some examples include:
- read – Access the WordPress dashboard.
- edit_posts – Edit posts.
- publish_posts – Publish posts.
- delete_posts – Delete posts.
- upload_files – Upload media.
- edit_users – Edit user accounts.
- list_users – View the user list.
- moderate_comments – Moderate comments.
A custom role is essentially a collection of these capabilities.
For example, a customer support role could have access to users and comments without being allowed to manage plugins or change website settings.
Method 1: Create a Custom User Role Without Code
If you don’t want to write PHP, a role-management plugin provides a visual way to create and manage custom roles.
One option is User Role Editor, which provides an interface for adding roles and selecting capabilities.
Step 1: Install User Role Editor
From your WordPress dashboard, go to:
Plugins → Add New
Search for User Role Editor, then install and activate the plugin.

Once activated, the plugin adds tools for managing WordPress roles and capabilities.
Step 2: Create a New Role
Open: Users → User Role Editor
From the role management screen, choose the option to add a new role.
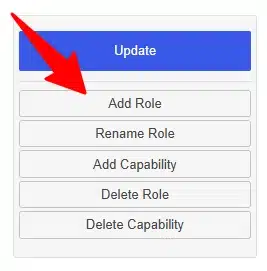
Give your role an internal ID and a display name.
For example:
Role ID: agent
Display Name: Customer Support Agent
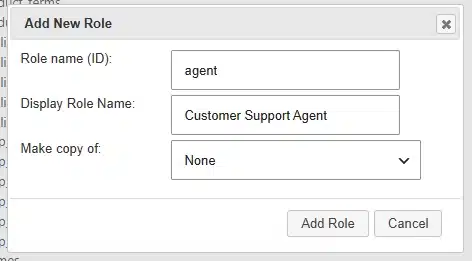
Keep the role ID simple and use a descriptive name for the label that administrators will see.
Step 3: Select the Required Capabilities
After creating the role, select the capabilities that the new user should have.
For example, a customer support role might need:
- read
- list_users
- edit_users
- moderate_comments
- read_private_posts
- read_private_pages
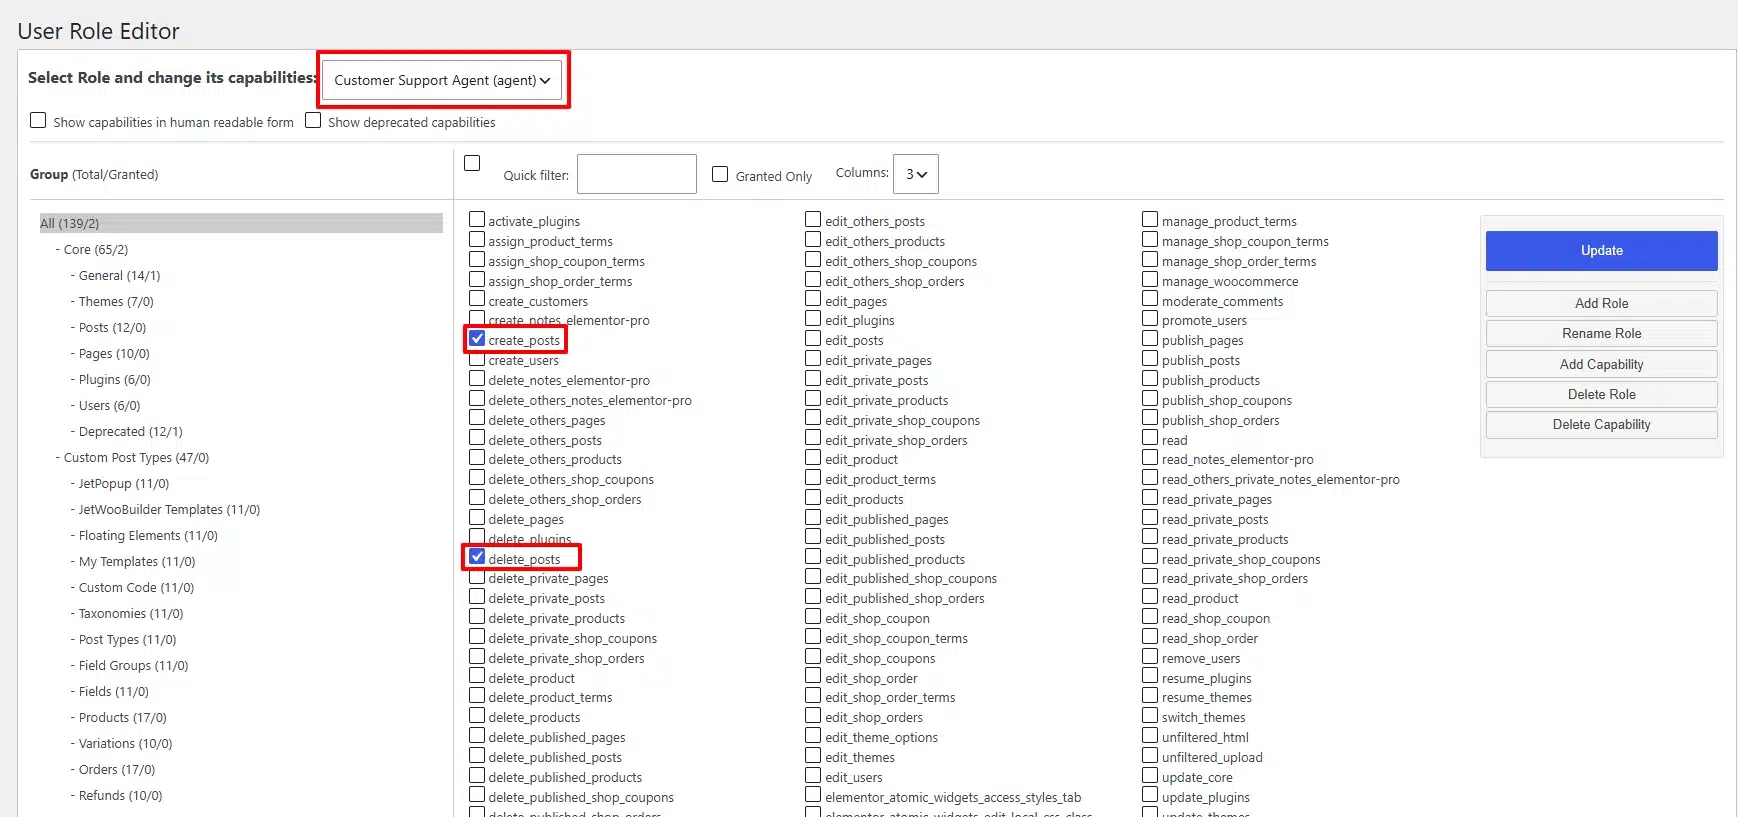
You can search through the available capabilities to find the permissions you need.
Avoid selecting capabilities simply because they are available. Only give users the permissions required for their responsibilities.
Step 4: Save the Role
After selecting the required capabilities, save or update the role.
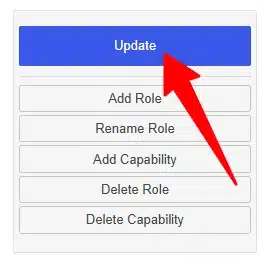
The custom role is now available in WordPress.
You can assign it when creating a new user or change an existing user’s role from the WordPress user management screen.
Step 5: Assign the Role to a User
Go to: Users → Add New
or open an existing user.
Find the Role dropdown and select your newly created role.
Save the user.
The user will now have the capabilities assigned to that custom role.
Method 2: Create a Custom User Role With Code
If you prefer not to install a role-management plugin, you can create a custom role with PHP.
WordPress provides the add_role() function specifically for creating roles programmatically.
For better portability and maintenance, you can place the functionality in a small custom plugin rather than directly modifying your theme’s functions.php file.
Step 1: Create a Custom Plugin
Create a folder inside:
/wp-content/plugins/For example:
custom-user-rolesInside the folder, create a PHP file:
custom-user-roles.phpStep 2: Add the Plugin Header
Add the following code:
<?php
/**
 * Plugin Name: Custom User Roles
 * Description: Adds a custom WordPress user role.
 * Version: 1.0
*/
You can change the plugin name and description to match your project.
Step 3: Add the Custom Role
Now create a function that adds your custom role:
function create_customer_support_role() {

    if ( ! get_role( 'customer_support' ) ) {

        add_role(
            'customer_support',
            'Customer Support Agent',
            array(
                'read'                 => true,
                'list_users'           => true,
                'edit_users'           => true,
                'moderate_comments'    => true,
                'read_private_posts'   => true,
                'read_private_pages'   => true,
            )
        );

    }
}
The first value is the role ID, the second is the display name, and the final array contains the capabilities assigned to the role.
Step 4: Run the Function When the Plugin Activates
Instead of creating the role every time WordPress loads, connect the function to the plugin activation process:
register_activation_hook(
    __FILE__,
    'create_customer_support_role'
);
When the plugin is activated, WordPress will create the role.
Step 5: Add Role Cleanup
You can also remove the custom role when the plugin is deactivated:
function remove_customer_support_role() {
    remove_role( 'customer_support' );
}

register_deactivation_hook(
    __FILE__,
    'remove_customer_support_role'
);
This keeps the custom role tied to the custom functionality provided by the plugin.
Step 6: Activate the Plugin
Upload the plugin to your WordPress installation and open:
Plugins → Installed Plugins
Activate Custom User Roles.
You can then go to the user management screen and assign the new role.
Plugin or Code: Which Approach Should You Use?
Both approaches can create custom WordPress roles, but they suit different workflows.
| Approach | Useful When |
|---|---|
| Plugin | You want a visual interface |
| Plugin | Roles need frequent adjustments |
| Plugin | Non-developers need to manage permissions |
| Custom code | You need a specific, predefined role |
| Custom code | You want to avoid another plugin |
| Custom code | The role is part of a custom development project |
If roles will change frequently, a visual role-management plugin can be more convenient.
If the role is part of a custom website implementation and its permissions are unlikely to change, a custom plugin can provide a straightforward solution.
Use ACF to Control Field Visibility by User Role
Custom roles can also be useful when working with Advanced Custom Fields (ACF).
ACF allows you to control when custom fields appear based on user roles.
For example, suppose you create a custom role called Content Manager.
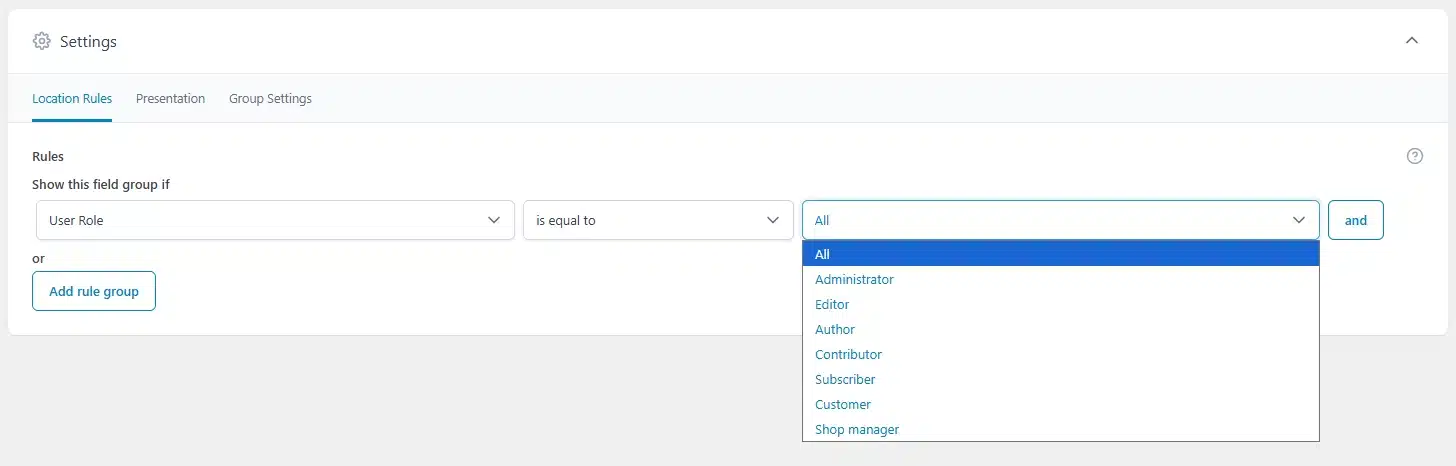
You could create an ACF field group containing fields specifically for content managers and configure its location rules so that the fields are displayed only to users with that role.
The general workflow is:
- Create your custom WordPress role.
- Create an ACF field group.
- Add the required custom fields.
- Open the field group’s Location Rules.
- Select User Role.
- Choose your custom role.
- Save the field group.
Now the fields can be targeted to users with that particular role.
This can make the WordPress editing experience more focused because users don’t necessarily need to see fields that aren’t relevant to their responsibilities.
Create Role-Specific Admin Experiences
ACF PRO can take this concept further with Options Pages.
For example, you could create an Options Page containing:
- Contact information
- Social media links
- Business details
- Branding settings
Access to the Options Page can then be restricted based on user roles.
This allows administrators to separate general content management from specific site settings.
Best Practices for Custom WordPress Roles
Start With Minimal Permissions
Give a new role only the capabilities it actually needs.
You can always add more permissions later if the user requires them.
Use Descriptive Role Names
Names such as content_manager, support_agent, or store_manager make the purpose of a role easier to understand.
Avoid Giving Administrator Access Unnecessarily
Administrator access includes powerful website-management capabilities. If a user only needs to edit content or manage customers, consider creating a more limited role instead.
Test the Role Before Assigning It
Create a test user and assign the custom role.
Log in as that user and check:
- Dashboard access
- Content permissions
- User management
- Media access
- Plugin visibility
- Settings access
- ACF field visibility
This helps identify missing or excessive permissions before the role is used by a real team member.
Document Your Custom Roles
For larger websites, keep a record of what each custom role is intended to do and which capabilities it contains.
This makes future maintenance much easier.
Conclusion
Custom WordPress user roles give you more control over how users interact with your website. Instead of relying entirely on the default Administrator, Editor, Author, Contributor, and Subscriber roles, you can create permission sets designed around your actual workflow.
You can create these roles visually with a plugin such as User Role Editor or programmatically with WordPress’s add_role() function. ACF can then be used to make custom fields and admin areas more relevant to specific user roles.
Whether you’re managing a client website, building an editorial workflow, or creating specialized access for a support team, custom roles provide a flexible way to give users the access they need without giving them unnecessary control.