Table of Contents
- What You’ll Build
- Why Create a Custom Full-Screen Menu?
- Before You Start
- Step 1: Create a Custom Header
- Step 2: Create a Full-Screen Menu Canvas
- Step 3: Design Your Full-Screen Menu
- Step 4: Add the Open Interaction
- Step 5: Add the Close Button
- Step 6: Add Entrance Animations
- Step 7: Test on Desktop and Mobile
- Why Use Divi 5 Interactions Instead of JavaScript?
- Benefits of This Approach
- Final Thoughts
- Ready to Build a Custom Divi 5 Website?
Navigation is one of the first things visitors interact with on your website. While Divi’s default menu works well for most projects, sometimes you want something more modern and visually engaging—like a full-screen animated menu.
With Divi 5’s new Interactions feature, you can build a completely custom full-screen navigation menu without relying on third-party plugins or custom JavaScript. This gives you full control over the design while keeping everything inside the Divi Builder.
In this tutorial, we’ll create a custom full-screen menu that opens with a click, closes smoothly, and can include Divi Menu Modules, Loop Modules, custom links, or any other content you want.
What You’ll Build
By the end of this tutorial, you’ll have:
- A custom header with a Menu button
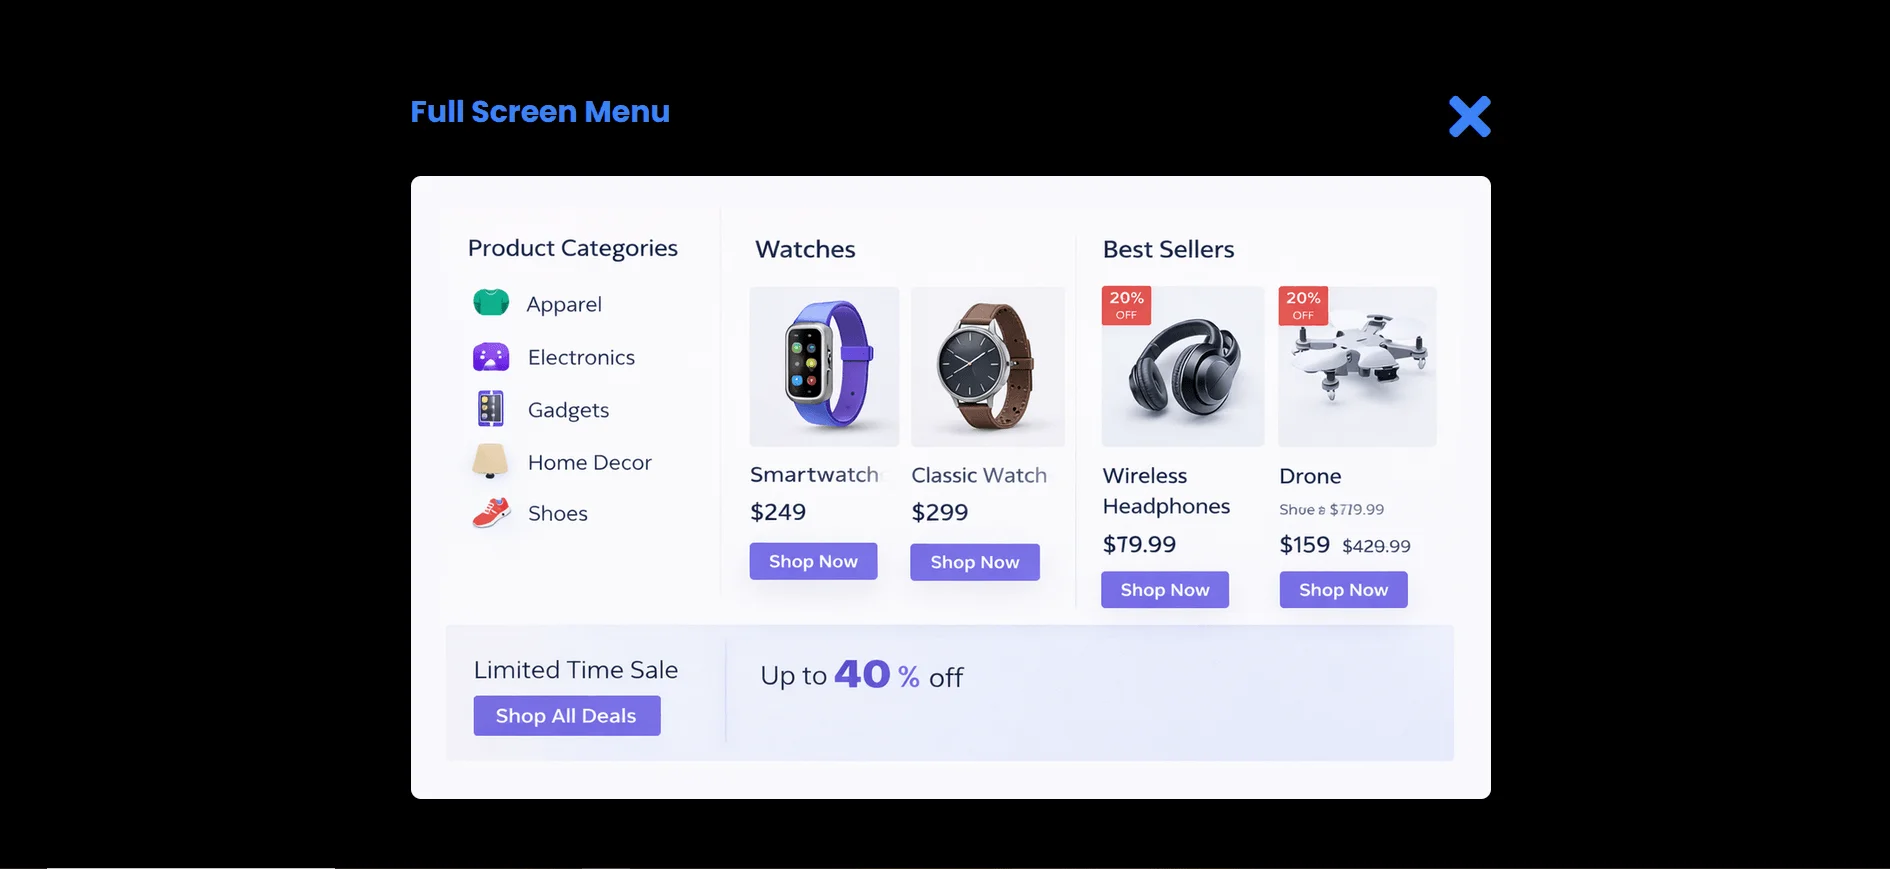
- A full-screen overlay menu
- Open and close animations using Divi 5 Interactions
- Support for Divi Menu Module
- Custom links
- Dynamic Loop Builder menus
- A responsive full-screen navigation without JavaScript
Why Create a Custom Full-Screen Menu?
A custom full-screen menu gives you much more flexibility than the default navigation.
Benefits include:
- Better mobile experience
- Modern website appearance
- Unlimited layout customization
- Add images, icons, CTAs, and widgets
- Display featured products or categories
- Include social icons and contact information
- Build completely unique navigation experiences
Before You Start
This tutorial requires:
- Divi 5
- Divi Theme Builder
- Divi 5 Interactions enabled
No custom JavaScript is required.
Step 1: Create a Custom Header
Open
Divi → Theme Builder
Create or edit your Global Header.
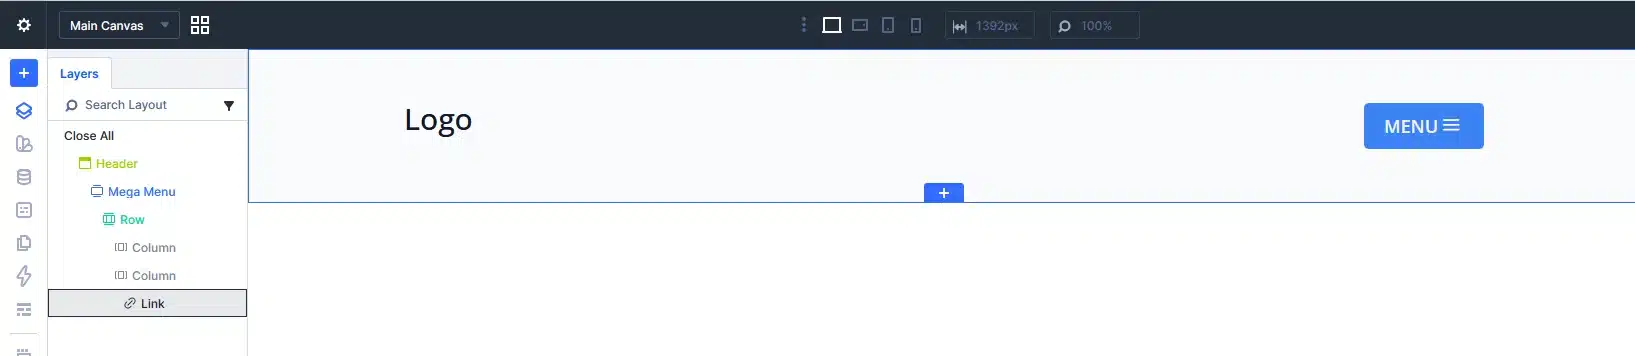
Inside the header create a simple row containing:
- Logo
- Menu Button (Text, Icon or Button Module)
For this example, we created a button labeled MENU ☰.
This button will trigger the full-screen navigation.
Step 2: Create a Full-Screen Menu Canvas
From the top-left Canvas dropdown, click New Canvas and create a new canvas for your full-screen menu.
Inside this canvas, add a new Section. This section will act as the full-screen menu overlay that appears when users click the Menu button.
Configure the section with the following settings:
- Width: 100%
- Height: 100vh
- Position: Fixed
- Top: 0
- Left: 0
- Z-Index: High (to display above all page content)
- Background: Your preferred full-screen background color or image
To ensure the menu is hidden when the page first loads, open the Visibility settings for the section and set it to Hidden.
This section will serve as your custom full-screen navigation canvas, where you can build your menu using Divi modules such as the Menu Module, Custom Links, Loop Builder, images, buttons, social icons, or any other content you want to display.
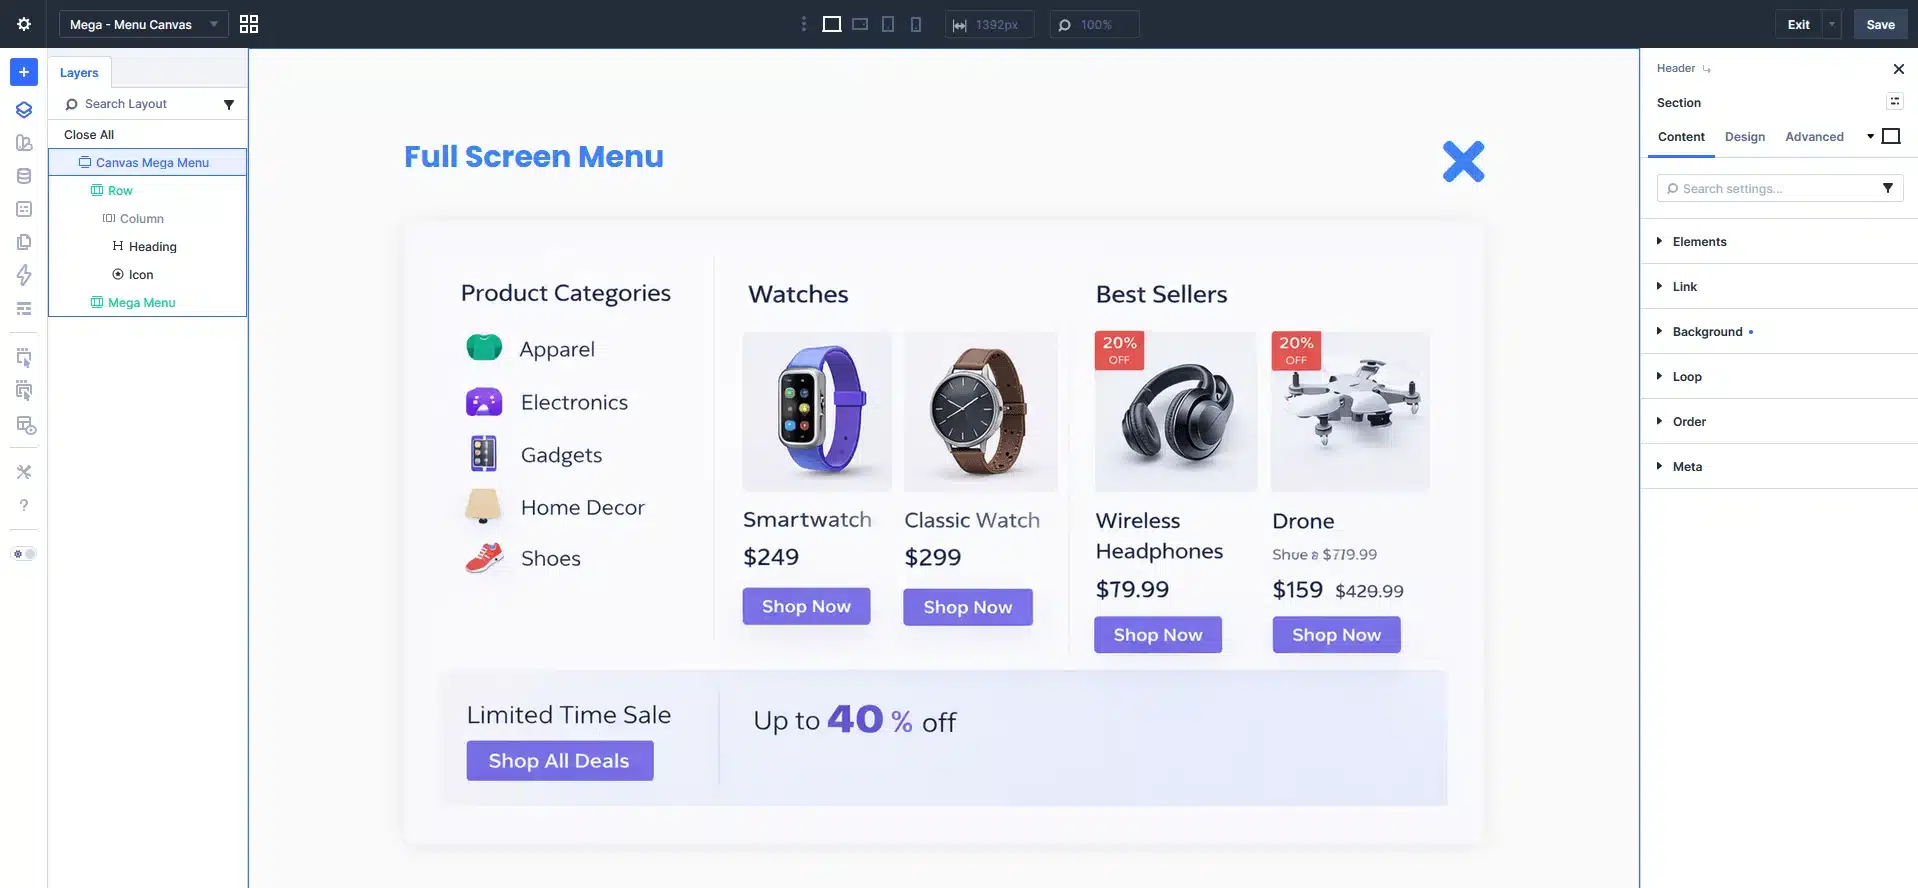
Step 3: Design Your Full-Screen Menu
Now comes the fun part.
Unlike Divi’s default menu, this layout can contain anything.
For example:
Navigation
- Divi Menu Module
Custom Links
- Services
- Portfolio
- Blog
- Contact
Dynamic Content
- Loop Builder
- WooCommerce Products
- Categories
- Featured Posts
Extra Content
- Social Icons
- Newsletter
- Contact Information
- Buttons
- Images
- Promotions
Since it’s just a normal Divi section, you can design it however you like.

Step 4: Add the Open Interaction
Select your MENU button.
Go to:
Advanced → Interactions
Create a new Interaction.
Configure:
- Trigger Event: Click
- Effect Action: Toggle Visibility
- Target Module: Your Full-Screen Menu Section
This allows the menu button to show and hide the overlay without writing JavaScript.
Tip: Toggle Visibility works perfectly for menus because the same button can both open and close the overlay.

Step 5: Add the Close Button
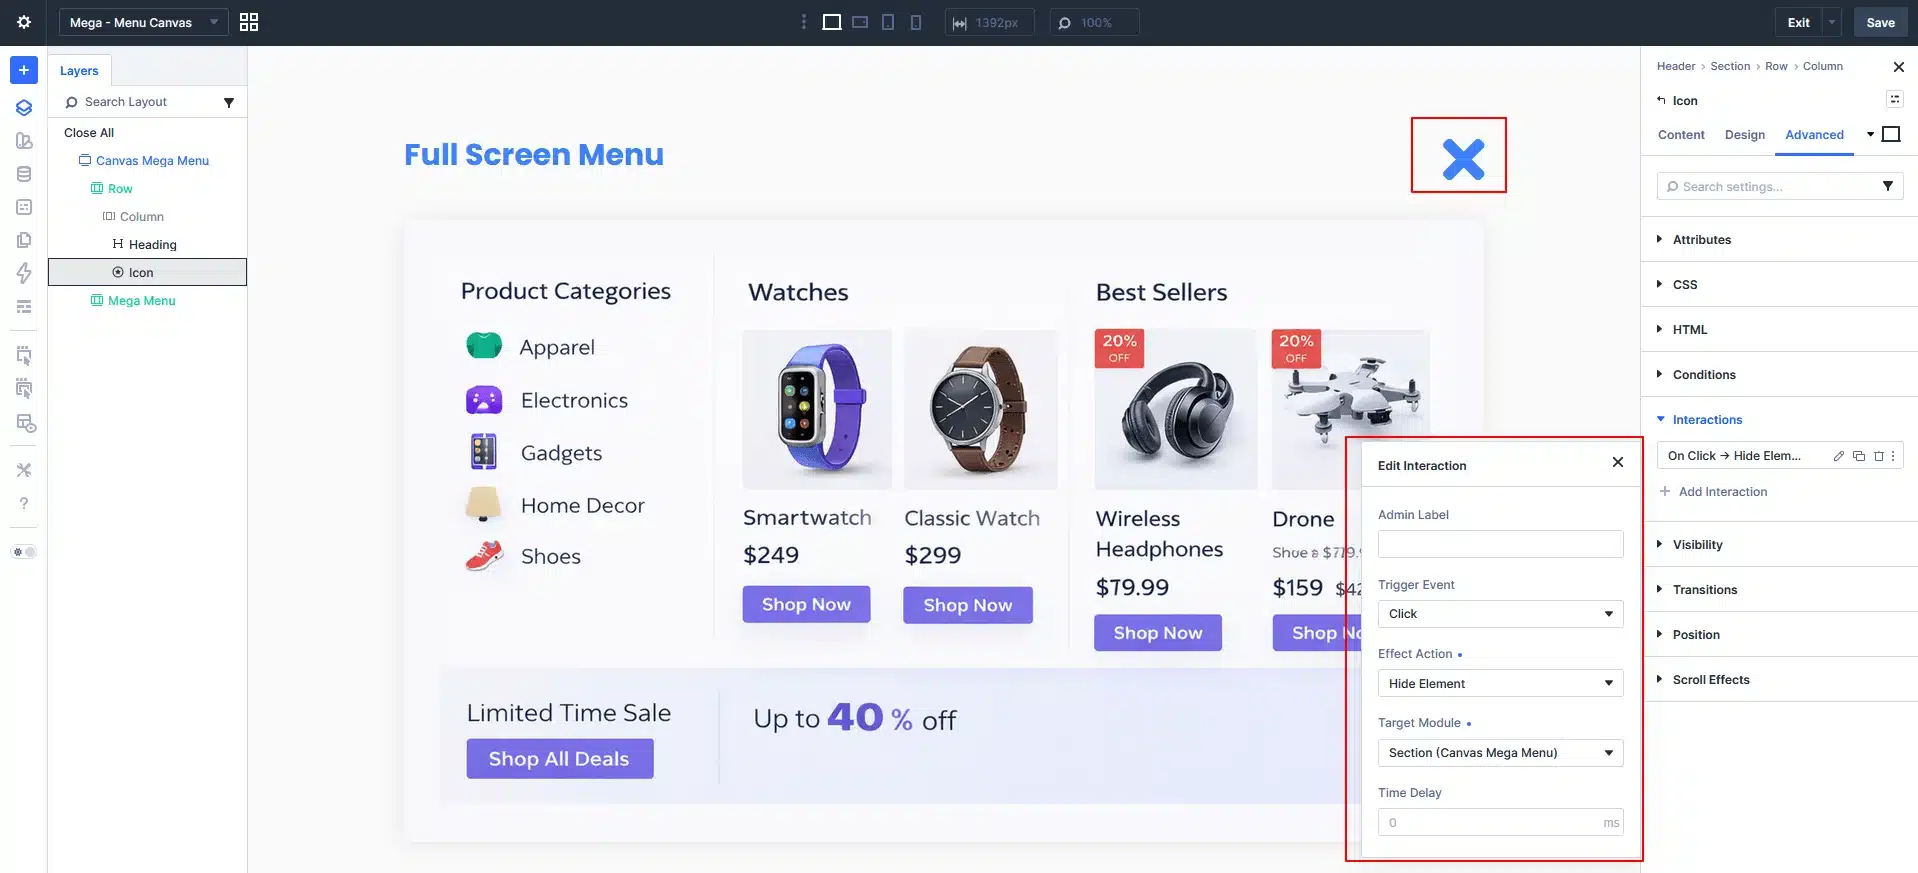
Inside the full-screen menu section, add an Icon Module.
Use an X icon and position it in the top-right corner.
Now add another Interaction.
Configure:
- Trigger Event: Click
- Effect Action: Hide Element
- Target Module: Full-Screen Menu Section
Now users can close the menu with a single click.
Step 6: Add Entrance Animations
To make your menu feel premium, animate the content.
You can animate:
- Heading
- Menu Links
- Images
- Buttons
- Social Icons
Use Divi 5’s animation settings to create:
- Fade In
- Slide Up
- Scale
- Staggered animations
This creates a much smoother user experience than an instant menu.
Step 7: Test on Desktop and Mobile
Preview your header on different devices.
Make sure:
- Menu opens correctly
- Close button works
- Overlay covers the full screen
- Links are clickable
- No background scrolling issues
- Mobile spacing looks good
Because everything is built with Divi modules, it’s easy to adjust responsive spacing for tablets and phones.
Why Use Divi 5 Interactions Instead of JavaScript?
Previously, building a full-screen menu usually required custom JavaScript and CSS.
With Divi 5 Interactions you can:
- Build visually
- Avoid third-party plugins
- Reduce maintenance
- Keep everything inside the Divi Builder
- Make updates without editing code
This makes it much easier for both developers and clients to manage.
Benefits of This Approach
Compared to Divi’s default navigation, this method offers:
- Fully custom design
- Full-screen overlay
- Click-to-open interactions
- Smooth animations
- Better mobile experience
- Support for dynamic content
- No JavaScript required
- Easy future customization
Final Thoughts
Divi 5 Interactions make it easier than ever to build custom navigation experiences without writing custom JavaScript. By combining a custom header, a full-screen overlay section, and simple click interactions, you can replace the default Divi menu with a modern, animated navigation that better reflects your brand.
Whether you’re creating a portfolio, WooCommerce store, agency website, or business site, a custom full-screen menu gives you complete design freedom while keeping everything inside the Divi Builder.
Ready to Build a Custom Divi 5 Website?
Whether you need a custom navigation menu, advanced Divi 5 interactions, or a complete WordPress website, our team can help. We build fast, responsive, and scalable websites with custom functionality tailored to your business goals.
today to discuss your next website project.